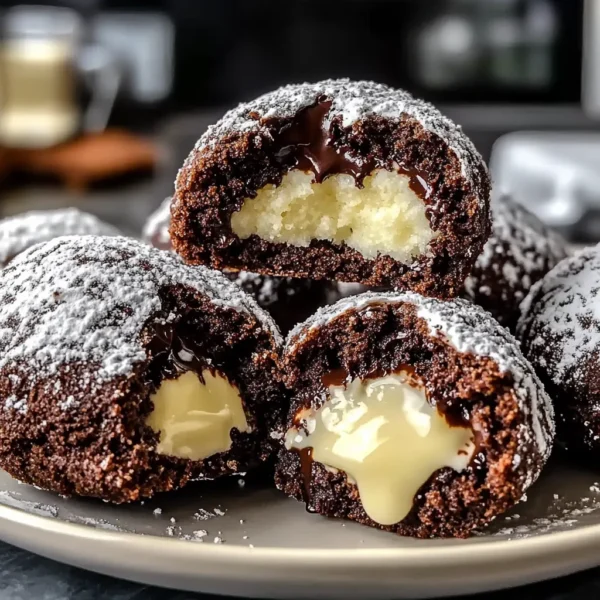
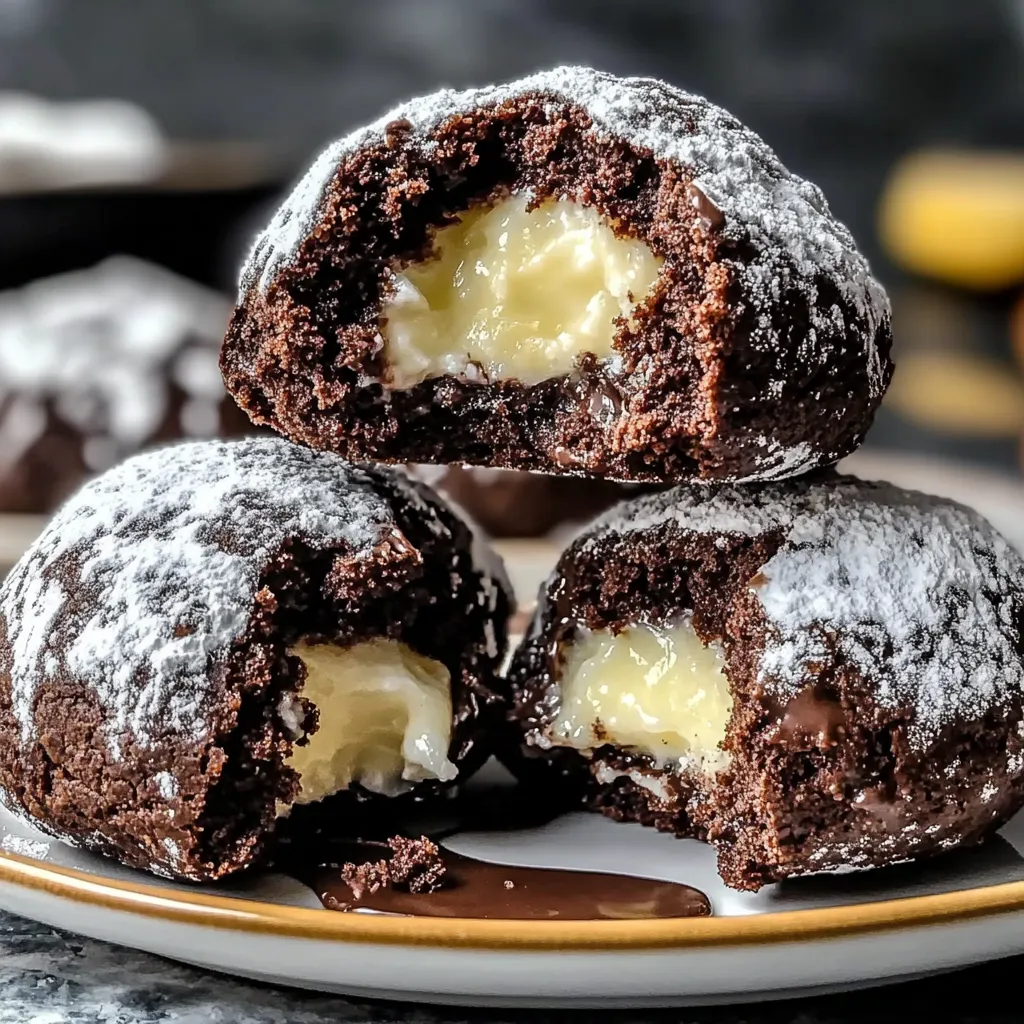
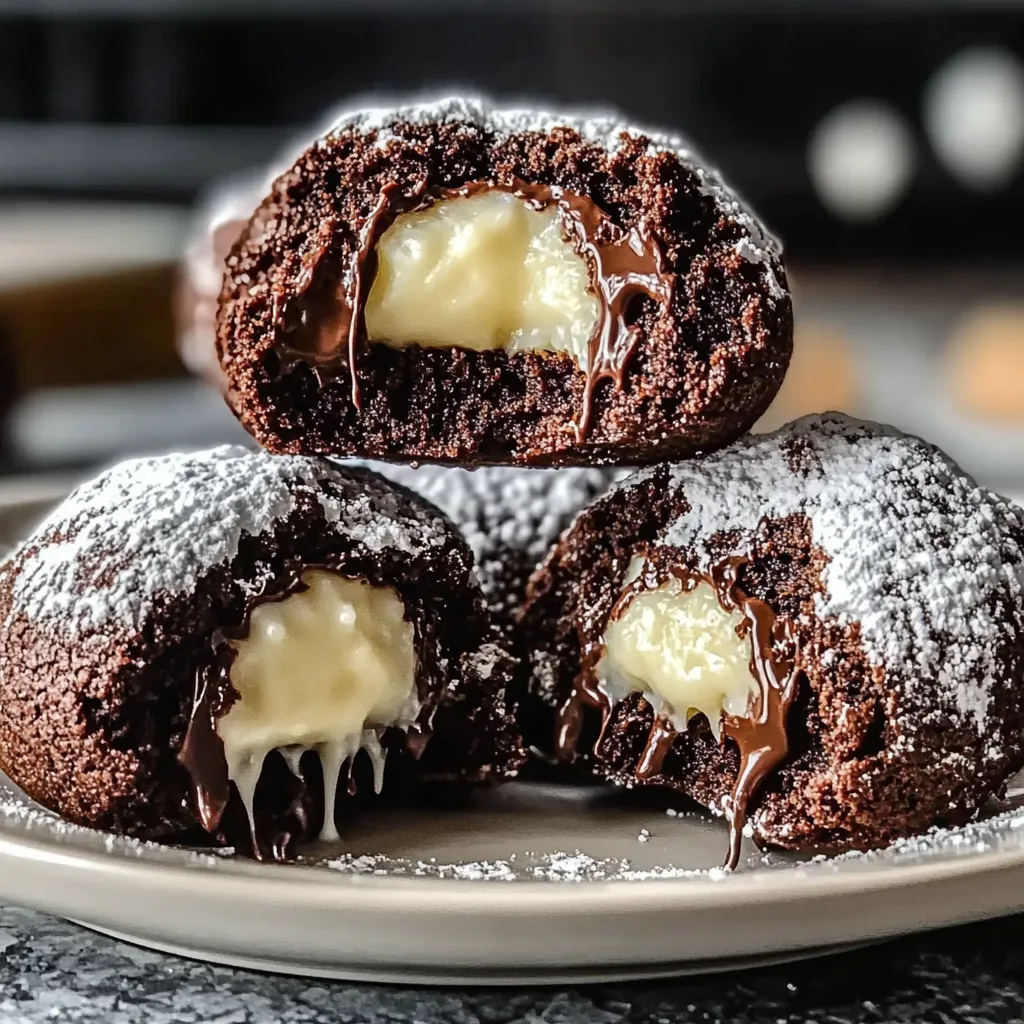
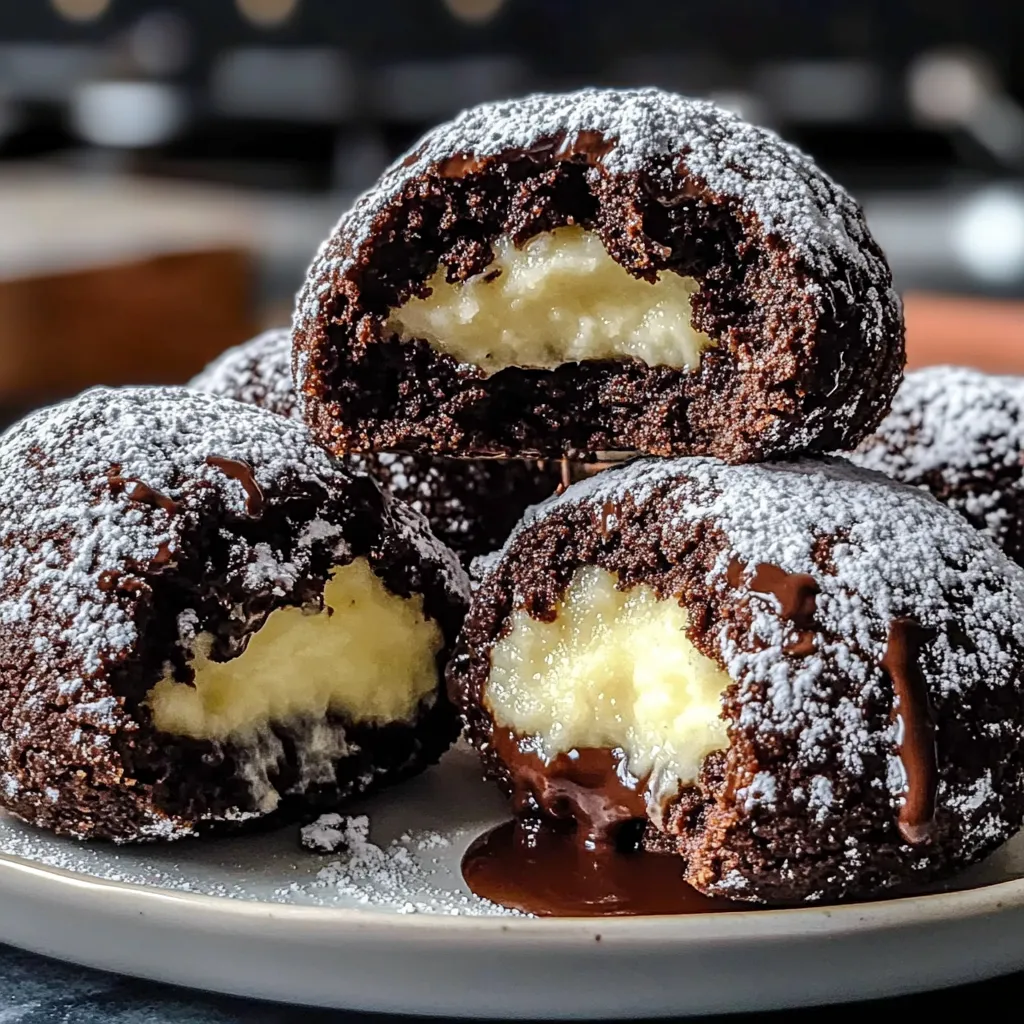
There’s something magical about the holiday season that makes every moment feel like a cozy celebration. I still remember the first time I baked Chocolate Snowball Cookies with a white chocolate center with my grandma in her warm, inviting kitchen. The air was filled with the rich aroma of melting chocolate, and as we rolled those little balls of joy in powdered sugar, it felt like creating tiny winter wonders. Each bite was a sweet surprise, with the creamy white chocolate melting into a rich chocolatey embrace. Now, every time I make these cookies, it’s like a warm hug from the past, bringing all those cherished memories rushing back.
If you’re looking to recreate that same warmth and joy in your kitchen, you’re in the right place. These delectable Chocolate Snowball Cookies are not only a visual delight but a blissful treat that truly captures the essence of the season. Let’s dive into this delightful recipe that will undoubtedly become a staple in your holiday baking lineup!
Why You’ll Love This Recipe
- The combination of rich chocolate and sweet white chocolate is absolutely heavenly!
- They’re easy to make, perfect for baking with kids or loved ones.
- These cookies look stunning on any dessert table or gift box.
- They store well, so you can make them ahead for gatherings or cozy nights in.
Ingredients
Gathering your ingredients is part of the fun! Here’s what you’ll need:
- 1 cup (2 sticks) unsalted butter, at room temperature
- 1 cup powdered sugar, plus extra for rolling
- 1 teaspoon vanilla extract
- 2 cups all-purpose flour
- 1/2 cup unsweetened cocoa powder
- 1/4 teaspoon salt
- 1 cup white chocolate chips (for filling)
- 1/2 cup finely chopped nuts, optional (walnuts or pecans work great!)
Note: Using unsalted butter gives you control over the salt content, enhancing the sweet flavors perfectly.
Step-by-Step Instructions
- Preheat the Oven: Preheat your oven to 350°F (175°C) and line a baking sheet with parchment paper. This prevents sticking and makes cleanup a breeze!
- Cream Your Butter and Sugar: In a large mixing bowl, beat the softened butter and powdered sugar together until it’s light and fluffy. This might take about 2-3 minutes. The texture should feel airy, and your kitchen should smell sweet already!
- Add the Flavors: Mix in the vanilla extract, ensuring it’s well incorporated. Vanilla has a magical way of enhancing sweetness, so don’t skip this part!
- Combine Dry Ingredients: In another bowl, whisk together the flour, cocoa powder, and salt. Gradually add this mixture to your butter mixture. Stir gently until just combined – this is essential, as overmixing can lead to dense cookies.
- Fold in the Chips: If you’re using nuts, fold in the white chocolate chips and chopped nuts into the dough. You want them to be evenly distributed but not overly mixed!
- Shape the Cookies: The fun part! Use a cookie scoop or your hands to form balls about 1 inch in diameter. Make a small indention in the center of each ball and place a white chocolate chip in it. Then encase the chip by rolling the dough into a ball again.
- Bake: Place the dough balls on your prepared baking sheet, about 2 inches apart. Bake for 10-12 minutes. You’ll know they’re done when the edges look firm, and the centers appear slightly soft. Don’t worry, they’ll set as they cool!
- Cool and Dust: Let the cookies cool on the baking sheet for 5 minutes before transferring them to a wire rack. Once they’re completely cool, roll them in powdered sugar for that snowy effect. This is what makes them so dreamy!
Pro Tips & Variations
Want to take your Chocolate Snowball Cookies to the next level? Here are some fun suggestions:
- Add a Kick: Mix in a pinch of sea salt or a dash of espresso powder into your dough for a richer chocolate flavor.
- Nutty Goodness: Swap out white chocolate chips for dark or even peanut butter chips if you’re feeling adventurous!
- Flavor Fun: Experiment with flavored extracts like almond or mint for a unique twist.
- Chewy Texture: For softer cookies, don’t hesitate to slightly underbake them. Trust me, they’ll still be delicious!
Serving Suggestions
These Chocolate Snowball Cookies are adorable on their own, but let’s make this cozy! Serve them alongside a steaming cup of hot chocolate or a rich espresso. Imagine a plateful of these snowy delights beside a warm fire, maybe with some soft holiday music playing in the background. If you’re entertaining, arranging them on a beautiful platter with colorful holiday sprinkles will surely impress your guests.
Storage Tips
Made too many? (Is there such a thing?) Here’s how to keep them fresh:
- Room Temperature: Store the cookies in an airtight container at room temperature for up to a week. They’ll be perfect for those late-night cravings!
- Refrigeration: For longer freshness, place the cookies in the fridge for up to two weeks. Just make sure they’re sealed tight to avoid drying out.
- Freezing: These cookies freeze beautifully! Lay them on a baking sheet to freeze individually for about an hour, then transfer them to a freezer bag. They can last up to three months. Just thaw before enjoying!
FAQs
Can I use salted butter instead of unsalted butter?
Yes, you can! Just skip the additional salt in the recipe to keep the flavors balanced.
Can I make these cookies gluten-free?
Absolutely! Substitute the all-purpose flour with a gluten-free flour blend, and you’ll have a delicious gluten-free version.
What can I use instead of white chocolate chips?
If you’re not a fan of white chocolate, feel free to swap them for dark chocolate or any favorite flavor of chips you have on hand!
How long do these cookies last?
In an airtight container at room temperature, these cookies can last for about a week. If stored in the fridge or freezer, they can last much longer! Just remember, they’re so good, they likely won’t stick around very long!
Conclusion
There you have it! Delicious, rich, and snowy Chocolate Snowball Cookies with a surprise white chocolate center that will bring joy to your kitchen and heart. I hope you’ll try making these delightful little treats yourself and perhaps share your own memories that come flooding back through the process. I can’t wait to hear about your baking adventures, so be sure to comment below and let me know how your cookies turn out! Happy baking, my friend!

Leave a Comment