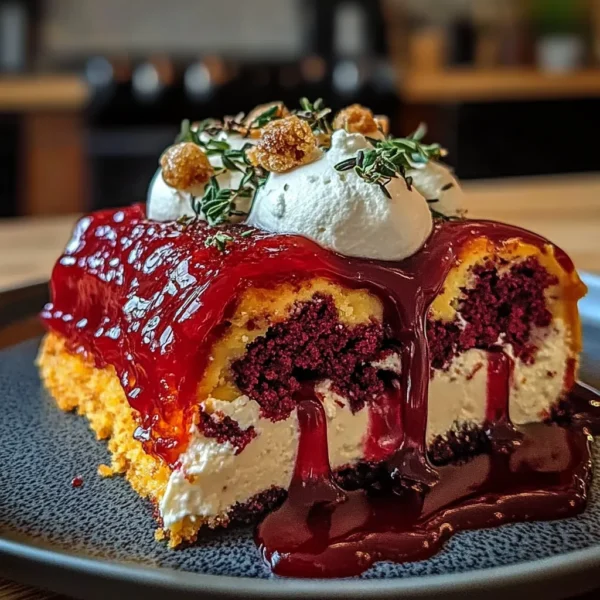
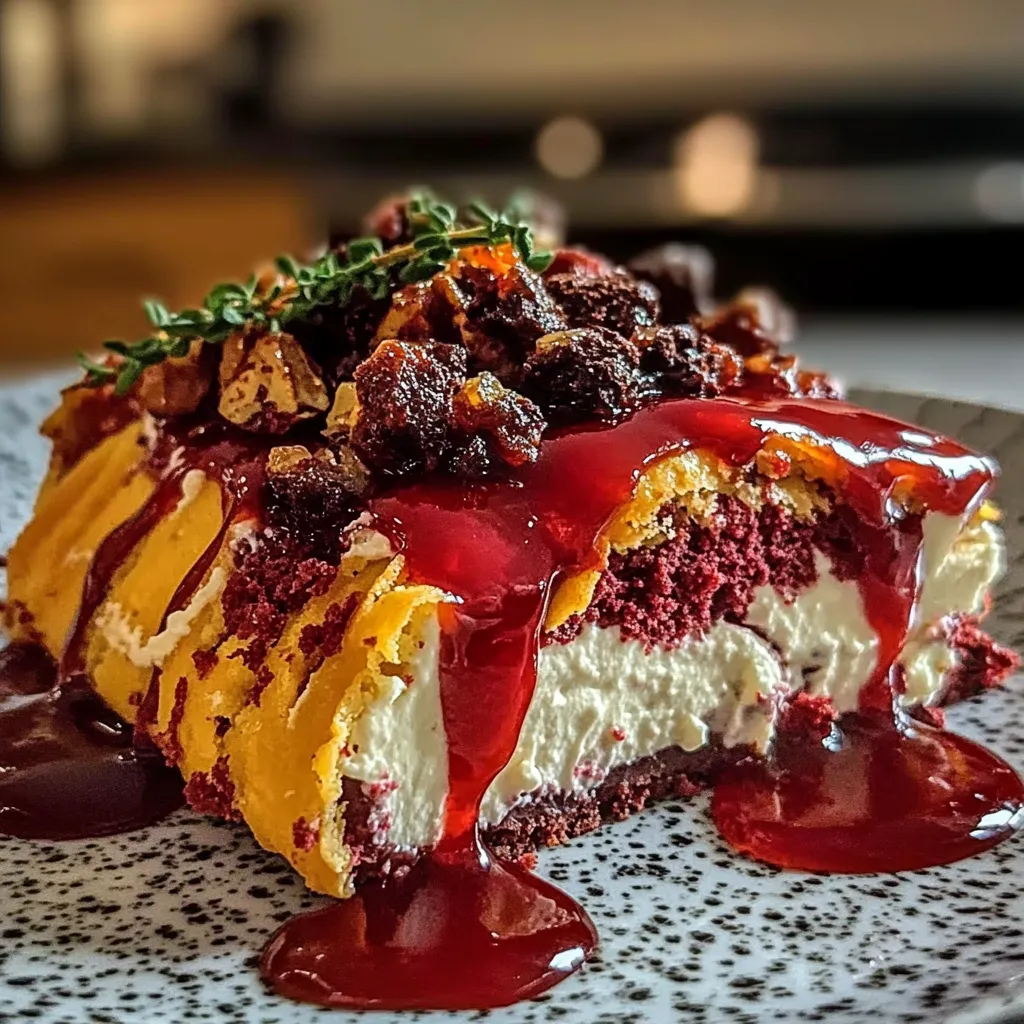
Ah, red velvet cheesecake. Just the name brings back fond memories of cozy get-togethers, where laughter filled the air and the sweet aroma of baked goods danced around the room. I remember the first time I made a red velvet cake. It was my best friend’s birthday, and I was determined to create something special. While I went for a classic recipe, let me tell you, I wish I had known about this No-Bake Red Velvet Cheesecake back then. It’s the kind of dessert that makes people gasp with delight and savor each bite like it’s a slice of heaven. If you’re looking for a show-stopping dessert without turning on the oven, then this recipe is just for you!
Why You’ll Love This Recipe
- All the Flavors: You get that irresistible red velvet taste without the fuss of baking.
- Easy Prep: Just mix and chill; it doesn’t get easier than that!
- Perfect for Any Occasion: Birthdays, anniversaries, or just because—this cheesecake fits every occasion.
- Impressive Presentation: Its vibrant color and smooth texture will wow your guests.
- No Baking Needed: Welcome to simple and stress-free cooking!
Ingredients
Gathering the right ingredients is half the fun! Here’s what you’ll need:
- For the crust:
- 1 ½ cups graham cracker crumbs (or Oreo crumbs for a chocolate kick)
- ½ cup unsalted butter, melted
- 2 tablespoons granulated sugar
- For the cheesecake filling:
- 16 oz cream cheese, softened (don’t skimp on this; it makes it creamy!)
- ½ cup powdered sugar
- ½ cup sour cream (adds that nice tang)
- 1 teaspoon vanilla extract
- 1 tablespoon red food coloring (you can adjust this for a deeper color)
- 1 teaspoon cocoa powder (for that hint of chocolate in the red velvet)
- 2 cups whipped cream (homemade or store-bought works fine)

Step-by-Step Instructions
- Prepare the crust: In a medium bowl, mix the graham cracker crumbs, melted butter, and sugar together until the mixture resembles wet sand. Press firmly into the bottom of a 9-inch springform pan. You want this crust to hold together well, so pack it tight!
- Chill the crust: Pop the crust in the refrigerator while you work on the filling. This will help it firm up nicely.
- Beat the cream cheese: In a large bowl, beat the softened cream cheese with an electric mixer until it’s smooth and creamy—no lumps allowed! This usually takes about 2 minutes.
- Add the sweeteners: Gradually add the powdered sugar and mix until combined. Then, toss in the sour cream, vanilla extract, red food coloring, and cocoa powder. Beat until everything is smooth and luscious. Just a quick note: the red food coloring can be added more or less to achieve your desired shade.
- Fold in the whipped cream: Gently fold in the whipped cream until fully combined. You want to keep that fluffy texture, so be gentle! A spatula is perfect for this.
- Pour and smooth: Take your prepared crust out of the fridge and pour the cheesecake mixture on top. Smooth the top with a spatula for a sleek finish.
- Chill out: Cover the cheesecake tightly with plastic wrap and refrigerate for at least 4 hours, or ideally overnight. This helps the flavors meld together beautifully and gives it that perfect set!
Pro Tips & Variations
Now that you’ve got the main recipe down, why not get creative? Here are some playful twists and tips to consider:
- Nutty Twist: Add finely chopped walnuts or pecans in the crust for a crunchy texture.
- Cheesecake Bites: Use mini muffin tins to create adorable cheesecake bites for parties!
- Toppings Galore: Top with chocolate shavings, fresh berries, or even a drizzle of chocolate ganache before serving for a gorgeous presentation.
- Diet Swaps: Use a dairy-free cream cheese and whipped topping to make this cheesecake dairy-free.
- Spice it Up: Add a pinch of cinnamon or nutmeg in the filling for an unexpected warm flavor kick.
Serving Suggestions
Picture this: you slice into that velvety cheesecake, and as you serve it up, the rich, red color glimmers under the light. To enhance the experience, I love to serve this dessert with a side of fresh whipped cream and a sprinkle of cocoa. A cup of hot coffee or a chilled glass of sweet iced tea pairs perfectly, balancing the rich flavors. You can also serve it on a simple white plate to let the cheesecake shine, but don’t hesitate to get creative with your garnishes!
Storage Tips
Have leftovers? No worries; this cheesecake stores beautifully! Here’s how to keep it fresh:
- Refrigerate: Cover the cheesecake with plastic wrap and keep it in the fridge for up to 5 days. (If it lasts that long!)
- Freeze: To freeze, make sure it’s well-wrapped in freezer-safe plastic wrap, then in aluminum foil. It’ll keep for up to 2 months. Just thaw in the fridge the night before you plan to serve it.
- Reheat? No reheating needed—just serve it chilled!
FAQs
Can I use a different type of crust?
Absolutely! Feel free to swap the graham crackers for digestive biscuits or chocolate cookie crumbs for a fun flavor twist. Just remember to adjust the butter amount if needed!
Is it necessary to use food coloring?
While the food coloring gives it that iconic red velvet look, you can skip it if you prefer a more natural approach or if you’re short on time. It’ll still taste amazing!
How can I make this cheesecake gluten-free?
Use gluten-free graham crackers or almond flour instead of traditional crumbs. It’s an easy switch that still delivers that delicious crust!
Can I freeze the cheesecake slices?
Yes! Slice it up and freeze individual pieces, wrapping each slice tightly. It’s a great way to enjoy this cheesecake anytime, just thaw a piece when the craving strikes!
What’s the best way to serve this cheesecake?
Slice with a hot knife for clean cuts! I love to top each slice with a dollop of whipped cream and a sprinkle of cocoa or chocolate shavings. It makes each bite feel extra special.
Conclusion
Making this No-Bake Red Velvet Cheesecake feels like crafting a piece of art—both delightful to create and a joy to share. I truly hope this recipe brings you as much happiness as it does for me. If you give this a try, please let me know how it goes! Did you add your own twist? Drop a comment below or share your creation. Can’t wait to hear all about your delicious adventures!

Leave a Comment