Ah, chocolate mousse! Just saying it brings back a flurry of memories filled with sweet indulgence and cozy dinners. I remember the first time I made this silky dessert for my closest friends during a rainy afternoon. The kitchen was filled with the rich aroma of melting chocolate, and the sight of those fluffy, airy clouds of mousse seemed to cast away the dreariness outside. We ended up laughing, sharing stories, and savoring spoonfuls of this delightful concoction, all while feeling warm inside from both the dessert and the company. That’s the magic of chocolate mousse—it’s not just dessert; it’s an experience.
Whether it’s a birthday celebration, a fancy dinner party, or just a quiet night in, this Chocolate Mousse recipe is the perfect treat to whip up. With only a handful of ingredients and a little bit of love, you’ll have a dessert that looks and tastes like it came straight from a high-end restaurant, but it’s so simple that anyone can make it. Let’s dive into this simple delight together!
Why You’ll Love This Recipe
- Simple and quick to prepare—perfect for last-minute desserts.
- Requires just a few basic ingredients, yet feels luxurious.
- Can be made ahead of time, making it easy to impress guests!
- Rich, creamy texture with a lightness that makes it irresistible.
- Customizable with your favorite toppings or a twist of flavors.
Ingredients
Here’s what you’ll need to create your perfect Chocolate Mousse:
- 200g dark chocolate (at least 70% cocoa for richness)
- 3 large eggs, separated
- 2 tablespoons granulated sugar (adjust to taste)
- 1 cup heavy cream
- 1 teaspoon vanilla extract
- Pinch of salt
- Optional: Whipped cream and chocolate shavings for garnish
Note: Using high-quality chocolate makes a significant difference in flavor. Try to avoid anything labeled “chocolate-flavored” or lower cocoa percentages.
Step-by-Step Instructions
Ready to make this Chocolate Mousse? Let’s get into it!
- Melt the Chocolate: Start by breaking your dark chocolate into small pieces and placing it in a heatproof bowl. Set the bowl over a pot of simmering water, making sure the bottom doesn’t touch the water (this is called a double boiler!). Stir gently until it’s fully melted and smooth. Remove from heat and let it cool slightly. Tip: If you’re in a pinch, you can microwave it in short bursts (15 seconds), stirring in between!
- Whip the Egg Whites: In a clean bowl, use a mixer to beat the egg whites with a pinch of salt until soft peaks form. Gradually add in the sugar while still mixing until you get glossy peaks. Gently fold the egg whites into the cooled chocolate. Watch out: Be gentle here! We want to keep that airiness that gives the mousse its signature texture.
- Whip the Cream: In another bowl, whip the heavy cream and vanilla extract until it reaches soft peaks. Now, just like the egg whites, we’ll fold the cream into the chocolate mixture. Keep that folding light and fluffy! Tip: Feel free to taste your mixture at this point to adjust sweetness if needed.
- Combine: Here comes the best part! Gently fold the whipped cream into the chocolate-egg mixture in three additions. This will help lighten it without deflating the mixture! Just enough to combine—don’t overmix.
- Chill: Divide your mousse into serving dishes or ramekins and pop them into the fridge for at least 2 hours. The longer it chills, the better the flavors meld! Pro Tip: Make it the night before for even more luxurious flavors!

Pro Tips & Variations
Now that you’ve got the basics down, here are some fun twists for your Chocolate Mousse:
- Flavor Infusions: Add a splash of espresso or coffee liqueur to your chocolate for a mocha mousse. Or get adventurous with a hint of orange zest for a citrus kick!
- Diet Swaps: For a dairy-free version, you can swap out heavy cream for coconut cream. Just chill a can of full-fat coconut milk overnight and use the solid creamy part.
- Layering: Create parfaits by layering the mousse with crushed cookies or fresh berries for an eye-catching presentation.
- Nutty Addition: Stir in finely chopped hazelnuts or almonds for a lovely crunch or sprinkle them on top before serving.
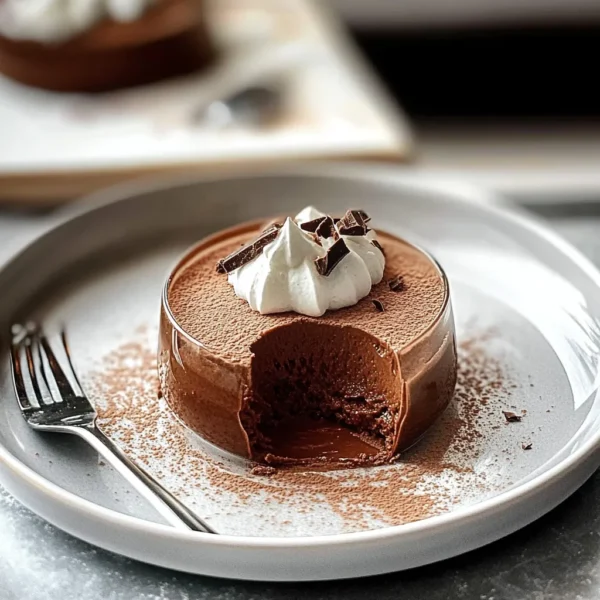
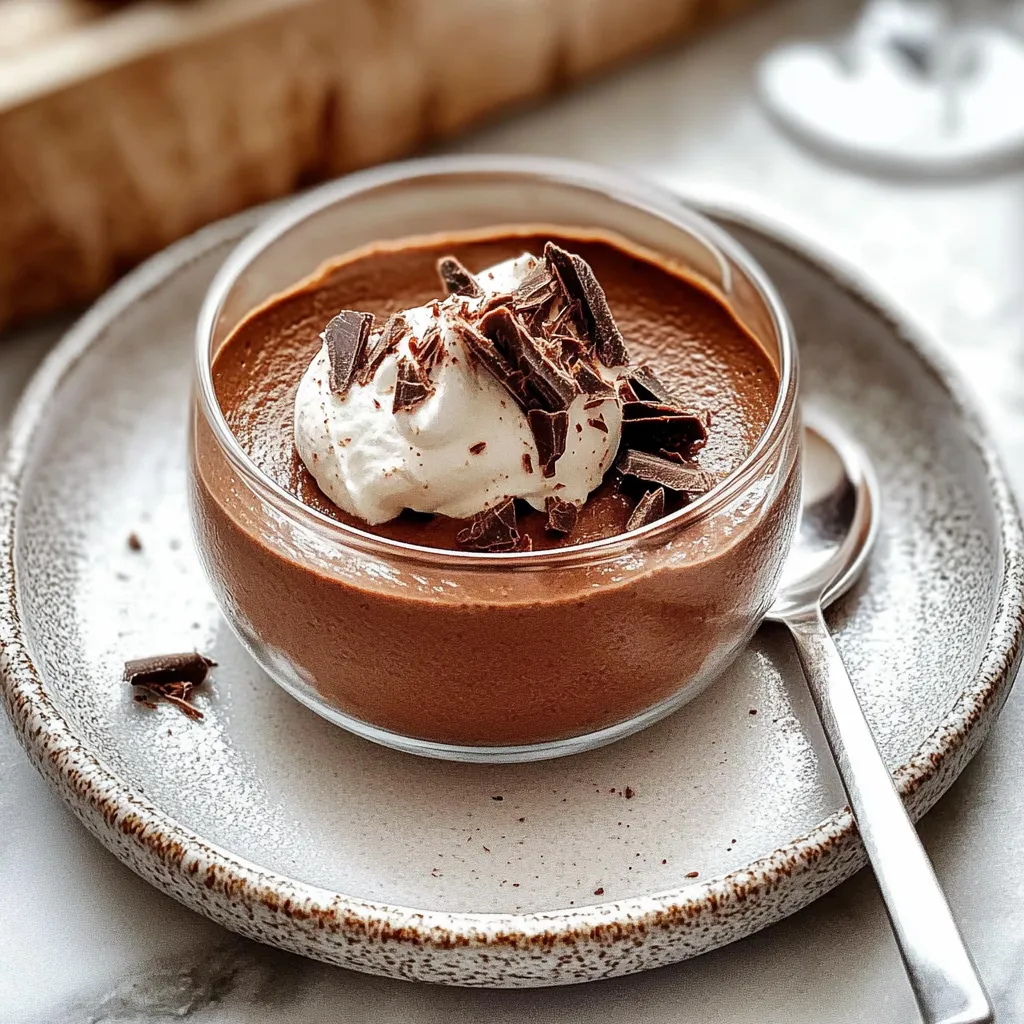
Serving Suggestions
How would I serve up this dreamy Chocolate Mousse? I love to present it in little glasses or fancy ramekins to show off those gorgeous layers. Top each serving with a dollop of whipped cream and a sprinkle of chocolate shavings for that extra touch. Serve alongside some buttery shortbread cookies or fresh strawberries to create a beautiful contrast to the richness of the mousse. And, of course, a steaming cup of coffee or dessert wine pairs perfectly! Picture this: you and your loved ones gathered around the table, spoons gliding through the luscious chocolate, faces lighting up with every bite. Cozy, isn’t it?
Storage Tips
This Chocolate Mousse can be stored in the fridge for up to 3 days, covered with plastic wrap to keep it fresh. If you want to save some for later, you can also freeze it—just be sure to keep it in an airtight container. Let it thaw in the fridge overnight before serving. The texture might change slightly, but it will still be delectable!
FAQs
Can I use milk chocolate instead of dark chocolate?
Yes, you can! Just keep in mind that it will result in a sweeter mousse. If you love milk chocolate, go for it! You might want to reduce the sugar a little.
How do I make a vegan version of this mousse?
You can substitute the eggs with aquafaba (the liquid from canned chickpeas) and use coconut cream instead of heavy cream. Whip the aquafaba until stiff peaks form and fold it in just like the egg whites!
Can I use a different sweetener?
Absolutely! You can experiment with alternatives like maple syrup or honey. Just be sure to adjust the amount as they can be sweeter than granulated sugar.
Why is my mousse not setting?
If your mousse isn’t setting, it could be that your chocolate was too warm when mixed, or the cream and egg combination wasn’t properly folded. It’s all about warm-fuzzy magic keeping that whipped air inside!
Can I make this ahead of time?
You bet! This mousse is perfect for making ahead. It actually tastes better after a day in the fridge, as the flavors deepen and develop.
Conclusion
And there you have it— a simple yet stunning Chocolate Mousse that’s sure to melt hearts! I hope you give this recipe a try and find as much joy in making it as I do. If you do, please let me know how it turned out! Are you team berries or nutty toppings? I would love to hear your ideas and variations. Until next time, happy chocolate baking!


Leave a Comment