
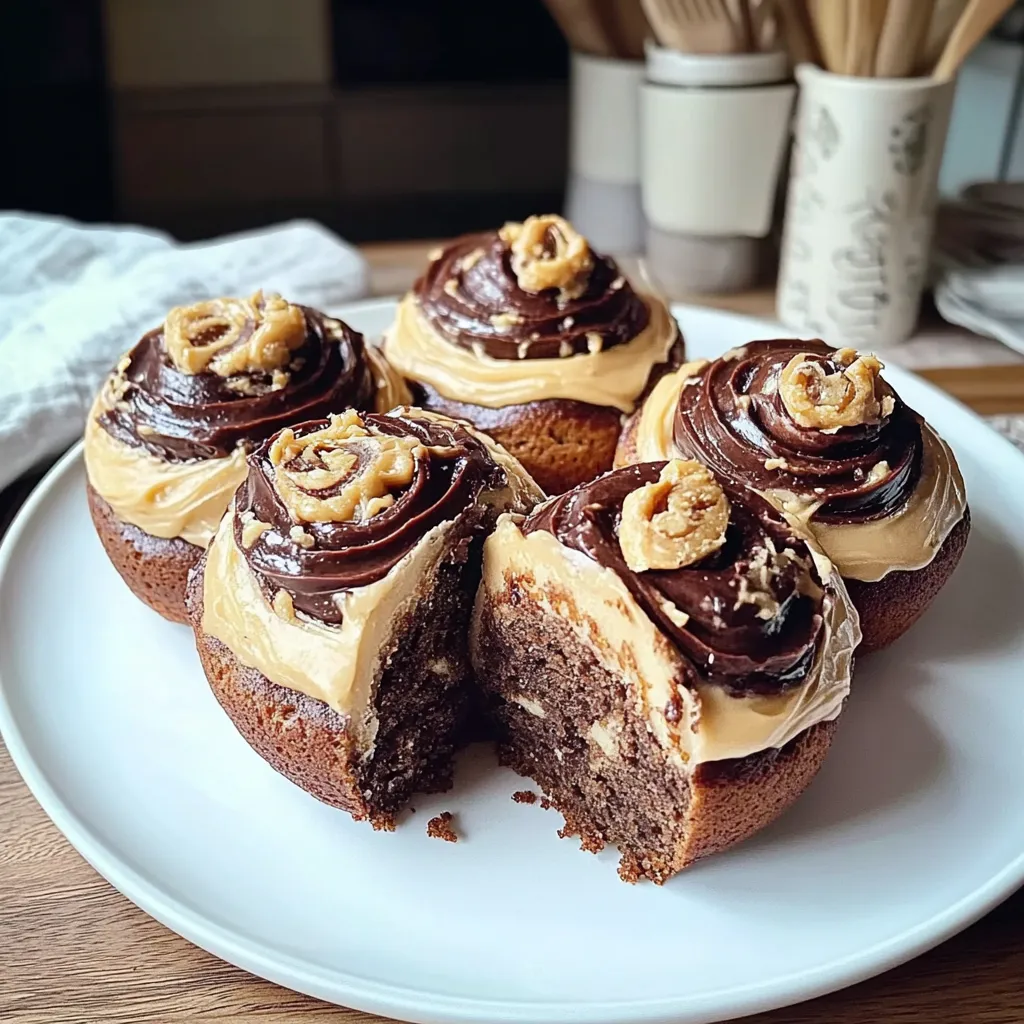
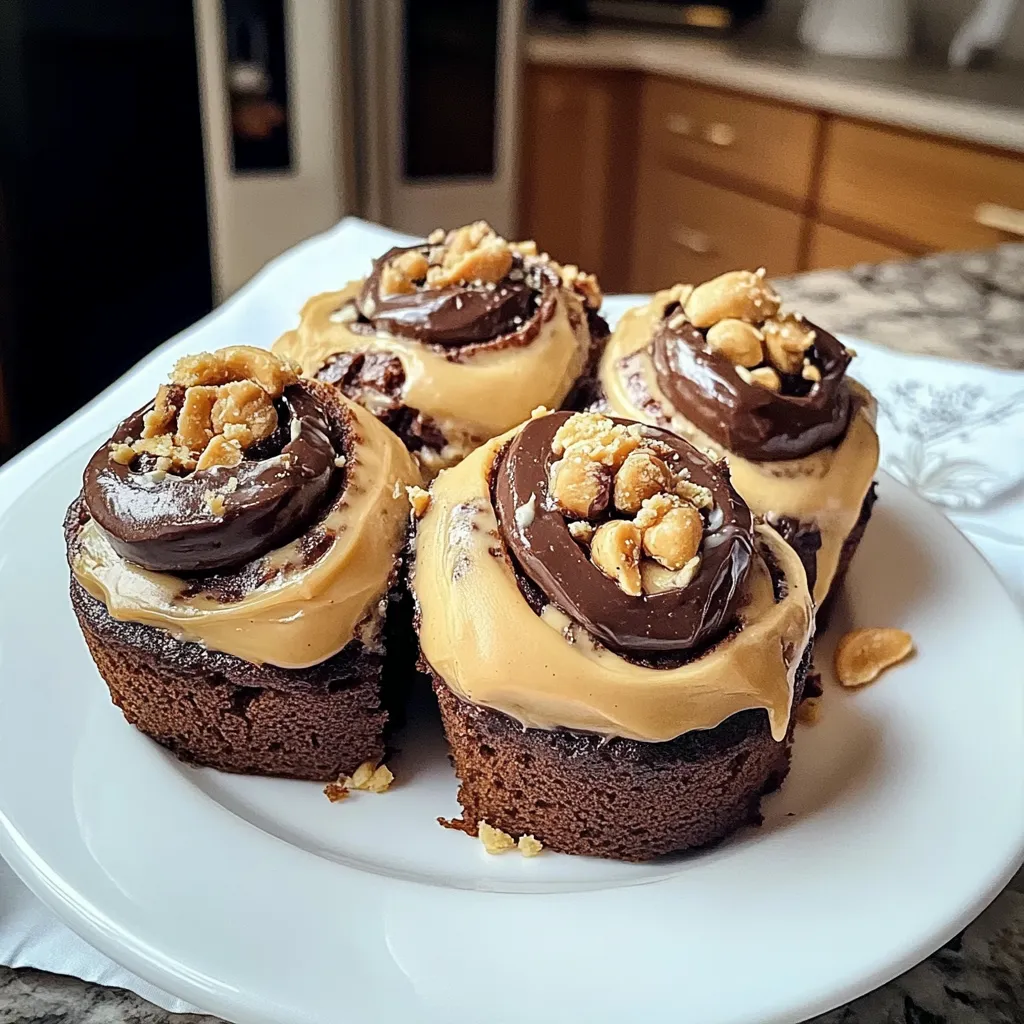
There’s something truly magical about the combination of chocolate and peanut butter, isn’t there? I remember sitting at my grandmother’s kitchen table, savoring the rich, creamy goodness of her peanut butter cookies. She’d always sneak a few chocolate chips into the dough, claiming it was a “secret family recipe.” The warm scent of baking sweets would fill the air, making everything feel cozy and inviting. That’s the feeling I want to capture with these Chocolate Peanut Butter Sweet Rolls, a treat that brings comfort and delight in every bite.
These rolls are not just for a special occasion; they’re perfect for a weekend brunch, a cozy dessert after dinner, or even a weekday pick-me-up. The soft, fluffy rolls combined with the ooey-gooey chocolate and peanut butter filling make for a lovely sweet indulgence. Let’s roll up our sleeves and dive into this delicious recipe together!
Why You’ll Love This Recipe
- Easy to make with simple ingredients.
- Perfect for sharing (or keeping all to yourself!).
- Heavenly chocolate and peanut butter flavor combo.
- Soft, fluffy texture that melts in your mouth.
- Great for breakfast, brunch, or a sweet snack.
Ingredients
Let’s gather our ingredients! Here’s what you’ll need to whip up these delicious rolls:
- 2 ¼ tsp (1 packet) active dry yeast
- ½ cup warm milk (about 110°F)
- ¼ cup granulated sugar
- 1 large egg
- ¼ cup unsalted butter, melted
- 3 cups all-purpose flour, plus more for dusting
- ½ tsp salt
- ½ cup creamy peanut butter
- ½ cup chocolate chips (semi-sweet or dark, depending on your preference)
- ¼ cup brown sugar
- ½ tsp vanilla extract
Note: The warm milk is crucial for activating the yeast, but make sure it’s not too hot – we don’t want to kill our little yeast friends!
Step-by-Step Instructions
Now that we have everything ready, let’s get baking! Follow these simple steps to create your own batch of chocolate peanut butter sweet rolls:
- Activate the yeast: In a small bowl, combine the warm milk, sugar, and yeast. Stir gently and let it sit for about 5-10 minutes, or until it’s frothy. This means our yeast is working! It’s one of my favorite little moments in baking.
- Mix the wet ingredients: In a large mixing bowl, combine the melted butter and egg. Once the yeast mixture is frothy, add it to the bowl along with the vanilla extract. Mix well!
- Add the dry ingredients: In a separate bowl, whisk together the flour and salt. Gradually add the flour mixture to the wet ingredients. I usually do this a little at a time to avoid making too much of a mess. Mix until a dough starts to form.
- Knead the dough: Flour your work surface and turn out the dough. Knead for about 5-7 minutes, until the dough is smooth and elastic. This is where the magic begins, and it’s okay to get a little flour on your clothes—baking is meant to be a bit messy!
- Let it rise: Place the kneaded dough in a greased bowl, cover it with a kitchen towel, and let it rise in a warm place for about 1 hour, or until it doubles in size. The smell will start to fill your kitchen, and you’ll know it’s worth the wait!
- Prepare the filling: While the dough rises, mix together the peanut butter, brown sugar, and chocolate chips in a bowl. This filling is going to be indulgent and delicious, so sample a little to make sure it’s just right!
- Roll and fill: Once the dough has risen, punch it down to release any air bubbles. Roll it out on a floured surface into a rectangle, about ¼ inch thick. Spread the peanut butter and chocolate filling evenly over the dough.
- Shape the rolls: Tightly roll the dough into a log, starting from the long side. Once it’s all rolled up, cut it into 12 equal pieces. A sharp knife or dental floss works wonders here—trust me!
- Second rise: Place the rolls in a greased baking dish, cover with a towel, and let them rise again for about 30 minutes until they puff up. This is a good time to preheat your oven to 350°F (175°C).
- Bake the rolls: Bake for about 20-25 minutes, or until golden brown and fluffy. You’ll know they’re ready when your kitchen smells divine and they have a lovely golden hue.
- Cool and enjoy: Let the rolls cool slightly before digging in. Drizzle a bit of warm chocolate or extra peanut butter on top if you’re feeling extra generous!
Personal tip: Don’t be afraid to let those rolls rise! The fluffier they are, the better. Patience is key in baking.
Pro Tips & Variations
Feeling adventurous? Here are some fun twists and variations you can try with your Chocolate Peanut Butter Sweet Rolls:
- Nutty addition: Toss in some chopped nuts (like pecans or walnuts) for added crunch and flavor.
- Spicy kick: Add a sprinkle of cinnamon to the peanut butter filling for a warm, cozy spice that compliments the chocolate.
- Gluten-free version: Substitute all-purpose flour with your favorite gluten-free blend. Just be sure to check that it’s a 1:1 baking substitute.
- Fruity twist: Instead of chocolate chips, use dried fruits like cranberries or cherries for a tart contrast to the sweet peanut butter.
Whatever variation you choose, remember to have fun with it! Baking should be a delightful experience, so feel free to let your creativity run wild.
Serving Suggestions
These rolls are perfect on their own, but they pair beautifully with a steaming cup of coffee or a cold glass of milk. I love serving them at brunch gatherings, piled up on a big platter, dusted with powdered sugar for that extra touch of elegance. You could even serve them warm with vanilla ice cream or whipped cream on the side for a decadent dessert.
Imagine sitting around the table with friends or family, warm rolls in hand, laughter filling the air—it’s the perfect way to make memories! If you have any leftovers (which is often rare), they warm up beautifully in the oven. Just a few minutes at 350°F will bring them right back to their gooey glory.
Storage Tips
Want to make these rolls ahead of time? Here’s how to store them:
- Refrigerator: Keep any leftover rolls in an airtight container for up to 3 days. Just reheat in the oven for a few minutes to regain that fresh-baked taste.
- Freezer: You can freeze the rolls after baking! Wrap them tightly in plastic wrap and then in aluminum foil to prevent freezer burn. They’ll last for about 2-3 months. To reheat, let them thaw in the fridge overnight, then warm them up in the oven.
- Unbaked rolls: If you want to prepare them ahead of time, you can shape the rolls and then freeze them before the second rise. When you’re ready to bake, let them thaw in the fridge overnight, then allow them to rise before baking as usual.
FAQs
Can I use natural peanut butter instead of creamy peanut butter?
Absolutely! Just keep in mind that natural peanut butter has a tendency to be a bit more oily. You might want to adjust the sugar levels accordingly for sweetness.
Can I make these rolls in advance?
Yes! You can prepare the dough and fill the rolls ahead of time, then refrigerate or freeze them before the second rise. That way, you can bake them fresh when you’re ready to enjoy.
What can I do if my yeast doesn’t foam?
If your yeast doesn’t foam after 10 minutes, it might be dead. Double check that your milk was warm (but not hot) and that your yeast hasn’t expired. If in doubt, start with fresh yeast!
How can I tell when the rolls are done baking?
When the rolls start to brown on top and your kitchen smells amazing, they should be ready. You can also test doneness by tapping the bottom of one; it should sound hollow.
Can I add frosting on top?
Oh, definitely! A simple glaze made of powdered sugar and milk or a chocolate ganache will take these rolls to the next level of indulgence.
How do I know when to stop kneading the dough?
The dough should be smooth and elastic when ready, not sticky. If you press it gently with your finger, it should spring back. If it doesn’t, keep kneading a little longer.
And there you have it! Your home will soon be filled with the delightful scent of chocolate and peanut butter. I can’t wait for you to try these Chocolate Peanut Butter Sweet Rolls and make them your own. Don’t forget to come back and let me know how they turned out or share your favorite variations. Happy baking, my friend!

Leave a Comment