
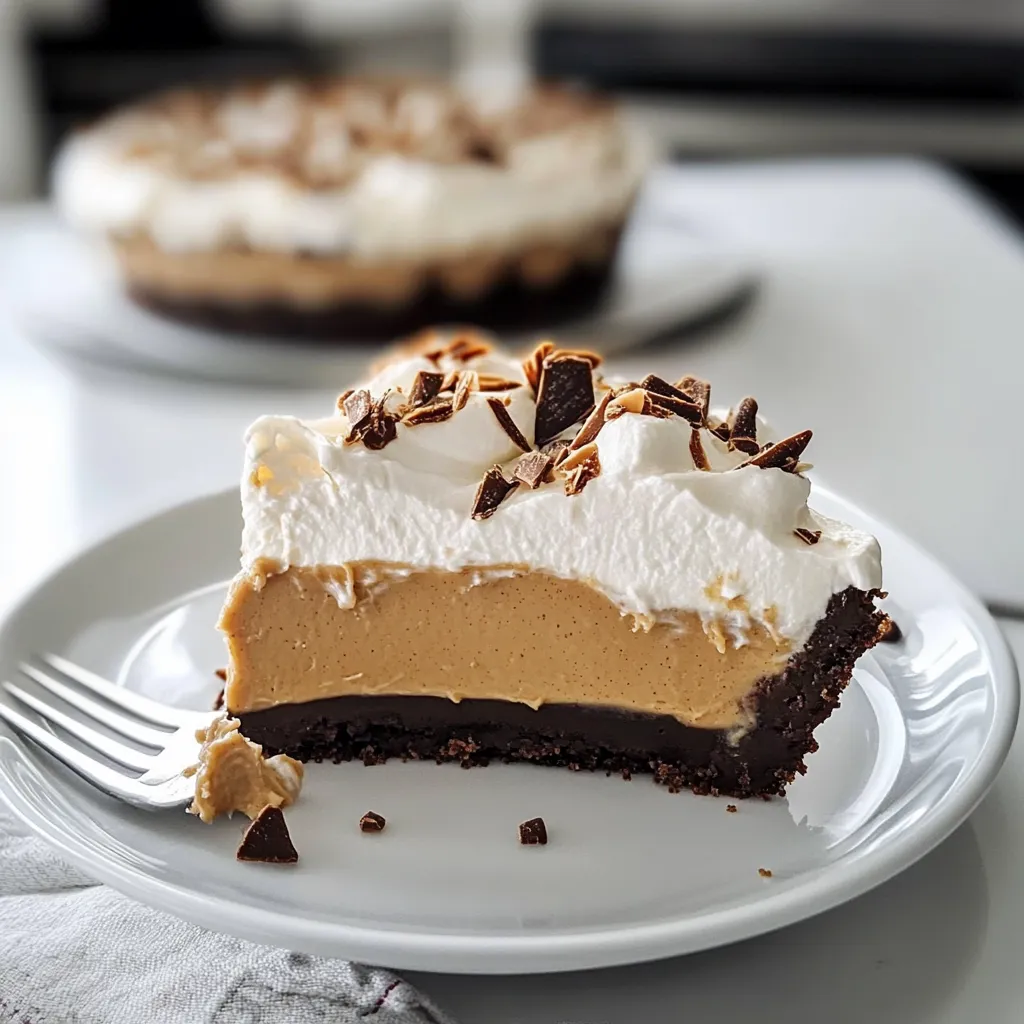
There’s something magical about the combination of peanut butter and chocolate, isn’t there? The way those flavors mingle always brings me back to lazy summer afternoons spent in my grandmother’s kitchen, where she’d whip up all sorts of delicious desserts to keep us kids entertained. One treat that stands out is her No Bake Peanut Butter Pie. The best part? It’s incredibly simple to make! This pie is perfect for hot days when turning on the oven feels like a crime against humanity. It’s rich, creamy, and just the thing to satisfy a craving for something sweet without all that baking fuss.
Whether it’s a birthday, a holiday gathering, or just because it’s Tuesday, you’ll find that this No Bake Peanut Butter Pie is always a hit! Trust me, it’s a dessert your friends and family will be raving about long after the last crumb has disappeared.
Why You’ll Love This Recipe
- Quick & Easy: No baking required! Simply mix, chill, and serve.
- Kid-Approved: This pie is sure to please both kids and adults alike.
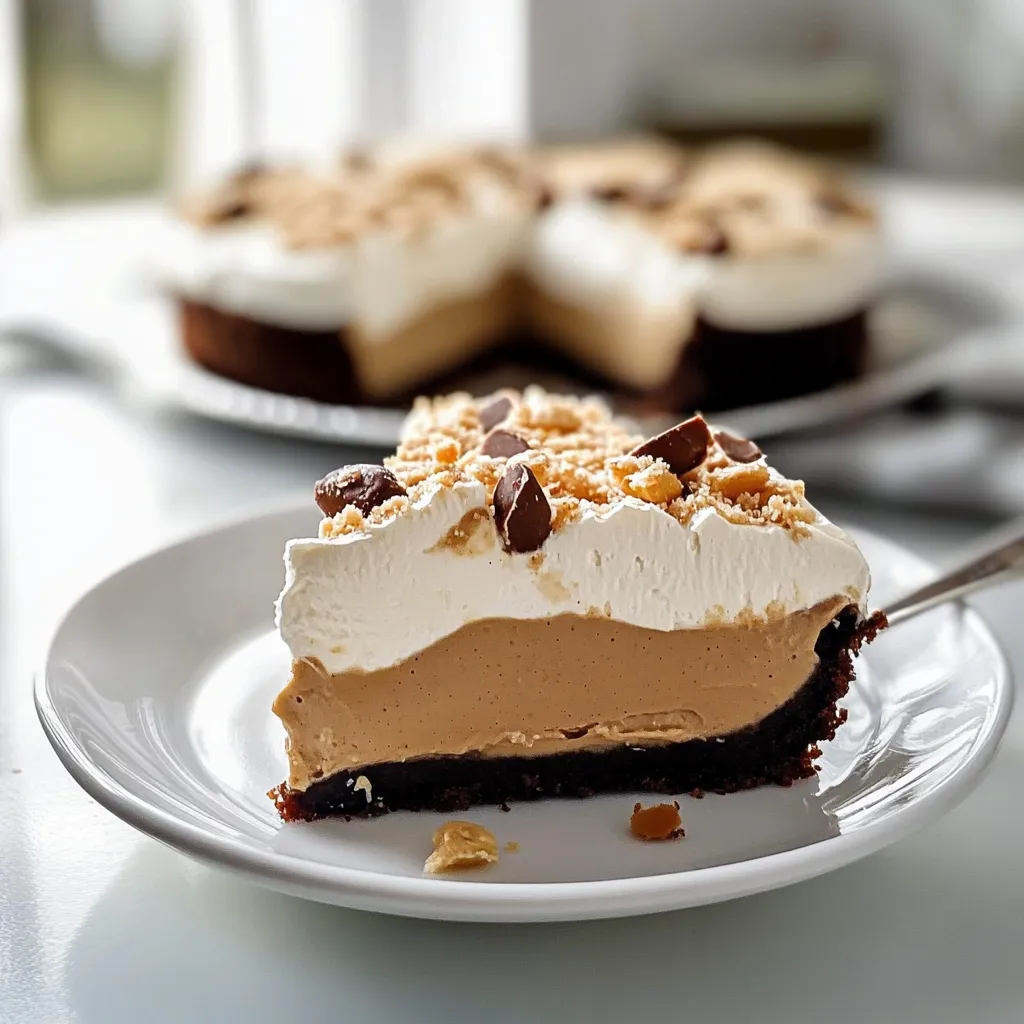
- Rich, Creamy Texture: The smooth filling combined with the crunchy crust is a perfect match.
- Versatile: Top it with anything from chocolate syrup to crushed peanuts or whipped cream.
- No Special Equipment Needed: Just a mixing bowl, spatula, and a pie dish.
Ingredients
Here’s what you’ll need to whip up this delightful No Bake Peanut Butter Pie:
- For the crust:
- 1 ½ cups graham cracker crumbs (about 10-12 whole crackers)
- ½ cup unsalted butter, melted
- ¼ cup granulated sugar
- For the filling:
- 1 cup creamy peanut butter (I prefer natural peanut butter for its rich flavor)
- 1 cup powdered sugar
- 1 cup heavy whipping cream
- 1 teaspoon vanilla extract
- For topping (optional):
- Chocolate syrup
- Crushed peanuts or Oreos
- Whipped cream (store-bought or homemade)
Step-by-Step Instructions
Ready to put this beauty together? Let’s dive in!
- Make the crust: In a mixing bowl, combine the graham cracker crumbs, melted butter, and granulated sugar. Mix until everything is well coated; it should resemble wet sand. If it’s too dry, add a bit more melted butter.
- Press the crust: Firmly press the mixture into the bottom and up the sides of a 9-inch pie dish. Use the back of a measuring cup or your hands to keep it even. Pop it in the fridge to chill while you prepare the filling.
- Prepare the filling: In a large mixing bowl, beat together the peanut butter and powdered sugar until smooth. This will get thick, which is totally okay.
- Add the cream: In a separate bowl, whip the heavy cream with the vanilla extract until stiff peaks form. This won’t take long—just be sure not to over-whip, or you’ll end up with butter!
- Combine: Gently fold the whipped cream into the peanut butter mixture. This is where that airy texture comes from, so take your time and be gentle to maintain those beautiful bubbles!
- Fill the crust: Pour the filling into the chilled crust. Use a spatula to smooth the top. It’s okay if it’s not perfect; the pie will still taste divine!
- Chill: Cover with plastic wrap and refrigerate for at least 4 to 6 hours, or overnight if you can wait. This will allow the filling to set properly.
Just imagine that first bite—the velvety filling against the crunch of the crust! Absolute bliss, my friends. But hold onto your hats because we’re not done yet!

Pro Tips & Variations
Let’s sprinkle in some fun twists for your No Bake Peanut Butter Pie!
- Chocolate Lover’s Delight: Melt some chocolate chips and fold them into the filling for a double chocolate kick.
- Nutty Flavor: Add a few tablespoons of chopped nuts or toffee bits into the filling for an exciting crunch.
- Swirl it up: Drizzle some melted chocolate or caramel in the filling before chilling for a beautiful marbled effect.
- Healthier Option: Use Greek yogurt instead of whipped cream for a protein boost and lower calorie count.
- Flavor Swap: Try almond butter or other nut butters for a different experience—yum!
Serving Suggestions
When it comes time to serve your masterpiece, consider these delightful ideas:
- Top with a generous drizzle of chocolate syrup and a dollop of whipped cream.
- Crushed Oreos or peanuts sprinkled on top add texture and extra crunch.
- Pair it with a strong cup of coffee or a tall glass of cold milk for the ultimate comfort treat.
And don’t forget: It’s all about presentation! A slice of this pie with a sprig of mint or a few chocolate shavings can elevate the look from homemade to showstopper in no time.
Storage Tips
You’ve made a fantastic pie, and chances are you might have a slice or two left over. Here’s how to keep it fresh:
- Refrigerate: Cover the pie with plastic wrap or foil. It’ll keep well in the fridge for up to 5 days.
- Freeze: Want to save some for later? Wrap individual slices in plastic and store them in an airtight container. They’ll last up to 3 months in the freezer.
- Thawing: To enjoy your frozen pie, simply take it out of the freezer the night before and let it thaw in the refrigerator. No need for microwave drama!
FAQs
Can I use crunchy peanut butter instead of creamy?
Absolutely! If you love that extra crunch, go for it. Just keep in mind it will change the texture slightly, but in a fun way!
What if I don’t have graham crackers?
No problem at all! You can use digestive biscuits, vanilla wafers, or any type of cookie that you love. Just crush them up to the same crumbly consistency.
Can I make this pie dairy-free?
Yes! Use dairy-free whipped cream and replace the butter with a dairy-free alternative. There are plenty of great nut-based options!
How long does it take to set?
Ideally, you’ll want to let it chill for at least 4 to 6 hours, but overnight is even better for that perfectly firm texture. Patience is key!
What can I use instead of heavy whipping cream?
If you want a lighter option, you can use coconut cream or silken tofu blended until smooth. Just note that it will alter the flavor slightly.
Conclusion
So there you have it, a delightful No Bake Peanut Butter Pie that’s about to become your go-to recipe for all occasions! I hope you enjoy this pie as much as my family and I do. It’s quick to put together, but the flavor and smiles it brings last for ages. I’d love to hear how yours turns out, so don’t forget to leave a comment below. Happy baking—or should I say “no baking”—and enjoy every delicious bite!


Leave a Comment