
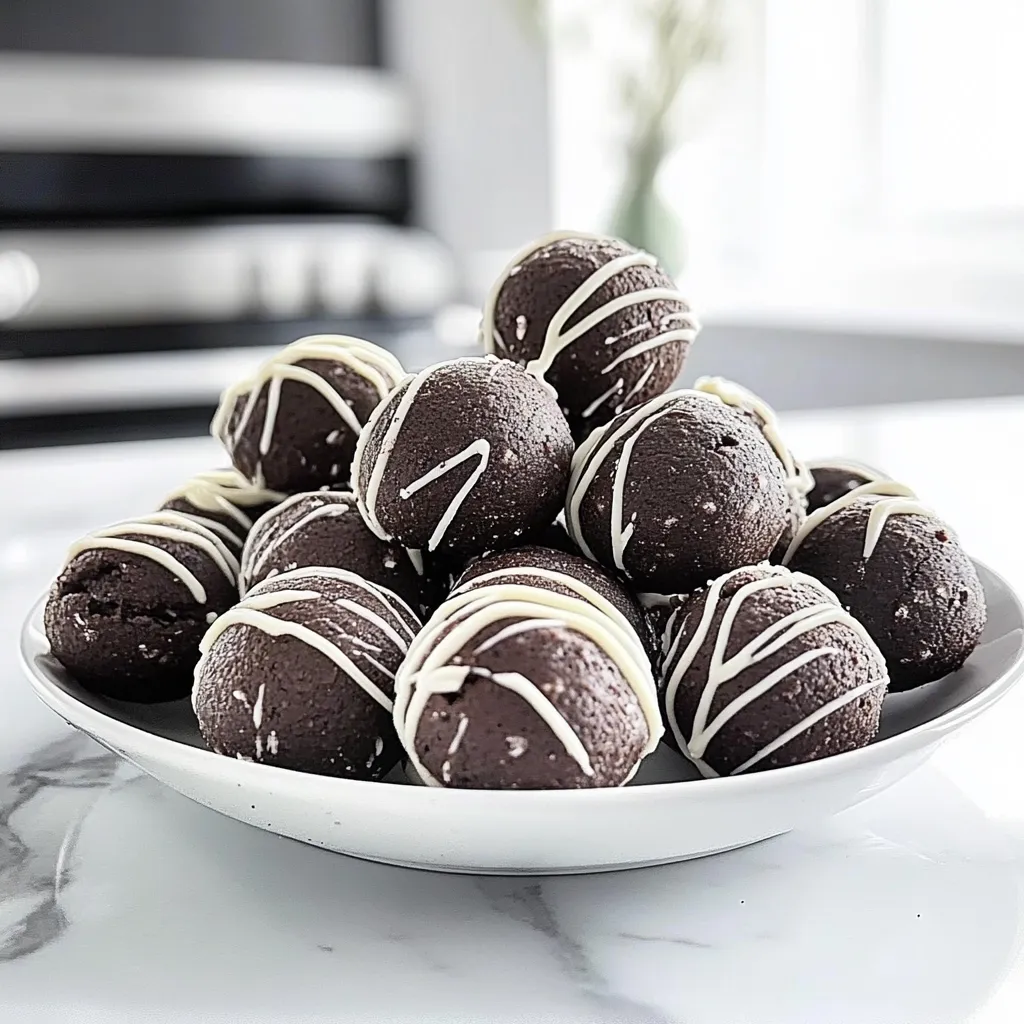
There’s something undeniably magical about sweet treats that evoke nostalgia and warmth. For me, Oreo Truffles are at the top of that list. I still remember the first time I made them during a cozy winter evening with my friends, all of us gathered around the kitchen island, laughter mingling with the tantalizing scent of chocolate. It was a joyful experience, one that turned a simple recipe into a cherished memory. These truffles are not only delightfully easy to whip up but also a hit at any gathering or even as a midnight snack. I can almost picture you enjoying them, each creamy bite melting on your tongue, rich with that signature Oreo flavor. Trust me; you’ll want to make these again and again. Let’s dive into this deliciousness together and make some magic, shall we?
Why You’ll Love This Recipe
- Super Easy: No baking required! Just mix, roll, and chill.
- Effortlessly Delicious: The creamy filling paired with the chocolate coating is pure bliss.
- Perfect for Any Occasion: Birthdays, holidays, or just because—these truffles are always a hit!
- Customization: You can easily tweak the flavors or toppings to suit your taste.
Ingredients
Here’s what you’ll need to create these mouthwatering Oreo Truffles:
- 1 package (15.35 oz) Oreo cookies (crushed)
- 8 oz cream cheese (softened, room temperature)
- 16 oz semi-sweet chocolate chips (or melting chocolate)
- 1 tablespoon vegetable oil (optional, for thinning chocolate)
- Optional toppings: crushed Oreos, sprinkles, or white chocolate drizzle
Helpful Note: Make sure your cream cheese is at room temperature for a smooth mixture!

Step-by-Step Instructions
- Crush the Oreos: Place the Oreo cookies in a food processor and pulse until they turn into fine crumbs. If you don’t have a food processor, a sealed bag and a rolling pin work just as well—just watch your fingers!
- Mix with Cream Cheese: In a mixing bowl, blend together the crushed Oreos and the softened cream cheese until they’re fully combined. The mixture should be thick and sticky. Don’t be afraid to get in there with your hands—sometimes, it’s the best way to ensure everything’s mixed well!
- Chill: Cover the bowl with plastic wrap and refrigerate the mixture for about 30 minutes. This will make it easier to roll into balls.
- Shape the Truffles: Once chilled, scoop about a tablespoon of the mixture and roll it into a ball. Place the formed truffles on a baking sheet lined with parchment paper. Your hands might get a little messy, but that’s part of the fun!
- Melt the Chocolate: In a microwave-safe bowl, melt the chocolate chips in 30-second intervals, stirring in between until smooth. If you’re using vegetable oil, mix it in now to ensure a nice, silky consistency.
- Dip the Truffles: Using a fork, dip each truffle into the melted chocolate, allowing any excess chocolate to drip off. Place the chocolate-covered truffles back on the parchment paper.
- Decorate: If you’d like, sprinkle crushed Oreos or toppings before the chocolate sets. You can also drizzle with melted white chocolate for an extra touch of elegance.
- Chill Again: Refrigerate the truffles for at least 30 minutes to allow the chocolate to harden completely.
Watch-Out: Avoid letting the chocolate sit too long after melting; it can harden and become difficult to work with!
Pro Tips & Variations
Ready to get creative? Here are a few fun twists you can try:
- Flavor Variations: Swap the regular Oreos for golden Oreos, mint Oreos, or even peanut butter Oreos for a unique flavor.
- Different Coatings: Experiment with different types of chocolate—dark, milk, or white chocolate—all bring something special to the table!
- Add Spices: Try adding a pinch of cinnamon or espresso powder to the Oreo mixture for an exciting flavor boost.
- Go Nutty: Roll your truffles in chopped nuts, coconut flakes, or mini chocolate chips for extra texture.
Serving Suggestions
These Oreos Truffles are delicious any time of the day, but here are a few cozy ideas to serve them:
- As Party Favors: Package them up in cute little boxes for a delightful treat at your next gathering.
- With Coffee: Enjoy them alongside a warm cup of coffee for a perfect afternoon pick-me-up.
- On a Dessert Table: They make a beautiful addition to any dessert table, adding both color and flavor.
Picture a set of these truffles on a rustic wooden board, perhaps nestled among some festive decorations if it’s a holiday season. They’re not just treats; they’re little pieces of joy to share and enjoy together.
Storage Tips
To keep your Oreo Truffles tasting fresh and delicious, here’s how to store them:
- Refrigeration: Keep them in an airtight container in the fridge for up to 2 weeks.
- Freezing: You can freeze the truffles for up to 3 months! Just make sure to layer them between parchment paper in an airtight container.
- Thawing: When you’re ready to enjoy your frozen truffles, simply transfer them to the fridge for a few hours to thaw before serving.
FAQs
Can I use light cream cheese instead of regular cream cheese?
Yes, you can! Light cream cheese will work, though it may alter the texture slightly and make them a bit softer.
What if I don’t have chocolate chips?
No worries! You can use chocolate bars broken into pieces or candy melts as a great alternative. Just adjust the melting time as needed!
Can I make these truffles ahead of time?
Absolutely! In fact, they taste even better after chilling for a good while, as the flavors meld together beautifully. Just make sure to store them properly!
How do I make these gluten-free?
Simplify things by using gluten-free Oreos, which are easy to find these days. The rest of the recipe is naturally gluten-free!
There you have it! Oreo Truffles are not just a sweet indulgence but a delightful experience waiting to happen in your kitchen. I truly hope you give this recipe a try and find joy in each bite. Please share your thoughts or any magical twists you tried in the comments below. Happy truffling!


Leave a Comment