There’s something utterly enchanting about walking into a kitchen filled with the sweet, tangy scent of strawberries baking in the oven. It takes me back to summers spent berry-picking with my grandmother, armed with nothing but baskets and our unyielding love for fresh fruit. After picking, we would hurry home, all chatter and giggles, eager to create something that felt like magic. That magic, my friends, comes to life in this strawberry crumble recipe!
This strawberry crumble is more than just a dessert; it’s a warm embrace after a long day, a sweet treat shared with friends, and a little slice of nostalgia. The juicy strawberries meld beautifully with a crumbly topping that has just the right crunch, making it the perfect comfort food any time of year. Plus, it’s super easy to throw together, which is always a win in my book. So, grab your favorite mixing bowl, and let’s make some strawberry crumble together!
Why You’ll Love This Recipe
- Quick and easy—perfect for busy weeknights.
- Uses fresh strawberries with a vibrant flavor that takes center stage.
- Budget-friendly; minimal ingredients that won’t break the bank!
- Versatile—enjoy it warm, with ice cream, or for breakfast the next day.
- A great way to get the whole family involved in the kitchen.
Ingredients
Here’s what you’ll need to whip up this scrumptious strawberry crumble:
- 4 cups fresh strawberries, hulled and sliced (feel free to substitute with frozen if fresh aren’t available)
- ½ cup granulated sugar (or adjust according to your taste)
- 1 tablespoon cornstarch (for thickening those delicious juices)
- 1 tablespoon lemon juice (adds brightness to the filling)
- 1 cup all-purpose flour (for the crumble goodness)
- ½ cup rolled oats (for a heartier texture)
- ½ cup brown sugar (for that deep caramel flavor)
- ½ teaspoon cinnamon (adds a warm depth, but you can skip it if you prefer)
- ½ cup cold unsalted butter, cubed (this is what makes it crumbly and delightful!)
- Pinch of salt (to balance sweet flavors)
Step-by-Step Instructions
Ready to embark on this delightful kitchen adventure? Let’s do it!
- Preheat the oven. Set your oven to 350°F (175°C) so it’s hot and ready for your crumble.
- Prepare the strawberries. In a large mixing bowl, toss the sliced strawberries with ½ cup granulated sugar, cornstarch, and lemon juice. Ensure the strawberries are well coated; this will help them release their juices while baking.
- Transfer to a baking dish. Pour the strawberry mixture into a greased 9×9-inch baking dish. Spread it out evenly.
- Make the crumble topping. In a separate bowl, combine the flour, rolled oats, brown sugar, cinnamon, and salt. Stir until mixed.
- Add the butter. Using your fingers or a pastry cutter, incorporate the cold cubed butter into the dry mixture until it resembles coarse crumbs. Don’t be afraid to get a little messy; it’s all part of the fun!
- Top your strawberries. Crumble the topping evenly over the strawberries. Don’t worry if some pieces are larger than others; this adds to the rustic charm!
- Bake it up! Slide the baking dish into the preheated oven and bake for about 30-35 minutes, or until the topping is golden brown and the strawberries are bubbling. Your kitchen will smell heavenly—just a heads up!
- Cool & serve. Allow the crumble to cool for about 10-15 minutes before serving. This helps it set a bit, making it easier to scoop.
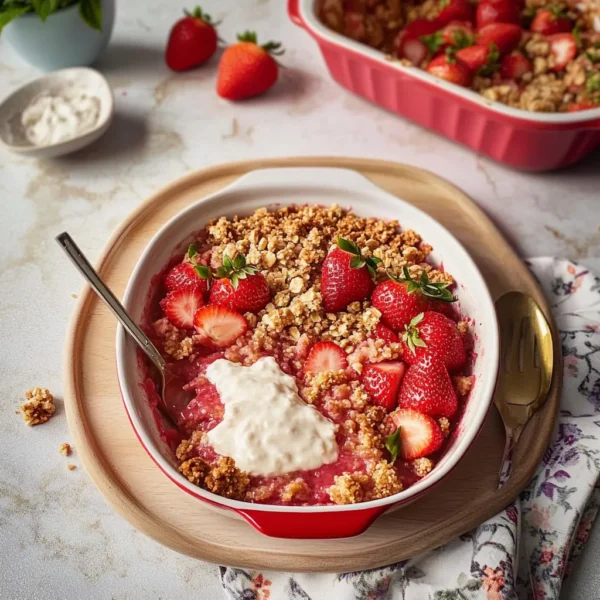
<img src=”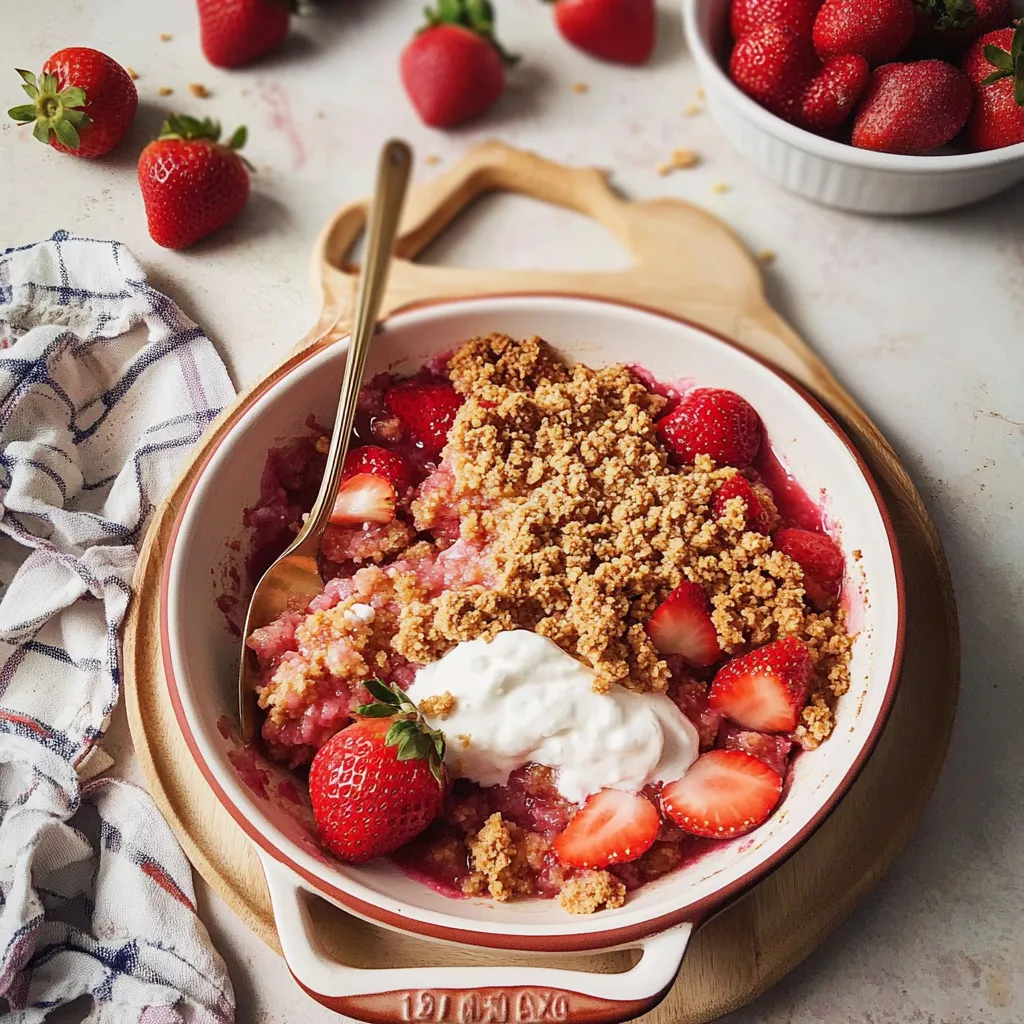 ” alt=”Delicious Strawberry Crumble Fresh Out of the Oven” />
Pro Tips & Variations
Want to switch things up a bit? Here’s how you can have fun with this basic recipe:
- Add some spice. Mixing in a pinch of nutmeg or ginger to the filling gives an extra layer of warmth and flavor.
- Try other fruits. Swap out strawberries for raspberries, blueberries, or even apples for a seasonal twist. You can also mix and match—strawberry-apple crumble is a personal favorite!
- Go healthier! Use whole wheat flour or almond flour for a nutty taste, or replace some of the sugar with a natural sweetener like honey or maple syrup.
- Make it dairy-free. Substitute the butter with coconut oil or a dairy-free spread for a deliciously vegan-friendly option!
Serving Suggestions
This strawberry crumble is delicious on its own, but here are a few cozy serving suggestions that will have everyone coming back for seconds:
- With a scoop of vanilla ice cream: The creamy cold ice cream melts into the warm crumble—pure bliss!
- Drizzled with whipped cream: A dollop of freshly whipped cream on top elevates this dessert while adding lightness.
- With yogurt for breakfast: Leftover crumble pairs beautifully with Greek yogurt for a delicious and filling breakfast or snack.
- Pair it with coffee or tea: Enjoy a slice for dessert after a cozy dinner, or even in the afternoon with a warm cup of tea.
<img src=” ” alt=”Crumble Ready to Serve” />
Storage Tips
Got some leftovers (if there are any)? Here’s how to store your scrumptious strawberry crumble without losing its delightful flavor:
- Refrigerate: Store leftovers in an airtight container in the fridge for up to 3 days. Simply reheat in the microwave or in the oven at 350°F (175°C) until warmed through.
- Freeze: You can freeze the unbaked crumble for up to 3 months. Just cover it tightly with plastic wrap and then foil. When you’re ready to bake it, no need to thaw—just add about 10-15 extra minutes to the baking time.
- To reheat: If you freeze it after baking, allow it to thaw in the refrigerator overnight and then reheat at 350°F (175°C) until warm.
FAQs
Can I use frozen strawberries?
Absolutely! Frozen strawberries work well, especially if they’re out of season. Just make sure to thaw and drain any excess moisture before using them in your crumble to avoid a soggy topping.
How can I make the topping extra crunchy?
To get that delightful crunch, you can mix in some chopped nuts like almonds or pecans to the crumble topping. Just a half cup will do the trick!
What can I do if I don’t have cornstarch?
No worries! You can use an equal amount of tapioca starch or even flour as a thickener for the strawberry filling. Just note that cornstarch gives a slightly clearer filling while flour can make it a bit cloudier.
Can I make this recipe gluten-free?
Yes, you can! Just substitute the all-purpose flour with a gluten-free flour blend. Additionally, ensure your oats are certified gluten-free.
How can I tell when the crumble is done baking?
You’ll know your strawberry crumble is ready when the topping turns a lovely golden brown and the strawberry filling is bubbling joyfully around the edges. It’s hard not to be tempted at this point!
Conclusion
I hope you find as much joy in making this strawberry crumble as I do. There’s nothing quite like the combination of crumbly goodness and sweet, juicy fruit. It’s a recipe that holds plenty of good memories in every bite. Please jump in the comments and let me know how yours turned out, or share your own lovely variations! Happy baking, friends, and may your kitchen be filled with warm, inviting flavors!

Leave a Comment