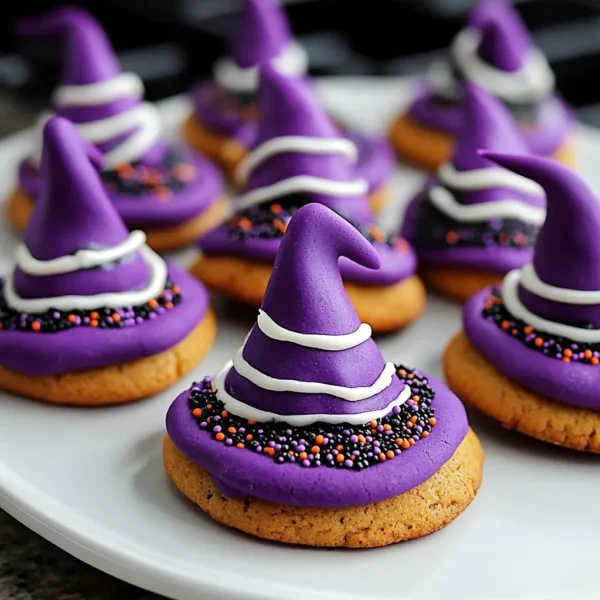
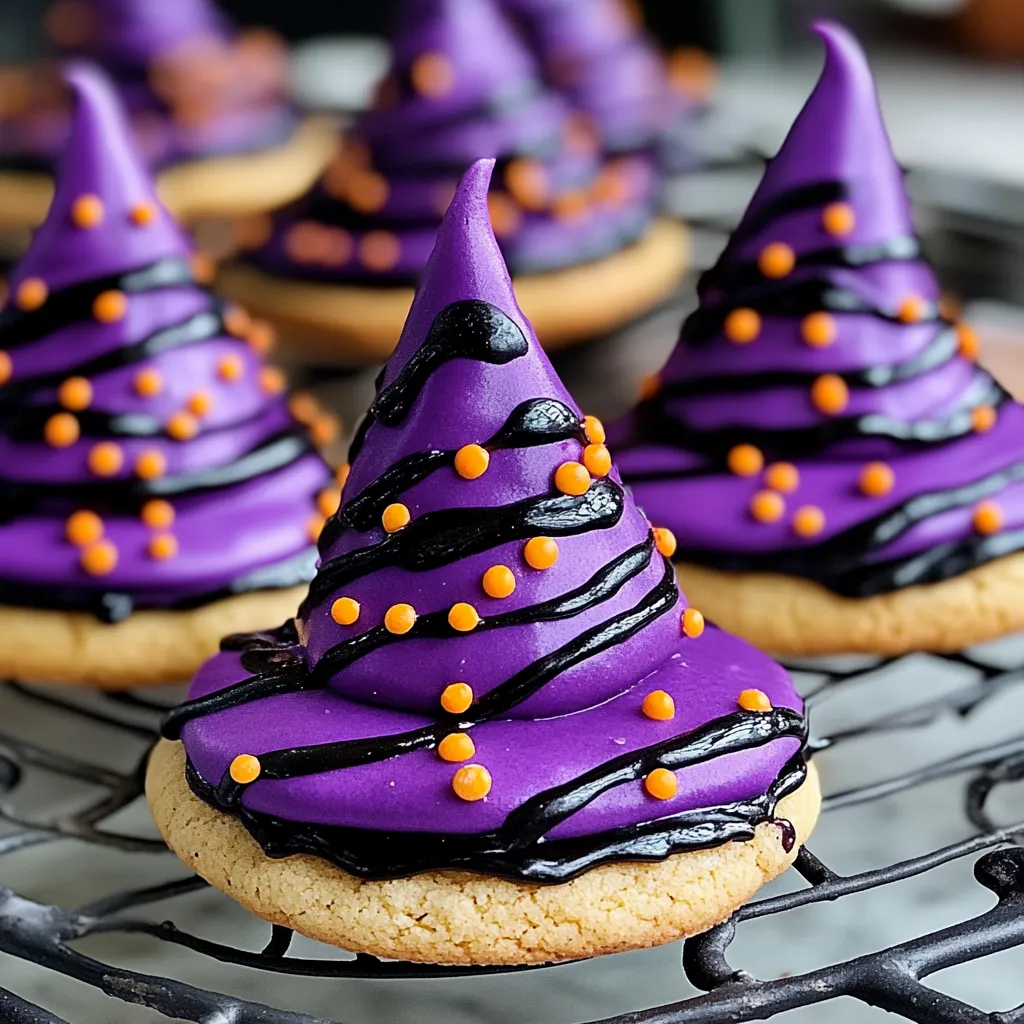
Welcome to my cozy kitchen, where today we’re conjuring up some delightful treats that’ll cast a sweet spell on your Halloween celebrations—Best Witch Hat Halloween Cookies! I can almost smell the warm chocolate and sweet candy wafting through the air as I share this recipe with you. These cookies are not just delicious; they’re a playful nod to the spirit of Halloween that brings back memories of my childhood, anxiously waiting for trick-or-treaters to come knocking while I nibbled on treats just like these. There’s something so magical about the combination of chocolate cookies topped with candy corn, transforming them into cute little witch hats. Let’s make some magical moments together!
Why You’ll Love This Recipe
- Super easy to whip up—perfect for novice bakers!
- Great for Halloween parties or a fun family activity.
- Brings a festive flair to your dessert table that kids will adore.
- Flexible recipe—you can switch up the decorations based on your preferences.
Ingredients
Here’s everything you need:
- 1 cup unsalted butter, softened
- 1 cup granulated sugar
- 1 cup brown sugar, packed
- 2 large eggs
- 2 teaspoons vanilla extract
- 3 cups all-purpose flour
- 1 cup unsweetened cocoa powder
- 1 teaspoon baking soda
- ½ teaspoon salt
- 1 bag of candy corn (for decorating)
- 1 bag of chocolate kisses or chocolate-covered vanilla cookies (the base of the hat)
Note: Using unsweetened cocoa powder gives that rich chocolate flavor you crave. And, as always, using fresh ingredients elevates your baking experience!
Step-by-Step Instructions
- Preheat your oven: Start by preheating your oven to 350°F (175°C). This is essential to ensure your cookies bake evenly!
- Mix your wet ingredients: In a large mixing bowl, cream together the softened butter, granulated sugar, and brown sugar until fluffy. Then, add the eggs and vanilla extract, beating until well combined. Remember, the more air you incorporate here, the lighter your cookies will be!
- Combine your dry ingredients: In another bowl, whisk together the flour, cocoa powder, baking soda, and salt. This helps to evenly distribute the cocoa powder and baking soda, which is key for even rising.
- Bring it all together: Gradually add the dry mixture to the wet ingredients, mixing just until combined. Don’t overmix! Just a gentle stir is all you need to avoid tough cookies.
- Shape your cookies: Using a tablespoon or a cookie scoop, scoop out the dough and roll it into balls. Place them about 2 inches apart on a parchment-lined baking sheet. They’ll spread a bit, so give them some space!
- Bake: Pop the tray into the oven and bake for 10-12 minutes. Watch them closely! You want the edges to be set while the centers remain soft (they’ll keep cooking as they cool).
- Cool down: Allow the cookies to cool on the baking sheet for about 5 minutes before transferring them to a wire rack to cool completely. That warm chocolate aroma will fill your kitchen in the best way!
- Decorate: Once the cookies are cool, take your chocolate kisses or chocolate-covered cookies and place them in the center of each cookie. Then, arrange the candy corn around the base to create the witch hat’s brim.
Tip: When placing the candy corn, try to pick a colorful assortment for that extra Halloween festivity!

Pro Tips & Variations
Here are a few fun ideas to mix things up a bit:
- Add some festive flair with sprinkles or edible glitter on top of the icing for the hats!
- Swap out the chocolate kisses for peanut butter cups if you want to add a nutty twist.
- If you’re looking for a softer cookie, try chilling the dough for about 30 minutes before rolling it out. This will change the cookie texture delightfully!
- For a gluten-free version, you can substitute the all-purpose flour with a 1:1 gluten-free flour blend!
Serving Suggestions
These adorable witch hat cookies are perfect for a spooky gathering with friends and family. Serve them up with a side of hot apple cider or a pumpkin spice latte for that cozy autumn vibe. They also look fantastic displayed on a table alongside other festive treats like caramel apples or spooky cupcakes—you know, to create that eye-catching Halloween spread! Just imagine the smiles on everyone’s faces as they indulge in these whimsical delights!

Storage Tips
To keep your cookies fresh and tasty:
- Store the cookies in an airtight container at room temperature for up to a week. They’ll stay chewy and soft—just the way we want them!
- If you want to keep them longer, freeze the undecorated cookies. Just make sure to wrap them in plastic wrap and then place them in a freezer-safe bag. When ready to eat, let them thaw at room temperature and decorate as you like!
- Reheat in the microwave for about 5-10 seconds for that freshly baked warmth before diving in again! Just be careful not to overdo it!
FAQs
Can I use a different type of candy for decoration?
Absolutely! You can get creative with your toppings. Try gummy worms for a spooky touch or even colorful M&M’s if you prefer a sweet crunch. The sky’s the limit!
What should I do if my dough is too crumbly?
If you notice that your dough is a bit crumbly, it might need a splash of milk or water. Just a teaspoon at a time will help to moisten it without making it sticky.
Can I make these cookies ahead of time?
Definitely! You can prepare the cookie dough in advance and refrigerate it for up to 3 days. When you’re ready to bake, just scoop and bake as usual. The flavors will intensify over time!
How can I tell when my cookies are done?
Look for the edges that set and a soft center. The cookies will continue to cook a little as they cool, so it’s fine if the centers seem a bit underbaked right out of the oven.
Conclusion
I hope you enjoy making and sharing these Best Witch Hat Halloween Cookies as much as I do! They’ll not only satisfy your sweet tooth but also spark joy and creativity with every bite. Feel free to drop a comment below to share how your cookie making went or any fun variations you tried. Happy Halloween baking, friends! May your kitchens be filled with the scents of chocolate and laughter!


Leave a Comment