
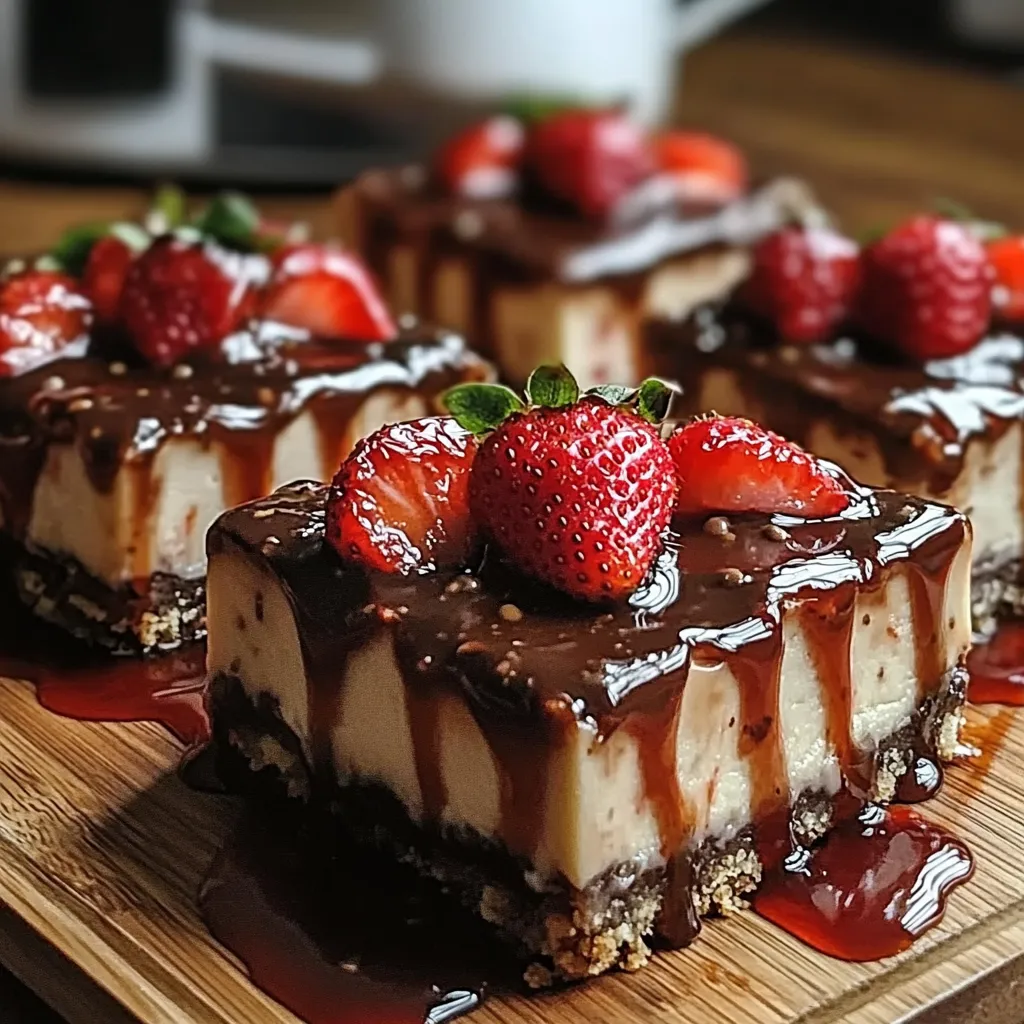
There’s something simply magical about the combination of chocolate and strawberries, isn’t there? It brings back memories of hot summer days, fresh strawberries picked right from the garden, and indulgent treats crafted from sweet, succulent fruit. These Chocolate Covered Strawberry Cheesecake Bars have a special place in my heart, reminding me of those sun-drenched afternoons spent nibbling on these mouthwatering delights. If you’re looking for a show-stopping dessert that brings both joy and nostalgia, you’re in for a treat with this recipe!
Not only do these bars look gorgeous, but they also deliver a symphony of flavors and textures. Creamy cheesecake meets rich chocolate, complemented by the freshness of strawberries. Trust me; they’re a hit at any picnic, party, or even just a cozy night in with your favorite Netflix series. So, let’s roll up our sleeves and make some magic happen in the kitchen!
Why You’ll Love This Recipe
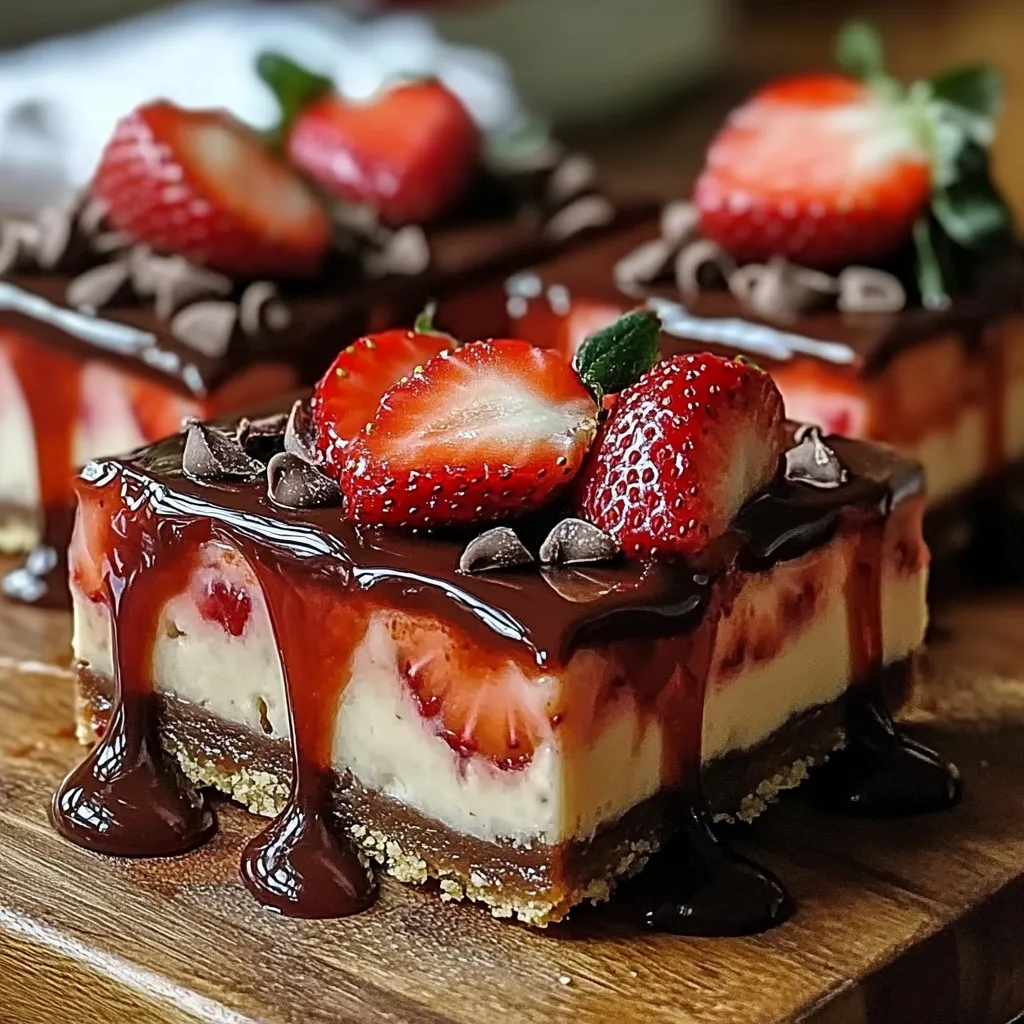
- Decadent layers of creamy cheesecake and chocolate.
- Perfect for sharing at gatherings or special occasions.
- Easy to make, even for beginner bakers.
- Can be prepared a day in advance for effortless entertaining.
- Customization options galore – swap fruits or toppings as you please!
Ingredients
Here’s what you’ll need to create these delightful bars!
- For the crust:
- 1 ½ cups graham cracker crumbs (make sure they’re finely crushed)
- ½ cup granulated sugar
- ½ cup unsalted butter, melted
- For the cheesecake layer:
- 16 oz cream cheese, softened (bring it to room temperature for better blending)
- ½ cup granulated sugar
- 1 tsp vanilla extract
- 2 large eggs
- ½ cup sour cream (for that creamy goodness)
- 1 cup fresh strawberries, pureed (about 8-10 strawberries)
- For the chocolate topping:
- 1 cup semi-sweet chocolate chips
- 2 tbsp coconut oil (this helps the chocolate set nicely)
- Fresh strawberries for garnish (optional, but oh-so-pretty!)
Step-by-Step Instructions
Now that you have everything you need, let’s get down to the delicious details!
- Preheat Your Oven: Start by preheating your oven to 350°F (175°C). It’s the perfect time to get the kitchen warmed up and filled with sweet aromas.
- Prepare the Crust: In a mixing bowl, combine your graham cracker crumbs, sugar, and melted butter. Stir until everything is crumbly and well combined. Press this mixture firmly into the bottom of a 9×9 inch baking dish to create a solid crust. Don’t be shy – really pack it down for a sturdier base!
- Bake the Crust: Place the crust in the preheated oven and bake for about 10 minutes until it’s lightly golden. Keep an eye on it; you want it just set, not too browned. When done, take it out and let it cool slightly.
- Make the Cheesecake Filling: In a large mixing bowl, beat the softened cream cheese with an electric mixer until smooth and creamy. Add sugar and continue mixing until well incorporated. Don’t rush this part; a smooth texture is key!
- Incorporate the Eggs: Add the eggs one at a time, mixing on low speed just until blended after each addition. Remember to scrape down the sides of the bowl in between to ensure even mixing. Overmixing can cause your cheesecake to crack.
- Add Vanilla and Sour Cream: Stir in the vanilla and sour cream until smooth. Then, gently fold in the pureed strawberries. This will give your cheesecake layer a delightful fruity flavor and a beautiful color!
- Layer Your Cheesecake: Pour the strawberry cheesecake filling over the cooled crust and spread it evenly. Tap the baking dish lightly on the counter to remove any air bubbles.
- Bake the Cheesecake: Pop this beauty back into the oven and bake for 30-35 minutes. The edges should be set, but the center might still have a slight jiggle. Don’t worry; it’ll firm up while cooling!
- Cool It Down: Once done, turn off the oven and leave the cheesecake inside with the door slightly ajar for about an hour. This gradual cooling helps prevent cracks.
- Chill in the Fridge: After it’s cooled at room temperature, transfer the cheesecake to the refrigerator and let it chill for at least 4 hours, preferably overnight. This allows all the flavors to meld beautifully.
- Prepare the Chocolate Topping: When you’re ready to serve, melt your chocolate chips with the coconut oil in a microwave-safe bowl, heating in 30-second intervals and stirring in between until smooth. This will coat the cheesecake in a glossy layer of chocolate bliss!
- Final Touch: Pour the melted chocolate over the chilled cheesecake layer, spreading it evenly. For a touch of elegance, garnish with some extra fresh strawberries on top.
- Chill Again: Pop the cheesecake back into the fridge for about 30 minutes to allow the chocolate to set. The anticipation will be worth it!
- Slice and Serve: Once everything is set, slice into bars and serve them chilled. I love using a hot knife (just dip it in hot water and dry it off) for clean edges. And voilà: your Chocolate Covered Strawberry Cheesecake Bars are ready to be devoured!
Pro Tips & Variations
Let’s talk about how you can make these bars uniquely yours!
- Fruit Variations: Feel free to switch out the strawberries for blueberries, raspberries, or even a mix of berries if you’re in the mood! Adjust the sweetness accordingly.
- Flavor Additions: Consider adding a tablespoon of lemon juice or zest to the cheesecake filling for a zingy twist, or even swap vanilla for almond extract for a different flavor profile.
- Diet-Friendly Options: You can easily make this recipe gluten-free by using gluten-free graham cracker crumbs. If you’re looking to cut down on sugar, try using a sugar substitute. Just make sure it’s suitable for baking!
- Topping Twist: Instead of chocolate, you could drizzle caramel sauce on top or dust with powdered sugar for a lighter finish. The possibilities are endless!
Serving Suggestions
These Chocolate Covered Strawberry Cheesecake Bars are a delight all on their own, but you can elevate your serving experience with some fun pairings!
- Serve with a dollop of whipped cream on the side for that extra creamy touch.
- For a refreshing counterpoint, enjoy with a scoop of vanilla ice cream.
- A cup of freshly brewed coffee or rich hot chocolate would be the perfect complement to these sweet bars, making for an indulgent dessert moment.
- Feeling extra fancy? Add a sprinkling of finely crushed nuts or edible flowers for presentation that’ll wow your guests!

Storage Tips
Now, let’s talk about how to keep these luscious bars fresh and potent in flavor:
- Refrigeration: Keep leftover cheesecake bars covered in the fridge for up to 5 days. I recommend slicing them into bars before storing – it makes grabbing a quick treat so much easier!
- Freezing: If you want to prep ahead, these bars freeze beautifully! Just wrap them tightly in plastic wrap before placing them in an airtight container. They’ll last for up to 3 months. To defrost, place in the refrigerator overnight.
- Reheating: These bars are best served chilled; however, if you’d prefer them slightly warmed, pop them in the microwave for a few seconds. Just be careful not to get them too hot, as that can affect their texture!
FAQs
Can I use frozen strawberries instead of fresh ones?
Absolutely! Just make sure to thaw and drain excess moisture before pureeing them for the cheesecake layer. This will help maintain the right consistency.
How can I avoid cracks in my cheesecake?
To prevent cracks, avoid overmixing your batter and make sure your cream cheese is softened well. Also, letting it cool gradually in the oven helps a lot!
Can I make these cheesecake bars ahead of time?
Definitely! These bars can be made a day in advance, which is perfect for parties or gatherings. Just let them chill overnight for optimal flavor.
What can I use instead of sour cream?
If you don’t have sour cream on hand, plain Greek yogurt works wonderfully as a substitute. It’ll still deliver that creamy texture with a slightly tangy flavor.
Conclusion
And there you have it, my dear friend! These Chocolate Covered Strawberry Cheesecake Bars are your next must-make dessert, perfect for sharing or simply indulging in all by yourself. I’d love to hear how you enjoyed making them! Did you add your own twist? Feel free to drop a comment below and share your experience. Happy baking!

Leave a Comment