There’s something magical about the combination of chocolate and citrus. I remember one rainy afternoon in my kitchen when I first discovered this delightful pairing. The sweet, rich aroma of melting chocolate mixed with the tangy scent of candied kumquats was like a warm hug from my oven. As the tart baked, my home was filled with the promise of a luscious dessert that was just waiting to be savored.
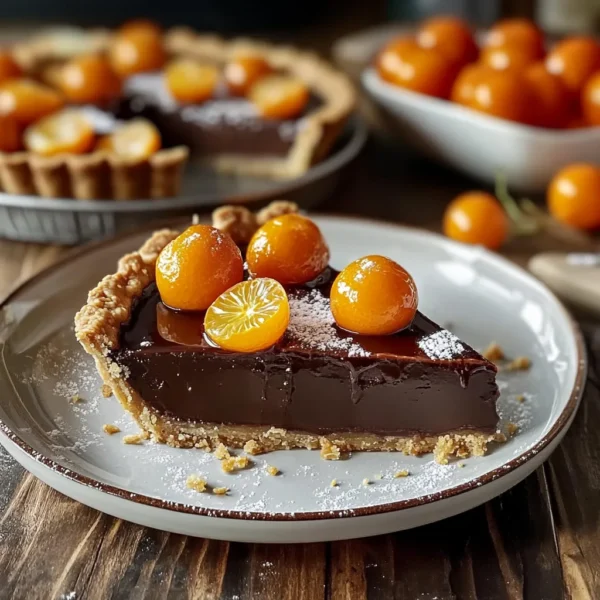
This Chocolate Tart with Candied Kumquats is a showstopper, perfect for gatherings or special occasions, but also just as lovely for a cozy night in. Whether you’re a chocolate lover or curious about pairing flavors, this tart will surely bring a smile to your face and warmth to your heart.
Why You’ll Love This Recipe
- Decadent chocolate flavor with a zesty twist
- Perfect for all occasions—birthdays, holidays, or just because
- Easy to follow, even for beginner bakers
- Can be made ahead of time and stored for later indulgence
Ingredients
- For the tart crust:
- 1 1/4 cups all-purpose flour
- 1/4 cup unsweetened cocoa powder
- 1/2 cup unsalted butter, softened
- 1/4 cup powdered sugar
- 1 large egg yolk
- 1/4 teaspoon salt
- For the chocolate filling:
- 1 cup heavy cream
- 8 ounces bittersweet chocolate, chopped
- 2 large eggs
- 1/4 cup granulated sugar
- 1 teaspoon vanilla extract
- For the candied kumquats:
- 1 cup kumquats, thinly sliced
- 1 cup sugar
- 1/2 cup water
- 1 teaspoon vanilla extract
Note: Fresh kumquats can usually be found in late winter to early spring. They’re sweet, tangy, and absolutely vibrant!

Step-by-Step Instructions
- Prepare the tart crust: In a large mixing bowl, combine the flour, cocoa powder, powdered sugar, and salt. Gently mix until well combined.
- Add the softened butter and egg yolk, and use a pastry cutter or your fingers to blend until the mixture resembles coarse crumbs. It’s okay if there are small lumps of butter—it’ll make the crust flaky!
- Form the dough into a disk, wrap it in plastic wrap, and refrigerate for at least 30 minutes. While waiting, you can start on your candied kumquats!
- Make the candied kumquats: In a small saucepan, combine the sliced kumquats, sugar, water, and vanilla extract. Bring to a simmer over medium heat, stirring until the sugar dissolves.
- Allow it to simmer for about 15-20 minutes, or until the kumquats become translucent. Remove from heat and let cool.
- Preheat your oven: Once your dough has chilled, preheat your oven to 350°F (175°C).
- Roll out and blind bake the crust: On a floured surface, roll out the dough until it’s about 1/8 inch thick. Carefully transfer it to a 9-inch tart pan and trim the excess. Prick the bottom with a fork and chill for another 10 minutes.
- Line the crust with parchment paper and fill it with pie weights or dried beans. Bake in the preheated oven for about 15 minutes. Remove the weights and parchment, and bake for an additional 5-7 minutes until the crust is set. Set aside to cool.
- Make the chocolate filling: In a small saucepan, heat the heavy cream over medium heat until it starts to simmer. Remove it from the heat and add the chopped chocolate. Stir until the chocolate is fully melted and smooth.
- In a separate bowl, whisk together eggs and granulated sugar until light and frothy. Slowly drizzle the melted chocolate mixture into the eggs while whisking continuously to avoid curdling. Finally, stir in the vanilla extract.
- Combine and bake: Pour the chocolate filling into the cooled crust and smooth the top with a spatula. Bake for 20-25 minutes or until the filling is set but still slightly wobbly in the center.
- Let the tart cool at room temperature for about 30 minutes before refrigerating until fully chilled, at least 2 hours.
Watch out: Don’t overbake the filling—it’s meant to be rich and fudgy!

Pro Tips & Variations
- Experiment with flavors: Add a pinch of sea salt or a dash of espresso powder to intensify the chocolate flavor.
- For a boozy twist: A splash of orange liqueur would really complement the kumquats.
- Top it off: Serve with freshly whipped cream or a scoop of vanilla ice cream for that extra touch of decadence.
Serving Suggestions
Once your chocolate tart is beautifully chilled and ready to go, it’s time to serve up those decadent slices. I love plating them with a sprinkle of flaky sea salt and a generous drizzle of the candied kumquats on top. It’s lovely paired with a cup of freshly brewed coffee or a glass of dessert wine, creating a cozy atmosphere perfect for enjoying every bite. For gatherings, slice into wedges and arrange on a pretty platter, garnished with some fresh mint leaves.

Storage Tips
This tart is an excellent make-ahead treat! You can store leftovers (if there are any!) in the refrigerator, covered with plastic wrap or in an airtight container, where it will keep for up to 5 days. If you’re looking to freeze it, wrap slices tightly in plastic wrap, then in aluminum foil. It will last for about 3 months in the freezer. When you’re ready to enjoy, just thaw in the refrigerator overnight and serve chilled. Trust me, every slice will taste just as delicious as the first!
FAQs
Can I use a different fruit instead of kumquats?
Absolutely! While kumquats add a unique zing, you can try other citrus fruits like orange zest or even berries for a different flavor profile.
Do I have to use bittersweet chocolate?
Not at all! You can use semi-sweet chocolate if you prefer a sweeter tart, but I highly recommend sticking to high-quality chocolate for the best flavor.
Can I make the tart crust ahead of time?
Definitely! You can prepare the crust a day or two in advance and keep it wrapped in the fridge until you’re ready to fill and bake it.
What should I do if my tart cracks?
Cracks can happen, but they’re easily concealed! Just top your tart with the candied kumquats and a dollop of whipped cream and no one will be the wiser!
Conclusion
I hope you feel inspired to whip up this Chocolate Tart with Candied Kumquats soon; it’s truly a labor of love that yields such rewarding results. I’d love to hear how it turns out for you! Drop a comment below and share your experience or any twists you tried. Happy baking!


Leave a Comment