As soon as the leaves start to turn that beautiful shade of amber and a crispness wafts through the air, I can’t help but feel a warm, compelling pull toward my kitchen. There’s something enchanting about fall—the spicy aromas of cinnamon and nutmeg, the rustic glow of candlelight, and the comforting touch of home-baked goodies. It’s during this wonderful season that I find myself craving the smooth, creamy indulgence of pumpkin desserts.
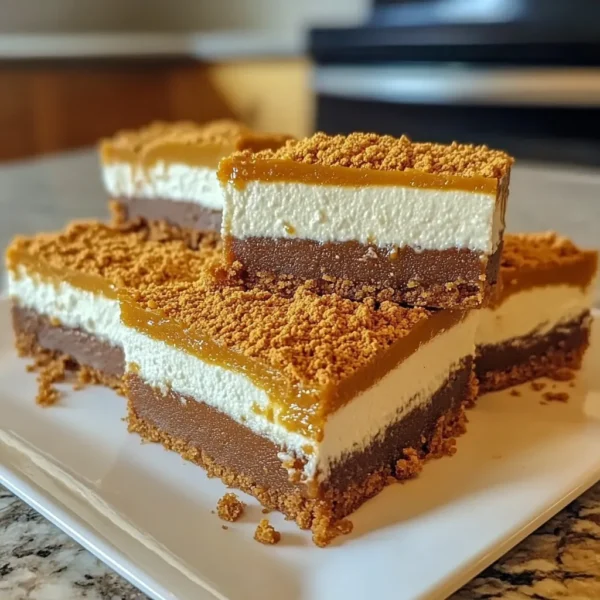
This year, I’ve whipped up something utterly delightful: No Bake Pumpkin Cheesecake Bars. They are not only rich and creamy but also incredibly simple to make! Seriously, no oven required, which means fewer dishes and more time to cozy up with a good book or enjoy a steaming cup of pumpkin spice latte by the window. Let’s dive in and make some heavenly fall treats together!
Why You’ll Love This Recipe
- Absolutely no baking involved—perfect for those warm fall days!
- Rich pumpkin flavor paired with a smooth, creamy cheesecake texture.
- Easy to slice and serve, making them perfect for gatherings.
- Lightened up yet indulgent; they can satisfy any sweet tooth without the guilt.
- Customizable with your favorite spices or toppings!
Ingredients
Let’s gather everything we need to create these luscious bars! Here’s what you’ll need:
- For the crust:
- 1 ½ cups graham cracker crumbs
- ½ cup unsalted butter, melted (using unsalted keeps the flavors balanced)
- ⅓ cup granulated sugar
- For the cheesecake filling:
- 2 cups cream cheese, softened (the creamier, the better!)
- 1 cup pumpkin puree (not pumpkin pie filling—we want real pumpkin flavor!)
- ¾ cup powdered sugar
- 1 teaspoon vanilla extract
- 1 teaspoon ground cinnamon
- ½ teaspoon ground nutmeg
- ½ teaspoon ground ginger (for an extra spicy kick!)
- 1 cup whipped cream (homemade or store-bought)

Step-by-Step Instructions
Ready to create some magic? Let’s start assembling these bars!
- Prepare the crust: In a large mixing bowl, combine the graham cracker crumbs, melted butter, and sugar. Stir well until everything is fully incorporated. The mixture should resemble wet sand.
- Press and chill: Firmly press the crumb mixture into the bottom of a greased 9×9 inch square baking dish. Use the back of a measuring cup to ensure it’s packed tightly. Pop this into the fridge while we prepare the filling.
- Mix the cheesecake filling: In a large bowl, beat the softened cream cheese with an electric mixer until it’s smooth and creamy. Add in the pumpkin puree, powdered sugar, vanilla, cinnamon, nutmeg, and ginger. Beat until everything is well combined and fluffy, about 2 minutes.
- Fold in the whipped cream: Carefully fold in the whipped cream using a spatula. This will help maintain that light, airy texture we love in cheesecake!
- Spread the filling: Remove the crust from the fridge, and spread the pumpkin cheesecake filling evenly over the crust. Smooth it out with the spatula for a beautiful finish.
- Chill and set: Cover the baking dish with plastic wrap and place it back in the fridge. Allow it to chill for at least 4 hours, or overnight if you can resist the temptation!
Just remember not to freak out when it jiggles a bit in the middle—this will firm up nicely once it’s chilling!

Pro Tips & Variations
Now that we have our delicious bars chilling away, let’s talk about some fun twists and variations you could try:
- Spice it up: Feel adventurous? Add a pinch of allspice or a dash of clove for a deeper flavor profile!
- Garnishes: Top your cheesecake bars with a dollop of whipped cream, a sprinkle of cinnamon, or even some crushed pecans for a bit of crunch.
- Diet swaps: Want to keep it lighter? Use Greek yogurt instead of cream cheese, or try a dairy-free cream cheese if you need to avoid dairy!
- Flavor swaps: Not into pumpkin? Use the same base recipe and swap in mashed bananas or other seasonal purees.
Serving Suggestions
When it comes to serving these bars, the options are virtually endless! I love to slice them into squares and stack them on a cozy fall-themed platter adorned with leaves and small pumpkins for that extra festive touch. Pair these sweet delights with:
- A piping hot cup of coffee or tea to balance the sweetness.
- Some extra whipped cream sprinkled with cinnamon for that cozy finish.
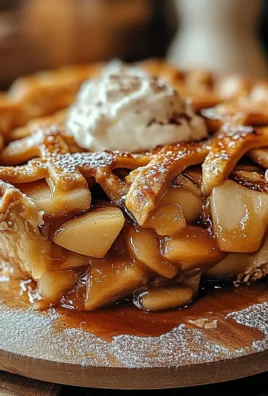
- Fresh apple slices drizzled with caramel for a delightful contrast.
Picture this: You invite friends over to share stories around the kitchen table, and each bites into one of these bars, a smile lighting up their face. Honestly, it’s a heartwarming experience.

Storage Tips
No Bake Pumpkin Cheesecake Bars not only taste divine, but they also store beautifully, making them perfect for meal prep or holiday gatherings. Here’s how to keep them at their best:
- Refrigerating: Keep them in an airtight container in the fridge for up to one week. Make sure to separate layers with parchment paper to prevent sticking (because no one wants a melted mess!).
- Freezing: You can freeze the bars before cutting them. Just wrap them tightly in plastic wrap and aluminum foil. They’ll keep for up to 2 months. When you’re ready to enjoy, thaw them in the fridge overnight.
- Reheating: If you’ve frozen them, there’s no need to reheat—they’re best enjoyed chilled straight from the fridge!
Can I use a different type of crust?
Absolutely! You can swap in Oreo crumbles, Nilla wafers, or even a nut-based crust to cater to different dietary preferences or taste buds.
How do I know when the cheesecake bars are set?
After chilling, give them a gentle shake. If the center has a slight jiggle but the edges are firm, it’s perfect! They’ll set up even more as they cool.
Can I make these ahead of time?
For sure! They’re perfect for make-ahead desserts. Just leave ‘em in the fridge overnight, and they’re ready to impress the next day!
What’s the best way to slice them cleanly?
Use a sharp knife and dip it in warm water before cutting—this helps achieve that clean, no-mess slice. Wipe the knife after each cut for the ultimate presentation!
Can I use fresh pumpkin instead of canned puree?
Yes, you can! Just make sure to cook and puree the pumpkin well, making it smooth and free of excess moisture. Sometimes fresh can have more water content than canned, so be cautious!
And there you have it—my cherished recipe for No Bake Pumpkin Cheesecake Bars, ready to warm your heart and satisfy your sweet tooth! As the days grow shorter and the nights cooler, I hope you find joy in bringing these bars into your kitchen to share with family and friends. Don’t forget to comment below and let me know how yours turned out. I’d love to hear your stories and any fun variations you tried. Happy baking (or no baking, in this case)! 🍂


Leave a Comment