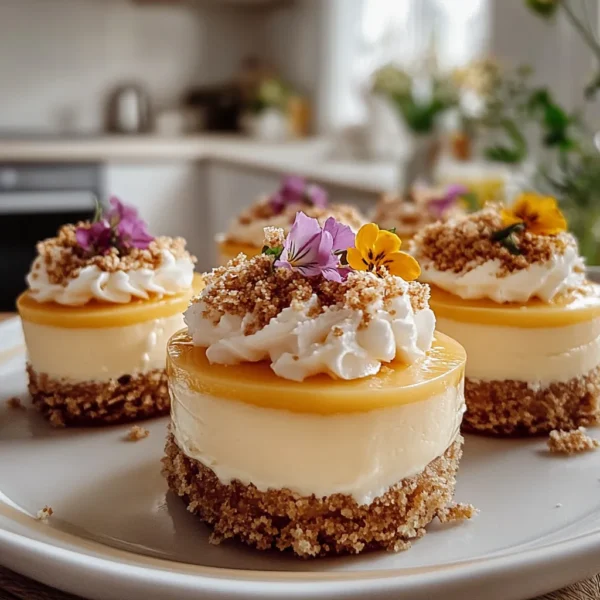
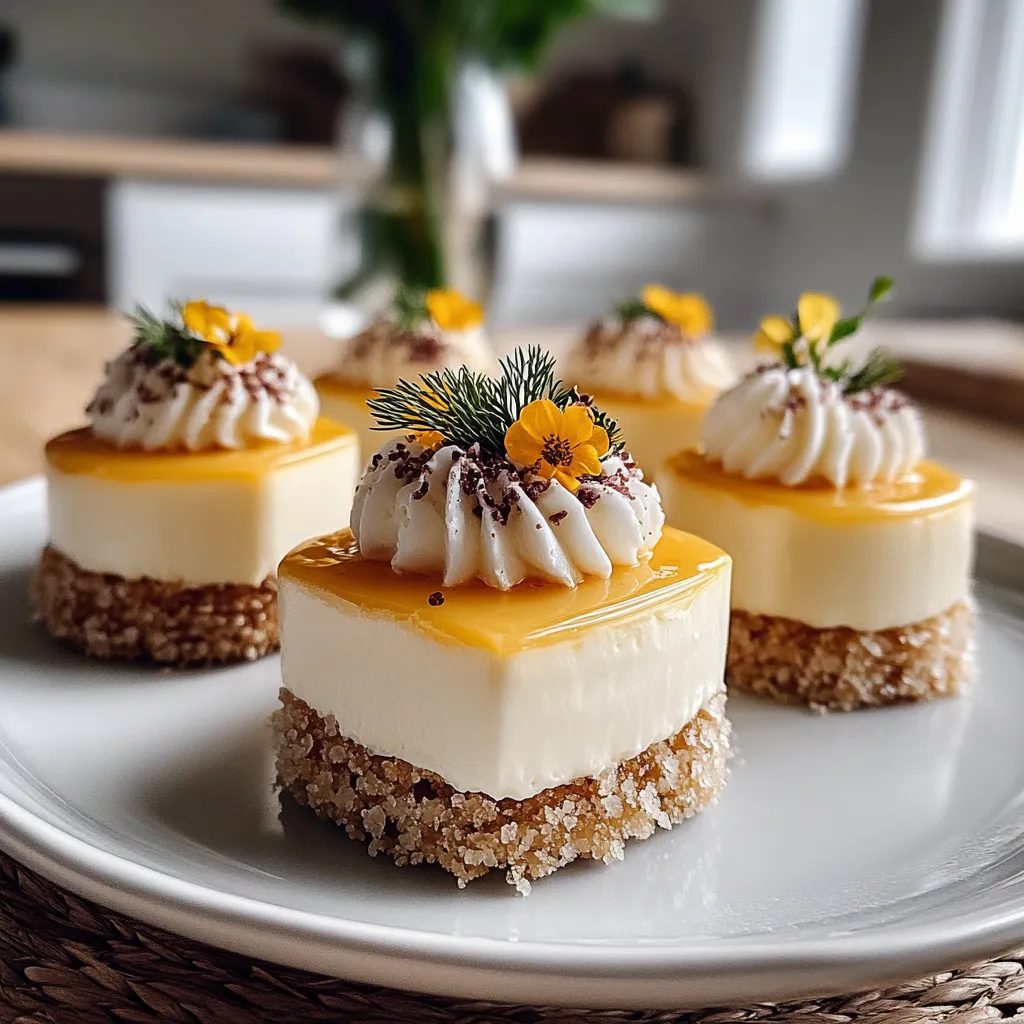
As the flowers start to bloom and the days grow longer, there’s something undeniably magical about Easter—a celebration of new beginnings, warmth, and togetherness. I can still remember the excitement of waking up on Easter morning, ready for a day filled with colorful eggs, family gatherings, and delicious treats. One of those beloved treats, which has become a staple in our Easter celebrations, is the delightful no-bake mini cheesecake. Just thinking about it brings back memories of my mom and I whipping up these adorable delights, each one a little masterpiece topped with fresh berries or a drizzle of chocolate. Today, I’m excited to share my recipe for Delicious Easter No-Bake Mini Cheesecakes for Festive Joy—a dessert that’s as easy to make as it is to devour!
Why You’ll Love This Recipe
- 💚 Effortless: No oven required! Just mix, chill, and enjoy.
- 🍰 Customizable: Play with flavors and toppings to jazz it up just the way you like.
- 🥳 Perfect for gatherings: These mini treats are always a hit at Easter brunches and beyond.
- 🍓 Fresh and flavorful: The texture is creamy and rich, with a flavor that’s just the right balance of sweet and tangy.
Ingredients
Gather the following ingredients to whip up these crowd-pleasers:
- For the crust:
- 1 cup graham cracker crumbs (or your favorite cookie crumbs)
- 1/4 cup granulated sugar
- 1/2 cup unsalted butter, melted
- For the cheesecake filling:
- 16 oz cream cheese, softened
- 1/2 cup powdered sugar
- 1 teaspoon vanilla extract
- 1 cup heavy cream
- zest of 1 lemon (optional for a bright touch)
- For toppings:
- Fresh berries (strawberries, blueberries, raspberries)
- Chocolate shavings or drizzles
- Whipped cream (optional)
Note: Using fresh berries will bring a beautiful pop of color and a refreshing taste! Feel free to swap the graham cracker crumbs for gluten-free cookies if needed.
Step-by-Step Instructions
Let’s dive into the fun part—making these little beauties! Follow these simple steps, and you’ll have Easter treats that everyone will adore.
- Prepare the crust: In a medium bowl, mix together your graham cracker crumbs, granulated sugar, and melted butter until everything is well combined. The mixture should resemble wet sand.
- Form the crust: Grab a muffin tin and line it with paper cupcake liners. Press about a tablespoon of the crust mixture into the bottom of each liner, packing it down firmly using the back of a spoon or your fingers. This helps create a nice, sturdy base.
- Make the cheesecake filling: In a large mixing bowl, beat the softened cream cheese with an electric mixer until smooth and creamy. Add the powdered sugar, vanilla extract, and lemon zest (if using) and mix until well combined—this should take about 2 minutes. You want it light and fluffy, so no lumps allowed!
- Add the whipped cream: In a separate bowl, whip the heavy cream to stiff peaks. This step is where the magic happens—fold the whipped cream gently into the cream cheese mixture, being careful not to deflate it. You want it to stay airy and light!
- Fill the cups: Spoon the cheesecake filling carefully into each cupcake liner on top of the crust. Smooth the top with a spatula if you like. You could even swirl it for a little flair!
- Chill: Cover the muffin tin with plastic wrap and place it in the fridge for at least 4 hours, or overnight if you can wait that long. This allows the cheesecake to set beautifully and develop its flavors.
Watch-out: Be patient! The longer they chill, the better they taste. I often make them the night before just to let the flavors meld.

Pro Tips & Variations
Now that you’ve got the basic recipe down, let’s explore some fun twists and variations. Making these mini cheesecakes unique is half the fun!
- Flavor variations: Consider adding a teaspoon of almond extract instead of vanilla for a different flavor or swirl in some fruit puree (like strawberry or raspberry) before chilling for a fruity twist.
- Swap out the crust: Try using Oreo crumbs for a chocolatey twist or even almond flour for a gluten-free option.
- Topping creativity: Think beyond berries! Crushed candy canes for a holiday twist, caramel drizzle, or even a sprinkle of toasted coconut can elevate your cheesecakes.
- Mini jars: If you don’t have a muffin tin, use small mason jars for an adorable presentation. Just layer the crust and filling in each jar.
Serving Suggestions
Serving these mini cheesecakes is like presenting a gift! I love to arrange them on a beautiful platter, garnished with fresh mint leaves, and a drizzle of chocolate sauce. They pair perfectly with a cup of coffee or a sweet herbal tea, making for a delightful afternoon treat. Picture this: the laughter of family and friends, the aroma of freshly brewed coffee swirling around, and everyone reaching for these charming little cheesecakes. It’s the epitome of a cozy, joyful gathering! You might want to take a moment to snap a picture—because trust me, these treats deserve the spotlight!
Storage Tips
If you find yourself with leftovers (which is rare, but it happens!), storing these cheesecakes is super easy:
- Refrigerate: Keep them covered in the fridge for up to 5 days. The flavors keep developing, making them even more delicious over time!
- Freeze: You can also freeze them before adding toppings, and they’ll hold up for about 1-2 months. Just wrap them well in plastic wrap and then aluminum foil to prevent freezer burn.
To thaw: Simply place them in the fridge overnight before serving, and then add your toppings fresh. This way, they’ll taste as great as the day you made them!
Can I make these mini cheesecakes ahead of time?
Absolutely! In fact, I recommend making them a day in advance. It gives them time to chill and set, and you’ll have one less thing to worry about on the day of your gathering.
What can I use instead of cream cheese?
If you want a non-dairy option, look for vegan cream cheese or consider using silken tofu blended until smooth as a healthier alternative. It may alter the flavor slightly, but it’s a great way to accommodate dietary restrictions!
How do I prevent my crust from getting soggy?
To ensure a crispy crust, make sure the butter is evenly mixed in, creating a solid base. Also, avoiding excess moisture in the filling will help keep your crust intact. If you’re concerned about sogginess, you can bake the crust for about 10 minutes at 350°F before adding the filling, just to set it a bit!
Can I use flavored cream cheese?
You can! Flavored cream cheese options can make for exciting variations. Just keep in mind that it may change the overall flavor of your cheesecake, but experimentation is always fun!
Conclusion
I hope you feel inspired to bring a little extra joy to your Easter celebrations with these Delicious Easter No-Bake Mini Cheesecakes for Festive Joy. They’re perfect for sharing memories with loved ones and will undoubtedly become a favorite tradition in your home too. I would love to hear how yours turn out! Feel free to comment below, share any variations you made, or simply share your favorite Easter memory. Happy baking (or rather, no-baking), my friend!

Leave a Comment