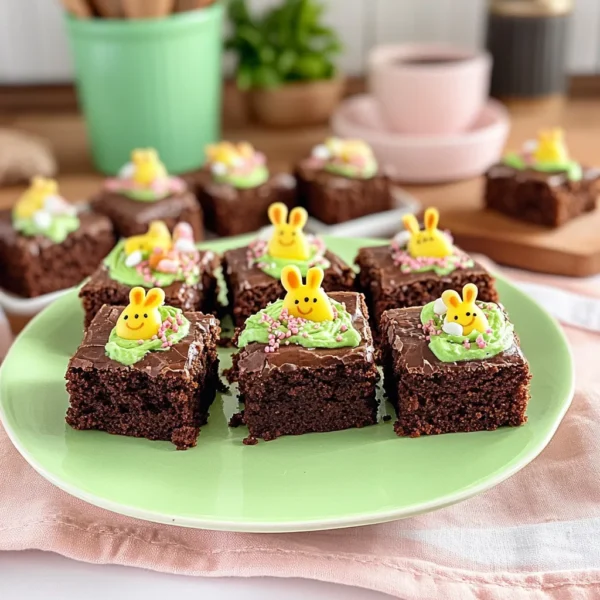
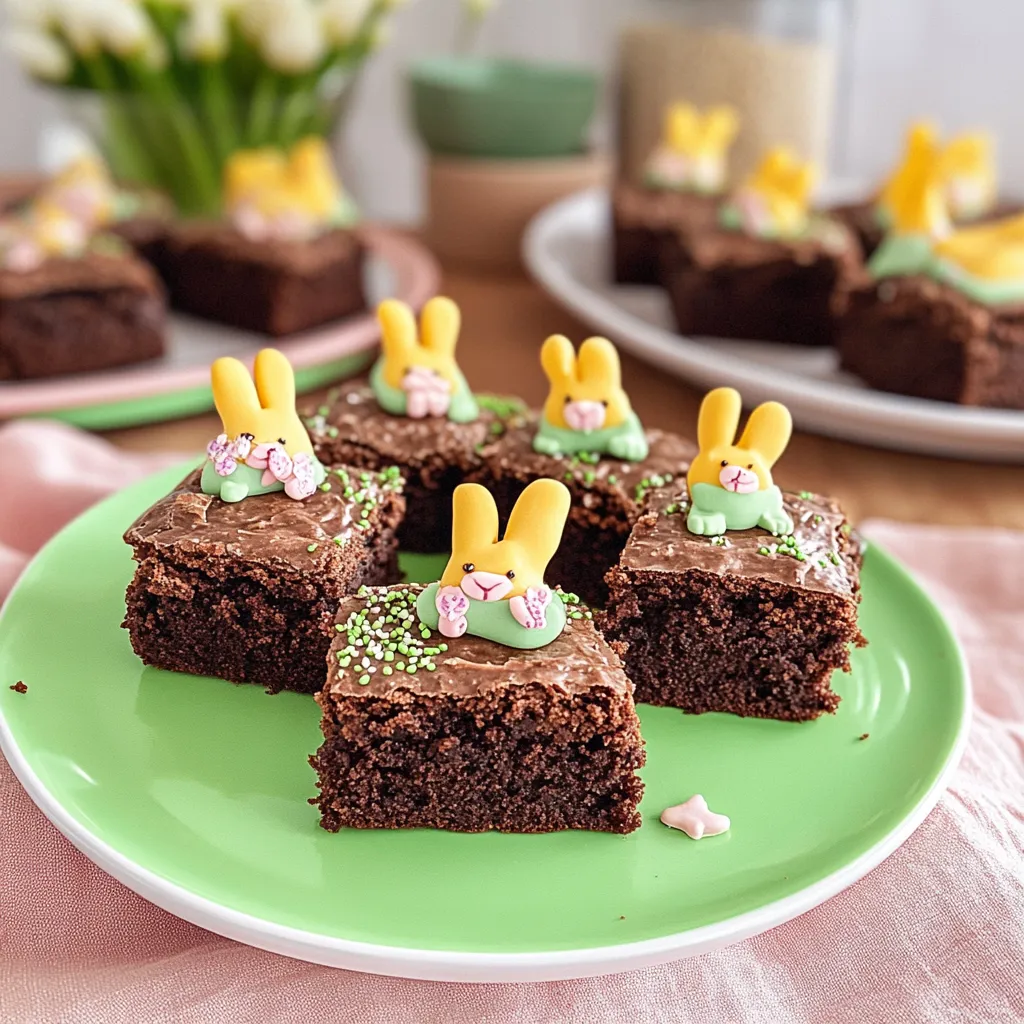
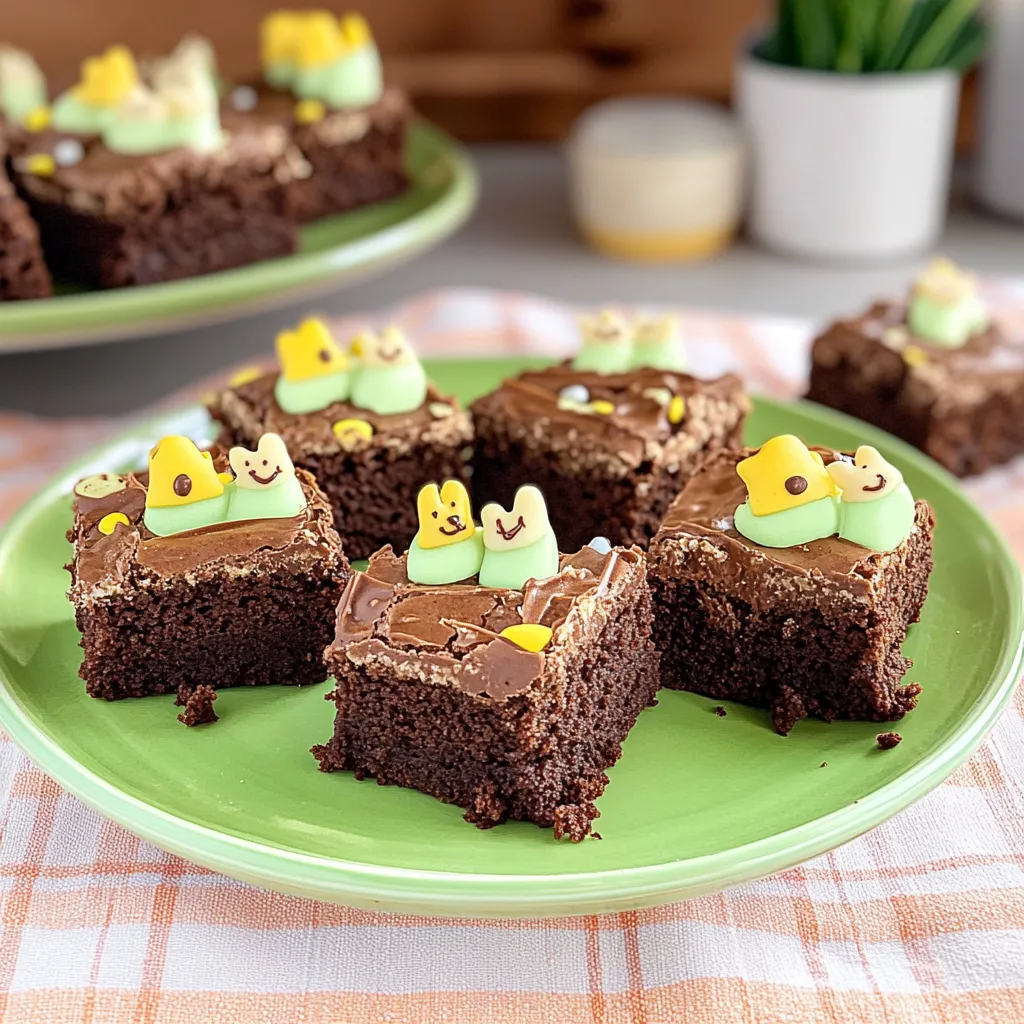
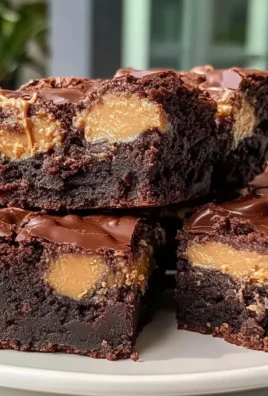
Easter Bunny Brownies
Introduction
As spring approaches, there’s a flutter of excitement in the air—especially for us home bakers! I can still remember the joy in my childhood when the first blooms of daffodils marked the arrival of Easter. My family would gather in the kitchen, laughter ringing out as we baked together, crafting sweet treats that not only tasted amazing but looked like pure magic. Among those beloved recipes was my mom’s Easter Bunny Brownies, a delightful twist on classic brownies that are just as fun to make as they are to eat!
The air filled with the rich aroma of chocolate and the sweetness of frosting, and those bunnies popped with color, hopping right off the dessert table. I’ve always loved the combination of fudgy brownies and whimsical decoration, and these Easter Bunny Brownies are guaranteed to put a smile on any face! So, let’s gather our ingredients and create a batch together!
Why You’ll Love This Recipe
- Easy to make: Perfect for bakers of all levels; these brownies come together quickly!
- Fun and festive: A delightful treat for Easter celebrations with friends and family.
- Customizable: You can easily switch up the toppings and decorations to suit your style.
- Decadent flavor: Rich, fudgy brownies with a creamy, sweet frosting that will have you coming back for seconds.
Ingredients
Gather these ingredients for the most amazing Easter Bunny Brownies:
- Brownies:
- 1 cup (225g) unsalted butter, melted
- 2 cups (400g) granulated sugar
- 4 large eggs
- 1 teaspoon vanilla extract
- 1 cup (130g) all-purpose flour
- 1 cup (90g) unsweetened cocoa powder
- 1/2 teaspoon salt
- 1/2 teaspoon baking powder
- Frosting:
- 1/2 cup (115g) unsalted butter, softened
- 2 cups (240g) powdered sugar
- 2 tablespoons milk
- 1 teaspoon vanilla extract
- Food coloring (pink, blue, and yellow, optional)
- Decorations:
- Edible eyes
- Mini chocolate eggs
- Coconut flakes (optional, for grass)
Tip: Using high-quality cocoa powder will really enhance the chocolate flavor in your brownies. Trust me on this one!

Step-by-Step Instructions
Let’s dive into the baking process, shall we? Grab your mixing bowls and let’s create some magic!
- Preheat the oven: Start by preheating your oven to 350°F (175°C). Grease and line a 9×13-inch baking pan with parchment paper—this makes for easy removal later on!
- Mix the wet ingredients: In a large mixing bowl, combine the melted butter and granulated sugar. Stir until well combined. Add in the eggs, one at a time, mixing thoroughly after each addition. Then, stir in the vanilla extract for that lovely aroma.
- Combine the dry ingredients: In a separate bowl, whisk together the flour, cocoa powder, salt, and baking powder.
- Combine both mixtures: Gradually add the dry ingredients into the wet mixture. Gently mix with a spatula until just combined. Be careful not to overmix or your brownies will be dense—trust me, we want them fudgy!
- Pour and bake: Spread the brownie batter evenly into your prepared pan. Bake in the preheated oven for 25 to 30 minutes, or until a toothpick inserted into the center comes out with a few moist crumbs.
- Cool and frost: Let the brownies cool in the pan for about 20 minutes before transferring them to a wire rack. Once completely cool, whip up your frosting!
- Make the frosting: In a mixing bowl, beat the softened butter until creamy. Gradually add the powdered sugar, followed by the milk and vanilla extract, and mix until fluffy and spreadable. If using food coloring, separate into different bowls and add colors to create your pastel palette.
- Frost those brownies: Spread a layer of frosting over the cooled brownies. Use a spatula to create swirls for some added texture.
- Cut and decorate: Cut the brownies into squares and decorate each one with edible eyes and a mini chocolate egg. Get creative! You can even place some coconut flakes around as “grass.”
Tip: When cutting your brownies, use a sharp knife and wipe it with a damp cloth after each cut for clean edges!
Pro Tips & Variations
Don’t hesitate to have some fun with this recipe! Here are some playful ideas to make it your own:
- Mountain of toppings: Consider adding sprinkles or crushed nuts on top of your frosting to give a little crunch.
- Chocolate overload: Swap half of the cocoa powder for melted chocolate for an ultra-rich brownie experience.
- Swap the frosting: Try cream cheese frosting for a tangy twist that complements the chocolate beautifully.
- Diet swaps: Use gluten-free flour for a gluten-free version or substitute coconut oil for butter for a dairy-free option.
- Add some zest: A touch of orange zest in the frosting can brighten up the chocolatey flavor.
Just remember, baking is about having fun and exploring flavors!
Serving Suggestions
Picture this: It’s a sunny Easter afternoon, and you have a few friends gathered around your dining table. You serve these adorable Easter Bunny Brownies alongside a steaming pot of coffee or a refreshing glass of iced tea. If you’re feeling fancy, pair them with whipped cream or a scoop of vanilla ice cream. The creaminess pairs perfectly with the fudgy brownies, making for a delightful treat!
For an added festive touch, arrange them on a vibrant platter, sprinkled with a little edible grass and adorned with fresh flowers. It’s all about presentation, right?
Storage Tips
Got leftovers? No worries! Here’s how to keep your Easter Bunny Brownies fresh:
- After decorating, store the brownies in an airtight container at room temperature for up to 3 days. If you prefer them cold, they’re delightful straight from the fridge!
- If you want to freeze them, simply wrap the brownies tightly in plastic wrap, then place them in a freezer-safe container. They can be frozen for up to 2 months.
- When you’re ready to indulge, just thaw them in the fridge overnight before serving.
FAQs
Can I use oil instead of butter in the brownies?
Yes, you can substitute oil for butter! Use a mild-flavored oil, like vegetable oil or canola oil. Just use 3/4 of the amount called for butter in the recipe to keep the texture rich.
How do I know when the brownies are done baking?
The best test is the toothpick method! Insert a toothpick into the center of the brownies; if it comes out with a few moist crumbs, they’re done. If it’s completely clean, they may be overbaked!
Can I make these brownies ahead of time?
Absolutely! You can bake the brownies a day in advance, frost them, and store them in an airtight container. Just remember they taste best when enjoyed fresh!
What should I do if my frosting is too thick?
If your frosting turns out too thick, just add a splash of milk, one teaspoon at a time, until you reach your desired consistency. It should be creamy and spreadable!
Can I leave out the decorations?
Of course! The brownies are delicious on their own without any fuss. However, the decorations do add a fun touch, especially for Easter!
Conclusion
I hope you’re just as excited to whip up a batch of these Easter Bunny Brownies as I am! Each one is a perfect little chocolatey treat, bringing smiles and joy to family gatherings. Whether you’re an experienced baker or just trying your hand at dessert for the first time, these brownies will have a place in your heart—and on your dessert table—for years to come.
Don’t forget to share your creations and let me know how they turned out! I’d love to hear your stories and see your whimsical decorating ideas. Happy baking and happy Easter!
Leave a Comment