
Easter Bunny Coconut Tails
Introduction
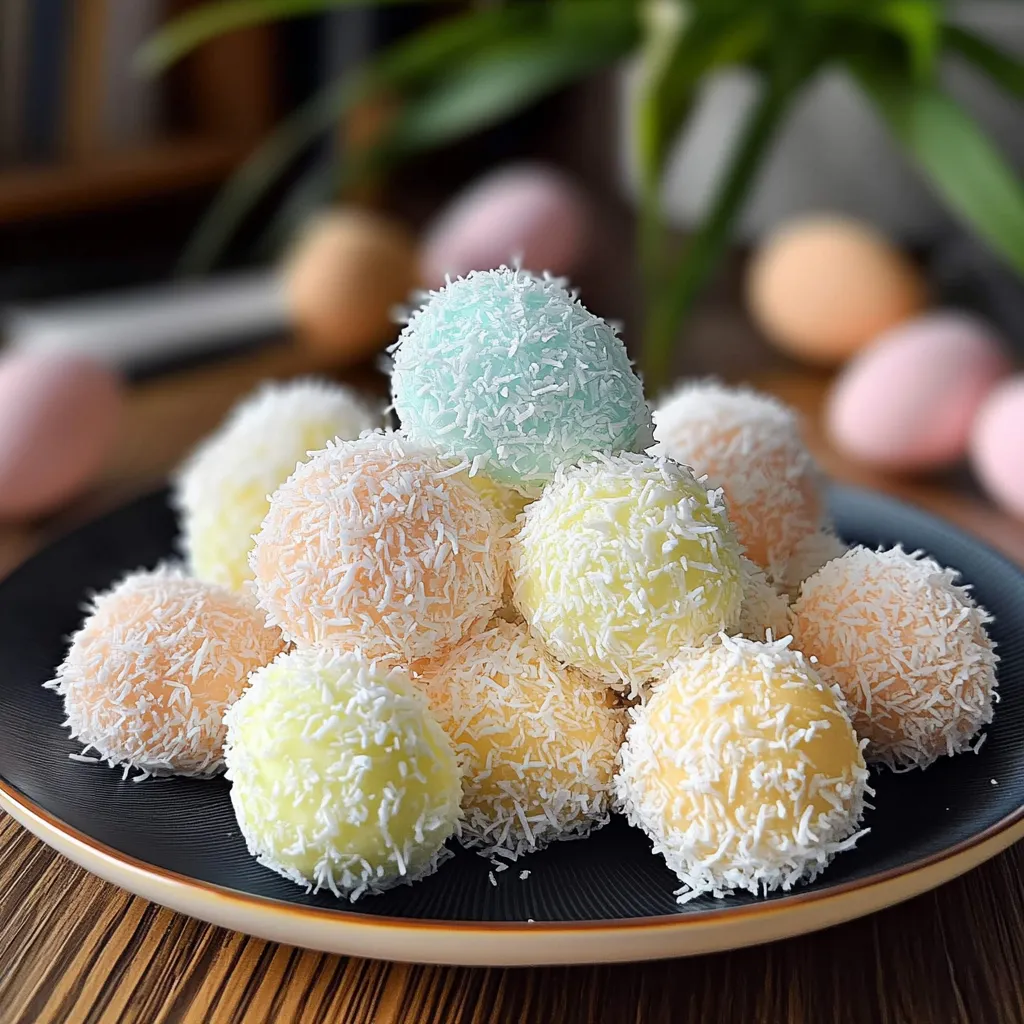
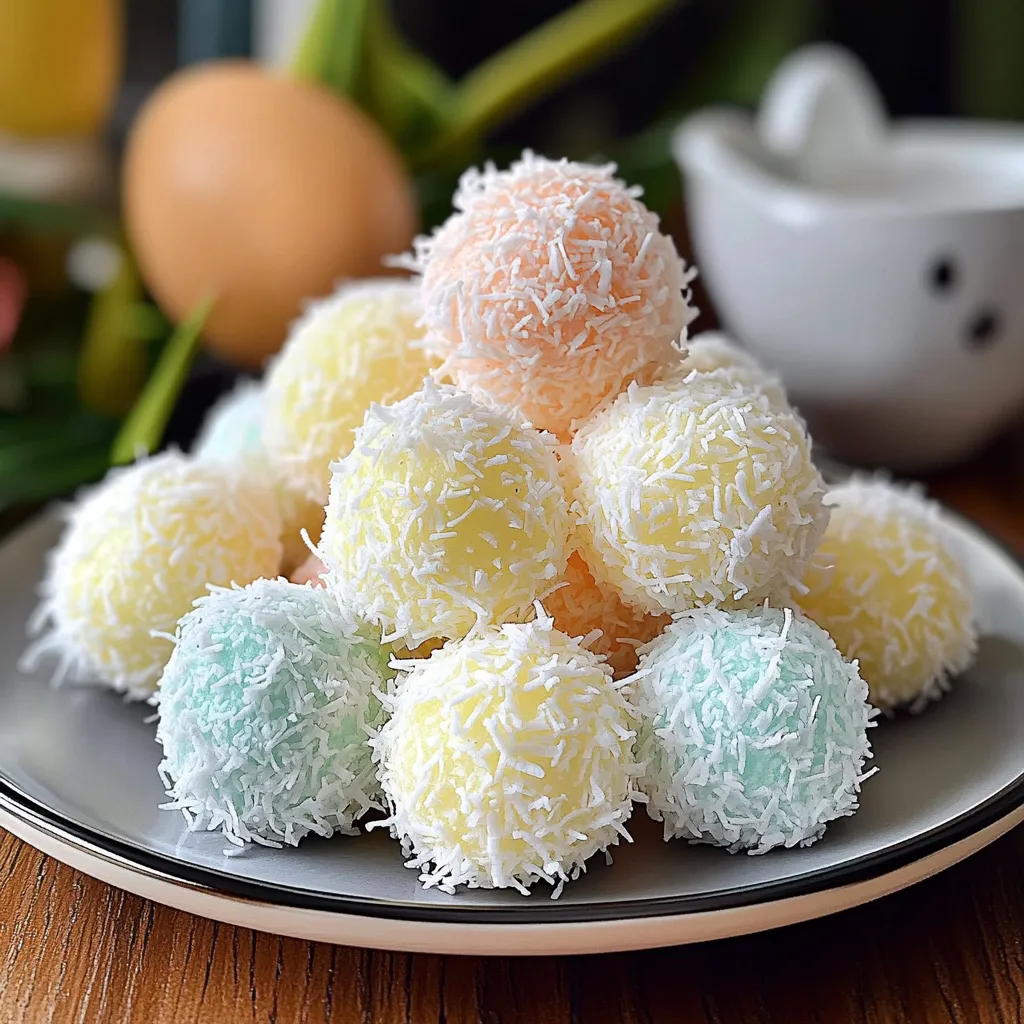
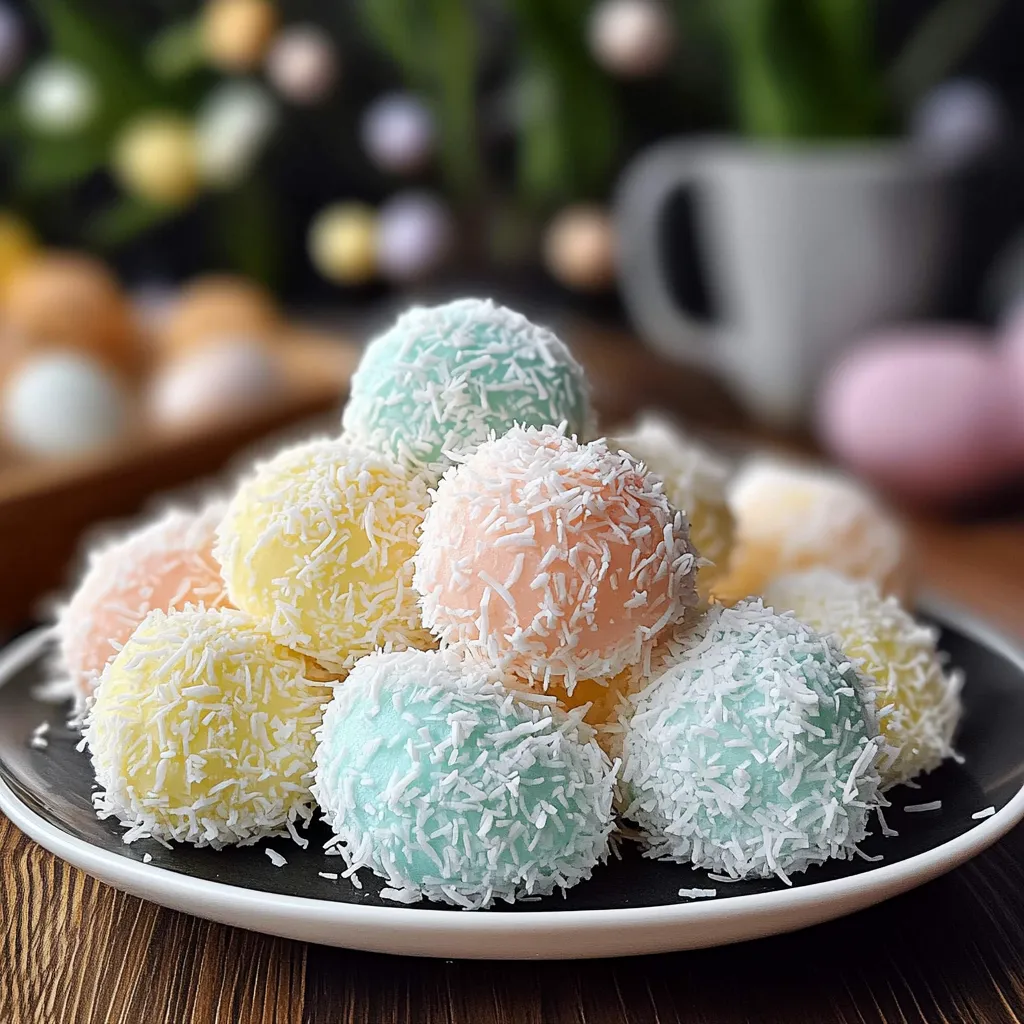
Oh my goodness, Easter time is upon us, and you know what that means—bunnies, eggs, and delightful springtime treats! I can almost hear the faint jingles of Easter baskets clinking together as I reminisce about the joyful egg hunts of my childhood. I vividly recall scampering around the garden and sneaking bites of delicious candies hidden under blooming flowers. But one treat that never fails to bring back warm memories is the charming Easter Bunny Coconut Tails. These delightful little confections are not just eye-catching; they’re bursting with flavor and a touch of whimsy that makes them perfect for any spring gathering.
Soft, chewy, and coconutty, these tails are sure to steal your heart (and your taste buds) this Easter. Plus, making them is as much fun as eating them! Gather your ingredients, and let’s create something special that can be enjoyed by the whole family. I can’t wait to share the joy of making these together with you in the kitchen!
Why You’ll Love This Recipe
- Easy and fun to make—perfect for kids and adults alike!
- Coconut lovers rejoice! The flavor is simply irresistible.
- Great for gatherings—these tails are a conversation starter!
- Customizable toppings and shapes; let your creativity shine.
- Perfect for Easter baskets, brunches, or a sweet afternoon treat.
Ingredients
Before we dive into the fun part, let’s gather our ingredients! Here’s what you’ll need:
- 2 cups shredded sweetened coconut (feel free to use unsweetened if you prefer!)
- 1 cup sweetened condensed milk
- 1 teaspoon vanilla extract
- 1/2 teaspoon almond extract (optional but adds a lovely depth!)
- 1 cup melted chocolate (dark or milk, depending on your taste)
- 1/4 cup confectioners’ sugar (for rolling)
- Colored sprinkles or edible glitter (for decoration)
- Mini chocolate chips (for bunny eyes)
Tip: Make sure your coconut is finely shredded for that dreamy texture. The sweetened variety will give extra sweetness and a lovely chew!
Step-by-Step Instructions
Now let’s roll up our sleeves and dive into making these adorable coconut tails!
- Combine Your Base: In a mixing bowl, combine the shredded coconut, sweetened condensed milk, vanilla extract, and almond extract. Use your hands or a spatula to mix until everything is well incorporated. This will get sticky, and that’s okay; it means you’re on the right track!
- Shape the Tails: Grab a small amount of the coconut mixture (about a tablespoon) and roll it into an elongated shape resembling a bunny tail. Repeat until you’ve used up all the mixture. You should get about 12-15 tails depending on how large you make them!
- Chill to Set: Place the shaped tails on a parchment-lined baking sheet. Pop them in the fridge for at least 30 minutes to an hour to firm up. This will help them hold their shape when you dip them in chocolate.
- Melt the Chocolate: While you wait, melt your chocolate in a microwave-safe bowl. Heat it in 30-second intervals, stirring between each, until it’s smooth and glossy. Make sure not to overheat the chocolate, as it can seize!
- Dip the Tails: Once the coconut tails have chilled and firmed up, it’s time to dip! Using a fork, dip each tail into the melted chocolate and gently tap on the side of the bowl to remove excess chocolate. Place them back on the parchment paper.
- Add Some Bling: While the chocolate is still wet, sprinkle the tails with colored sprinkles or edible glitter to make them sparkle, and place mini chocolate chips as eyes!
- Set Them: Allow the chocolate to set at room temperature or pop them back in the fridge for quicker setting.
Tip: Don’t worry about being perfect; each tail will have its unique charm. Embrace the imperfections—they make your treats all the more lovable!
Pro Tips & Variations
Now that we’ve crafted some cute coconut tails, let’s explore some fun variations that you can try out:
- Flavor Twist: Add a splash of orange or lemon zest to the coconut mix for a citrusy twist that’s perfect for spring!
- Nutty Delight: Mix in finely chopped nuts, like almonds or pistachios, for some crunch.
- Chocolate Drizzle: Once the tails are set, drizzle some contrasting chocolate on top for an elegant look.
- Less Sweet: Try using unsweetened coconut and reducing the sweetened condensed milk for a less sweet option.
Serving Suggestions
These Easter Bunny Coconut Tails are fantastic on their own, but here’s how I love to serve them up:
- Pop them in cute little baskets as part of an Easter table centerpiece!
- Serve them alongside a warm cup of coffee or tea for a cozy afternoon pick-me-up.
- Include them in a sweet platter along with other yummy Easter goodies like chocolates, cookies, and cupcakes.
Picture this—gathered around the table with family and friends, laughter in the air, and a plate of these charming, delightful tails sitting at the center. It feels like a scene straight out of a heartwarming springtime movie!
Storage Tips
To keep your Easter Bunny Coconut Tails fresh and delightful, here’s how to store them:
- Refrigerate: Keep them in an airtight container lined with parchment paper in the fridge. They will last for about a week (if they last that long!).
- Freeze: For longer storage, freeze them in a single layer on a baking sheet, then transfer to a freezer-safe container. They’ll keep well for up to two months. Just let them thaw in the fridge overnight before enjoying!
- Reheat: If they’re a little chilly, a quick 10-second zap in the microwave will do wonders. Just make sure not to overheat them!
FAQs
Can I use different types of chocolate?
Absolutely! Whether you prefer dark, milk, or even white chocolate, feel free to choose what tickles your taste buds the most. Milk chocolate offers a sweet touch, while dark chocolate gives a lovely contrast to the sweetness of the coconut.
What if I’m not a coconut fan?
No worries! If coconut isn’t your thing, you can easily substitute it with rice krispies for a crunchy, sweet tail. Just tweak the measurements accordingly and follow the same method!
Can I make these ahead of time?
You bet! These tails store beautifully in the fridge or freezer, making them a perfect make-ahead sweet for your Easter celebrations. Just keep them in an airtight container!
Is there a way to make these healthier?
Sure! You can use unsweetened coconut, substitute the sweetened condensed milk with a DIY version of almond milk thickened with some maple syrup, and feel free to cut back on the chocolate for a lighter treat!
Conclusion
I hope you’re as excited as I am to try these Easter Bunny Coconut Tails! Let your creativity shine as you make them your own, and don’t forget to share with family and friends. I’d love to hear how your tails turn out or if you made any creative adjustments! So, pull up a chair, stay a while, and let’s enjoy this magical season of color, joy, and delicious treats together. Happy baking and happy Easter!


Leave a Comment