
erry Cheesecake RecipeAs the sun warms up and the birds start to sing, there’s something magical about springtime treats. The vibrant colors, fresh produce, and tempting scents remind me of lazy afternoons spent on my grandma’s porch, savoring a slice of her cherry cheesecake. Those golden moments by the garden, where the air was sweetened with the smell of blooming flowers and freshly baked delights, fuel my love for dessert. Today, I’m excited to share that nostalgia with you through my Easy No-Bake Cherry Cheesecake Recipe. This delightful treat is creamy, fruity, and oh-so-simple to whip up, making it the perfect dessert for any occasion—no oven required!
Why You’ll Love This Recipe
- Quick and easy: This cheesecake comes together in under an hour!
- No baking hassle: You don’t need to turn on the oven—perfect for warm days.
- Deliciously creamy: The texture is smooth and velvety, leaving everyone wanting more.
- Customizable toppings: Change it up with your favorite fruit or chocolate drizzle.
- Perfect for gatherings: This crowd-pleaser is ideal for parties, potlucks, or family dinners.
Ingredients
- Graham cracker crumbs: 1 ½ cups (for a buttery crust, use crushed butter cookies instead)
- Granulated sugar: ¼ cup (adds sweetness; feel free to adjust to taste)
- Melted butter: ½ cup (unsalted works best; allows you to control the saltiness)
- Cream cheese: 16 oz, softened (let it sit at room temperature for that creamy texture)
- Powdered sugar: ½ cup (provides the right sweetness without the grittiness)
- Vanilla extract: 1 tsp (homemade is fabulous if you have it on hand!)
- Cool Whip or whipped cream: 8 oz (for that luscious, airy finish; homemade whipped cream adds a lovely touch)
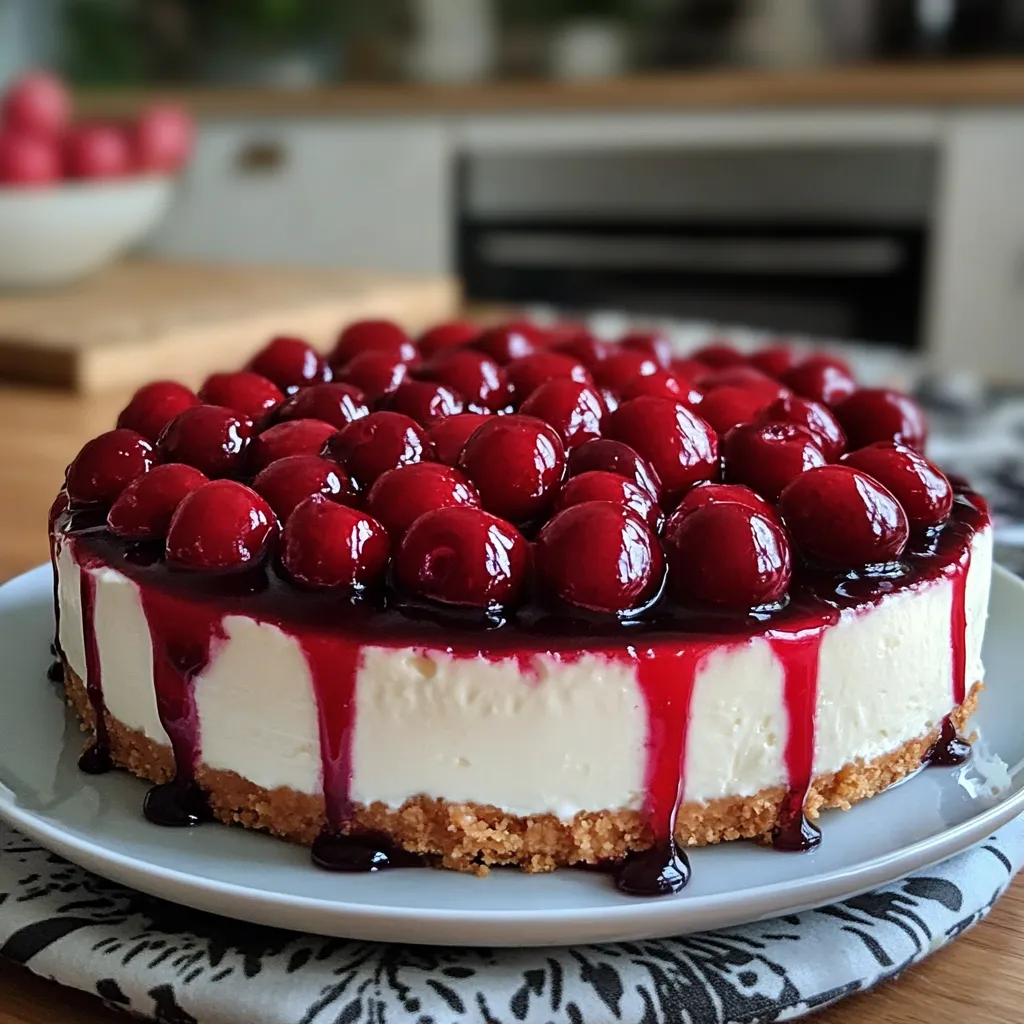
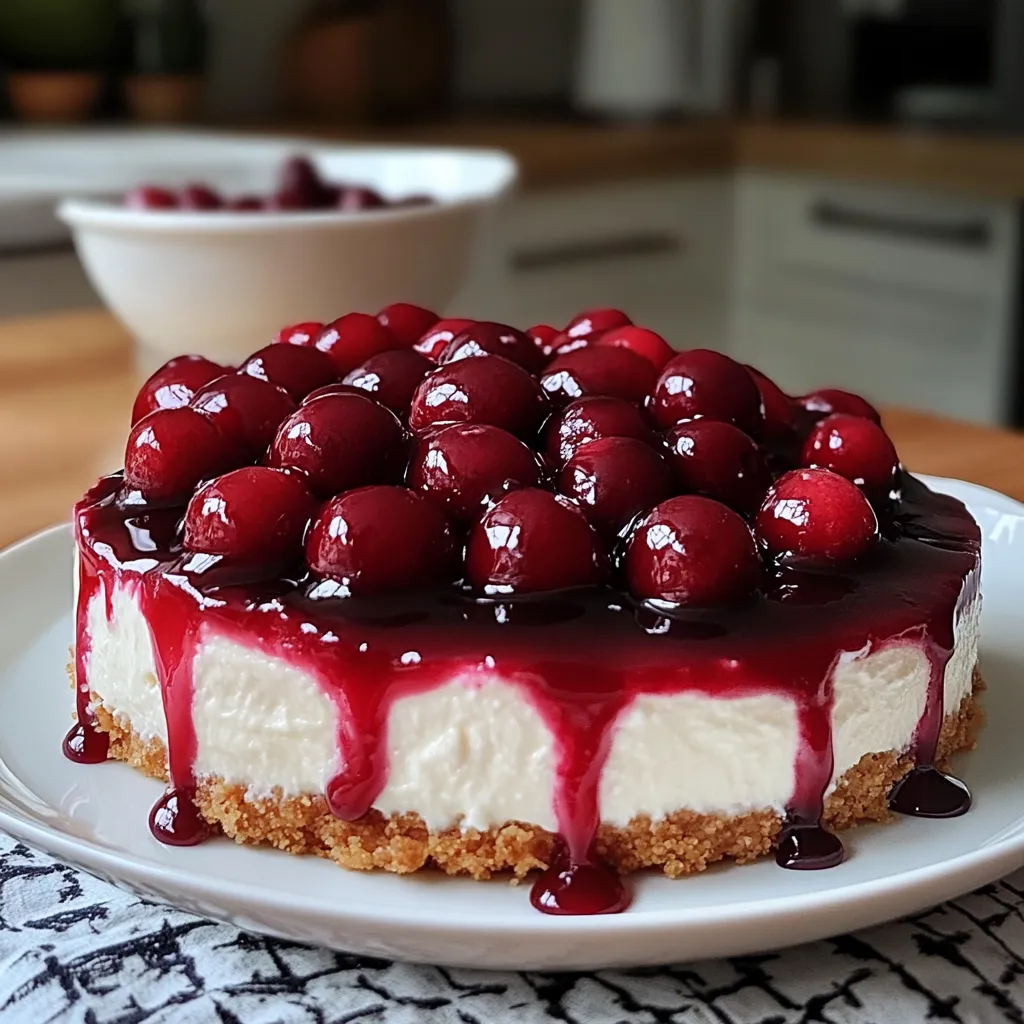
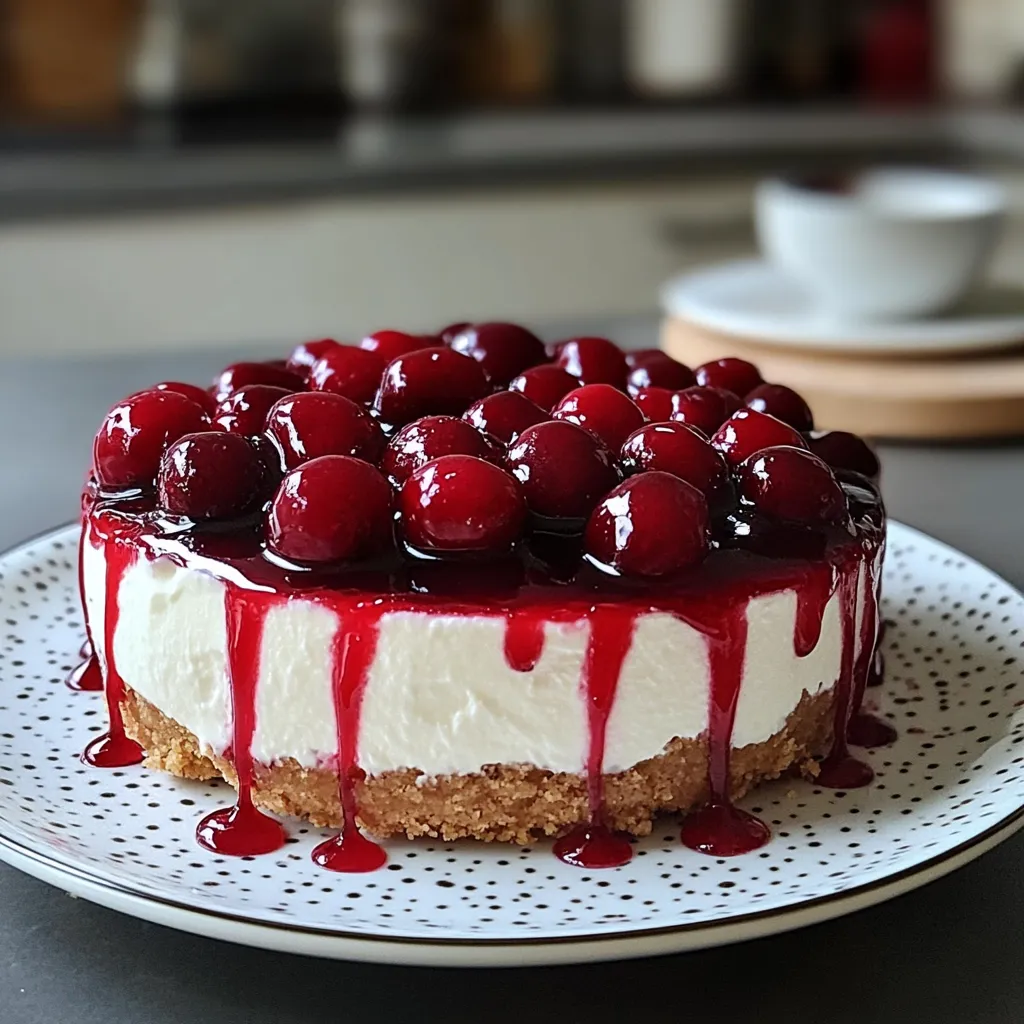
- Cherry pie filling: 1 can (for a burst of fruity goodness on top)
Step-by-Step Instructions
- Prepare the crust: In a mixing bowl, combine the graham cracker crumbs, granulated sugar, and melted butter. Stir until the mixture resembles wet sand. Press this mixture firmly into the bottom of a 9-inch springform pan (or a pie dish) evenly. Use the back of a measuring cup to help compress it nicely. Set aside.
- Mix the cream cheese filling: In a large bowl, beat the softened cream cheese with a hand mixer until smooth and creamy. Add in the powdered sugar and vanilla extract, mixing until fully combined. Make sure you scrape down the sides to catch any lumps—nobody wants that in their cheesecake!
- Fold in the Cool Whip: Gently fold the Cool Whip into the cream cheese mixture until combined. Be careful not to deflate the mixture; this will keep your cheesecake nice and fluffy. Watch out for overmixing, as we want to preserve that texture!
- Assemble the cheesecake: Pour the cream cheese filling over the crust, smoothing the top with a spatula. Tap the pan gently on the counter to eliminate any air bubbles. Cover with plastic wrap and refrigerate for at least 4 hours, but overnight is best for a set and delicious flavor.
- Add the cherry topping: When you’re ready to serve, spoon the cherry pie filling over the top of the cheesecake. You can arrange the cherries as you like or go for a generous spread. The shiny cherries will tempt everyone at the table!
Pro Tips & Variations
This recipe is delightfully versatile, so feel free to get creative! Here are some fun twists:
- Mixed berry topping: Swap out the cherry filling for strawberries, blueberries, or raspberries.
- Chocolate lover’s version: Mix in some chocolate chips into the cream cheese filling or drizzle melted chocolate over the top.
- Nutty crust: Add ½ cup of chopped nuts to the graham cracker crust for an extra crunch.
- Flavor variations: Swirl in lemon or orange zest for a citrusy twist in the filling!
Serving Suggestions
The best part about this Easy No-Bake Cherry Cheesecake is how beautifully it pairs with everything! Serve it chilled and cut into generous slices. It’s delightful on its own, but if you want to elevate it, try:
- Pairing it with a cup of freshly brewed coffee or iced tea for that perfect afternoon treat.
- Adding a dollop of whipped cream on each slice, because who doesn’t love a little extra creaminess?
- Serving it alongside seasonal fruits like strawberries or a light fruit salad for a refreshing finish.
Storage Tips
This cheesecake is a great make-ahead dessert! Here are some tips for keeping it fresh:
- Refrigerating: Store any leftovers covered in the refrigerator for up to 3-4 days. Make sure it’s well wrapped to avoid drying out.
- Freezing: You can freeze the cheesecake (without the cherry topping) for up to 3 months. Just cover it tightly with plastic wrap, then foil. When you’re ready to enjoy it, thaw it in the fridge overnight.
- Reheating? There’s no need! Simply serve it chilled for the best flavor and texture.
FAQs
Can I use a different crust?
Absolutely! You can use pre-made cookie crusts, an Oreo crust, or even a gluten-free crust if you prefer. Just remember, each adds a unique flavor!
What if I don’t have Cool Whip?
No worries! You can use freshly whipped cream instead. Just whip 1 cup of heavy cream with a bit of powdered sugar until soft peaks form, and gently fold it in.
Can I make this cheesecake in advance?
Yes! In fact, making it a day ahead will enhance the flavors. Just be sure to store it properly in the fridge!
Can I change the fruit topping?
Of course! Feel free to use any pie filling you prefer, or mix and match with fresh fruits like strawberries or blueberries for a refreshing change.
How can I make my cheesecake even creamier?
Using full-fat cream cheese at room temperature will help you achieve that super smooth texture. Also, take care not to overmix once you add the whipped cream to maintain that lightness!
Conclusion
And there you have it—the perfect way to bring a little nostalgia into your kitchen with my Easy No-Bake Cherry Cheesecake Recipe! I hope you find as much joy in making (and, of course, devouring!) this creamy delight as I always do. I would love to hear about your baking adventures. Did you add your own twist? Please drop a comment below or share with friends, and let’s spread that cherry cheesecake love together!
Leave a Comment