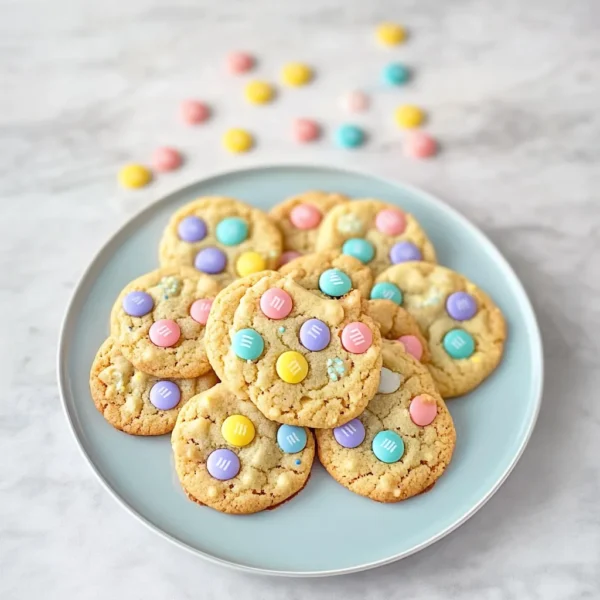
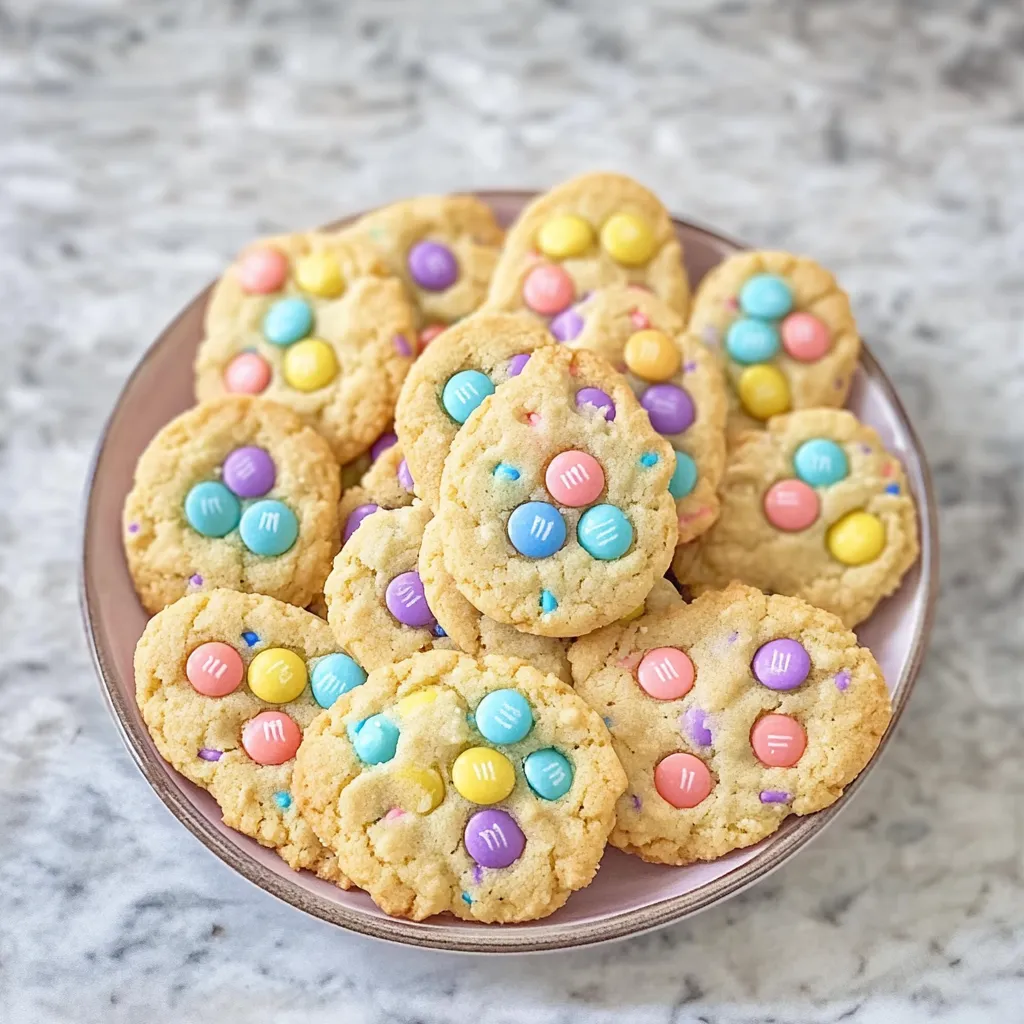
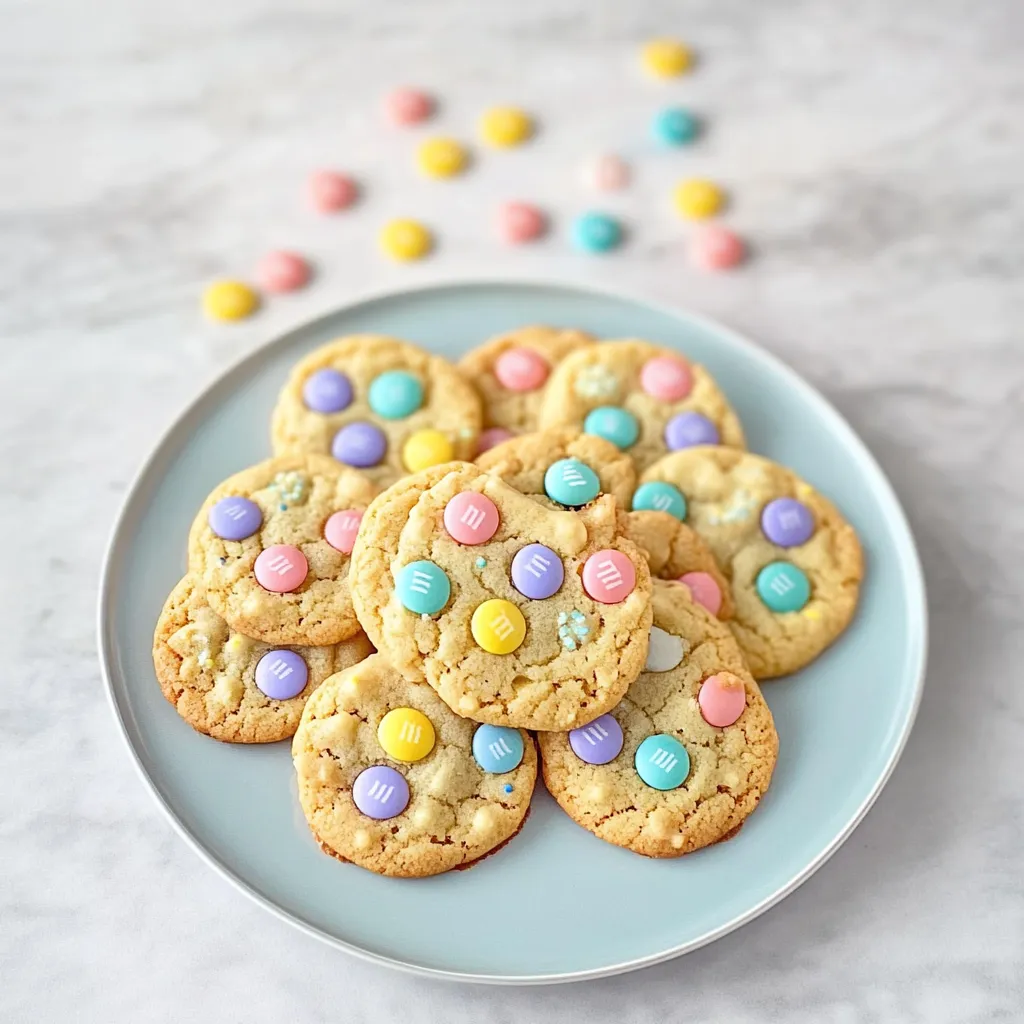
M&M Bunny Cookies
Introduction
Ah, spring! The time when flowers bloom, birds chirp, and, of course, that delightful holiday, Easter, rolls around. It’s a season of renewal and joy, filled with vibrant colors and sweet treats. One of my fondest memories is the Easter celebrations at my grandmother’s house. She always had the biggest basket filled with chocolate bunnies and colorful M&Ms, and every year, she’d bake these charming M&M Bunny Cookies. They were a bit whimsical, brilliantly festive, and just the right amount of sweet. Baking a batch of these cookies now feels like stepping back to those sunny afternoons filled with laughter and love. Today, I’m excited to share my version of her recipe—these M&M Bunny Cookies are not only fun to make but also bring a smile to everyone’s face!
Why You’ll Love This Recipe
- Perfect for Easter celebrations or any spring gathering.
- Easy to whip up, even if you’re a beginner in the kitchen.
- Colorful and fun, making them a hit with kids and adults alike.
- Customizable with your favorite M&M colors and even other mix-ins!
- Soft, chewy texture with a delightful crunch from the chocolate-coated candy.
Ingredients
Before we dive into the fun part, let’s gather our ingredients. Here’s what you’ll need:
- 2 ½ cups all-purpose flour
- 1 tsp baking soda
- ½ tsp salt
- ¾ cup unsalted butter, softened
- 1 cup brown sugar, packed
- ½ cup granulated sugar
- 1 tsp vanilla extract
- 2 large eggs
- 1 cup M&M candies (plus more for decoration)
- ½ cup white chocolate chips (optional for added sweetness)
Tip: Make sure your butter is at room temperature—it helps achieve that perfect creamy texture when mixing!
Step-by-Step Instructions
Ready to unleash your inner baker? Let’s get started on our M&M Bunny Cookies!
- Preheat your oven: Set it to 350°F (175°C). Nothing beats the smell of freshly baked cookies wafting through the house!
- Mix the dry ingredients: In a medium bowl, whisk together the flour, baking soda, and salt until well combined. Set aside.
- Cream the butter and sugars: In a large mixing bowl, beat the softened butter, brown sugar, and granulated sugar until it’s light and fluffy, about 2-3 minutes. It should look a bit like a cloud of sweetness!
- Add the eggs and vanilla: Beat in the eggs, one at a time, followed by the vanilla extract. Remember, fresh vanilla adds a lovely aroma that makes your cookies stand out!
- Combine the mixtures: Gradually add your dry ingredients to the wet mixture. Mix just until combined—be careful not to overmix; we want our cookies to be tender!
- Fold in the M&Ms: Gently stir in the M&Ms (and white chocolate chips if using). Just think of the vibrant colors mixing in—how fun!
- Drop the dough: Use a cookie scoop or tablespoon to drop rounded dough onto a baking sheet lined with parchment paper, spacing them about 2 inches apart. This gives them room to spread out.
- Decorate: To make them extra special, pop a few extra M&Ms on top of each cookie before baking.
- Bake: Place the baking sheet in the oven and bake for about 10-12 minutes, or until the edges are lightly golden. The centers may look a bit soft, but they’ll firm up as they cool.
- Cool and enjoy: Let the cookies cool on the baking sheet for 5 minutes, then transfer them to a wire rack to cool completely. You might want to sneak one while they’re still warm—trust me, they’re heavenly!
Watch out: If you leave them in the oven for too long, they can turn crispy instead of chewy, and nobody wants that!
Pro Tips & Variations
Feeling adventurous? Here are some fun ways to jazz up your M&M Bunny Cookies:
- Spice it up: Consider adding a teaspoon of cinnamon or nutmeg for a warm, cozy flavor!
- Use different add-ins: Swap the M&Ms for chocolate chunks, dried fruits, or even nuts for a lovely crunch.
- Make it festive: Use pastel-colored M&Ms in the spring, or shape the cookies to resemble bunnies for an extra touch of whimsy.
- Go healthier: Try using whole wheat flour or gluten-free flour to cater to different dietary needs!
Serving Suggestions
These cookies aren’t just a treat; they’re a colorful centerpiece for any celebration! Serve them on a bright, cheerful platter, add a few sprigs of mint or edible flowers for an extra spring touch, and pair them with a tall glass of milk or a cozy cup of coffee. They also make a delightful addition to an Easter basket or a sweet surprise for after an egg hunt. Imagine the smiles as you hand these out to family and friends. It’s the little touches that make the season bright!
Storage Tips
Want to save some for later? Here’s how to keep your cookies fresh and tasty:
- Room temperature: Store the cookies in an airtight container for up to a week. They may lose a bit of their soft texture but will still taste delicious!
- Refrigeration: If you live in a warm climate, refrigerate them to prevent melting or sticking.
- Freezing: Freeze the cookies for up to 3 months. Layer them between parchment paper in an airtight container. When you’re ready to enjoy, just let them thaw at room temperature, or pop them in the microwave for a few seconds for that warm, gooey goodness.
FAQs
Can I make these cookies without M&Ms?
Absolutely! You can replace M&Ms with chocolate chips, dried cranberries, or even nuts for a different twist. The dough is versatile, so feel free to customize it!
Can I use a different type of sugar?
Yes! You can experiment with different sugars, like coconut sugar or even brown sugar alone. Each will give a slightly different taste and texture, but they all will work!
Why are my cookies spreading too much?
Overmixing the dough can lead to cookies that spread too much! Make sure to mix just until combined, and also ensure your butter isn’t too warm when you start. If it’s too soft, refrigerate the dough for about 10-15 minutes before baking.
Conclusion
There you have it! A delightful recipe for M&M Bunny Cookies that’s sure to bring joy and a sprinkle of fun to your home. I hope you enjoy making these cookies as much as I do and create your lovely memories around them. Don’t forget to share your thoughts on this recipe or your unique twists in the comments below. Happy baking, friends! Wishing you a joyful and delicious spring season!


Leave a Comment