Ingredients
Before we jump into the fun part, here’s what you’ll need. Let’s gather these goodies!
- 1 cup creamy peanut butter (make sure it’s the good stuff—natural varieties work great!)
- 1/2 cup unsweetened cocoa powder (for that rich chocolatey flavor)
- 1/2 cup honey or maple syrup (your sweetener of choice)
- 2 cups rolled oats (old-fashioned work best for texture)
- 1/2 cup mini chocolate chips (because who doesn’t love chocolate?)
- Pinch of salt (to balance those sweet flavors)
If you want a little extra jazz, feel free to add a splash of vanilla extract to the mix. Trust me, it makes everything feel just a bit more special!

Step-by-Step Instructions
Alright, let’s get our hands in the mix! Follow these simple steps, and you’ll have your bars ready to chill before you know it:
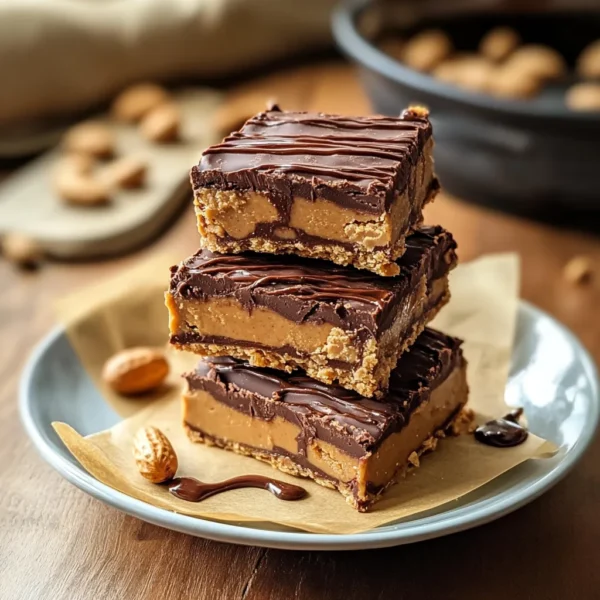
- Mix Wet Ingredients: In a large mixing bowl, combine the creamy peanut butter, honey (or maple syrup), and cocoa powder. Mix them together until you have a smooth, luscious mixture. I like to use a spatula for this, but a whisk works too!
- Add Oats: Stir in the rolled oats. This is where the magic begins! Make sure everything is well combined, and you see no dry oats remaining.
- Incorporate Chocolate Chips: Fold in the mini chocolate chips gently. You want those little bits of chocolate to spread throughout for gooey bites of goodness!
- Prepare the Pan: Line an 8×8-inch square baking dish with parchment paper. Leave a little overhang so you can pull the bars out easily later on. This is a key step—you don’t want a sticky situation!
- Spread and Press: Transfer the mixture into your lined baking dish. Use the back of a spatula to firmly press it down into an even layer. Get in there and make it compact—the firmer the mixture, the better your bars will hold together!
- Chill Out: Pop the dish in the fridge for at least an hour (or as long as 2-3 hours if you have the patience). This helps set the bars nicely.
Once the time is up, take the bars out and let them sit at room temperature for about 10 minutes before cutting. This will soften them just a tad, making it easier to slice into perfect squares.
Pro Tips & Variations
Now that we’ve got the basics down, let’s talk about some fun twists!
- Add Nuts: For a bit of crunch, throw in some chopped walnuts or pecans. They complement the flavors beautifully!
- Try Different Sweeteners: If you prefer something lower in sugar, feel free to swap honey for a sugar-free syrup or agave nectar.
- Spice it Up: A pinch of cinnamon or sea salt on top before chilling can elevate the flavors—it adds a little something special!
- Top Them Off: Drizzle some melted chocolate over the cooled bars or sprinkle some shredded coconut for extra flair.

Serving Suggestions
When it comes to serving your No-Bake Chocolate Peanut Butter Bars, the possibilities are endless! I love to enjoy them alongside a steaming cup of coffee or perhaps even a glass of almond milk. They also make a fantastic dessert while lounging on the couch with a good movie, or as a sweet treat at gatherings and picnics. Just imagine – you’ll be the star of any potluck, with friends asking for the recipe!
You can cut them into squares, rectangles, or whatever shape you fancy! For a more elegant touch, try using cookie cutters to make fun shapes for a special occasion, like a birthday party or holiday. The kids will love them!
Storage Tips
These bars are best stored in the refrigerator, where they’ll keep for up to a week (not that they’ll last that long!). Just wrap them in plastic wrap, or keep them sealed in an airtight container.
If you want to save some for later (you can thank me later), they also freeze beautifully! Just layer them between parchment paper in an airtight container, and they’ll stay fresh for about a month. To enjoy, just pull out a bar, let it sit for about 10-15 minutes at room temperature, and dive in. Trust me, these bars are delicious both chilled and at room temperature!
FAQs
Can I use crunchy peanut butter instead of creamy?
Absolutely! Crunchy peanut butter will add a nice texture and more nutty flavor to your bars. Just keep in mind that the bars may be a bit crumbly due to the added texture.
What can I substitute for oats?
If you want a gluten-free option, you can use gluten-free oats or swap them out for almond flour or ground nuts. This will alter the texture a bit, but they’ll still be delicious!
Can I make these vegan?
Yes! Simply replace honey with maple syrup or agave to keep it strictly plant-based. Use vegan chocolate chips, and you’re all set!
How do I know when the bars are set properly?
After chilling, the bars should feel firm to the touch and hold their shape when you take them out of the pan. A slight press should not leave your finger stuck in, so you know they’re ready to slice!
Conclusion
I hope you enjoy whipping up these No-Bake Chocolate Peanut Butter Bars as much as I do! They’re a delightful treat that’s perfect for any occasion—or just for indulging your sweet tooth after a long day. I’d love to hear how yours turn out, so feel free to drop a comment or share your favorite variations! Happy baking (or rather, no-baking!), my friends!


Leave a Comment