
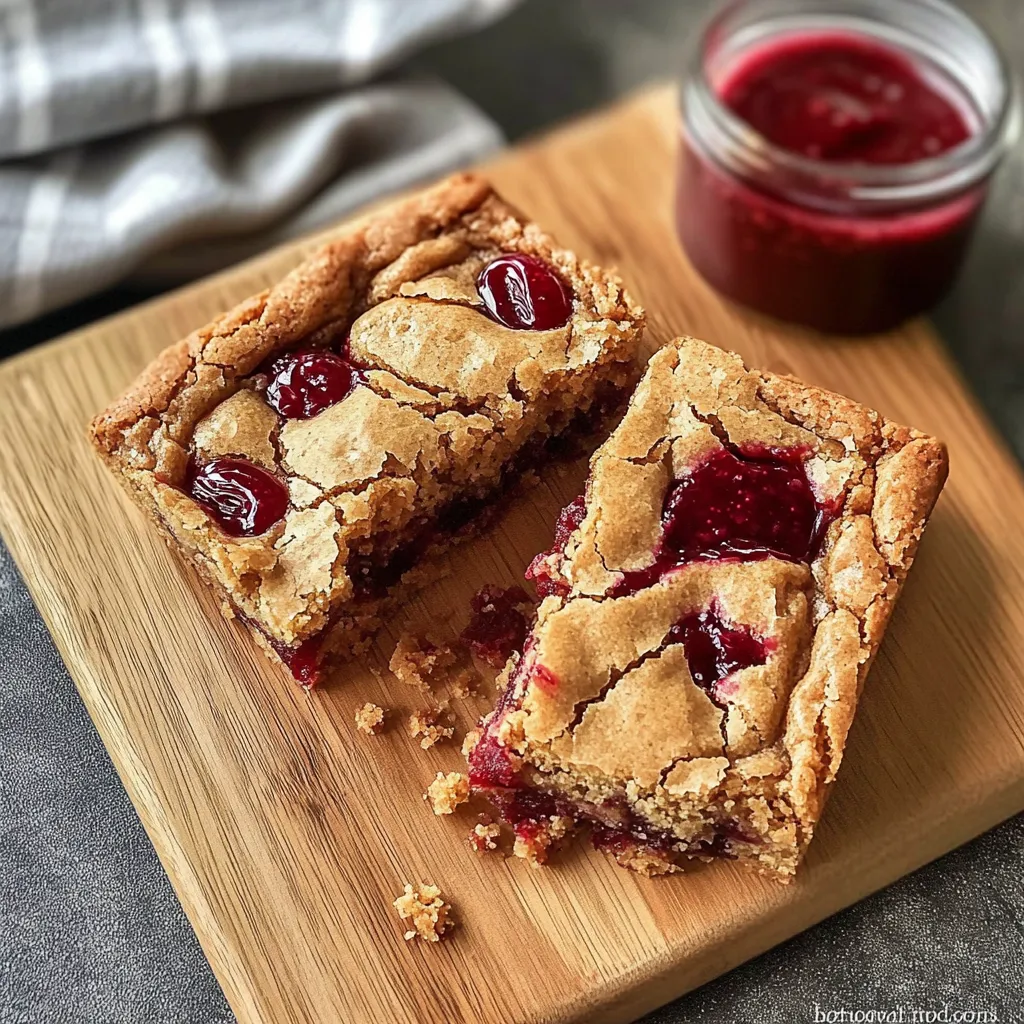
Ah, the timeless duo of peanut butter and jelly! It brings a surge of nostalgia, doesn’t it? I can vividly recall those sunny afternoons as a kid, sitting on the porch with a sticky PB&J sandwich in hand, giggling with friends over sweet stories and shared secrets. Those simple, carefree moments inspired me to create something special, and voilà—here we have Peanut Butter and Jelly Blondies! These delightful treats capture the comforting flavors of our beloved classic sandwich but turn them into soft, chewy bars that will make your taste buds sing.
What I love most about this recipe is its ability to evoke memories while still being a fun twist on a classic. It’s the perfect combination of nutty, sweet, and fruity—essentially a celebration of childhood in every bite. Plus, they’re easy to whip up on a busy weeknight or serve at a lovely gathering with friends. You’ll find yourself making these blondies over and over again because, honestly, who can resist that luscious swirl of peanut butter and jelly?
Why You’ll Love This Recipe
- Simple and Quick: Just a few steps to get these beauties in the oven!
- Comforting Flavors: The warm aroma of peanut butter combined with the fruity jam is irresistible.
- Flexible and Fun: You can switch up the flavors with different jams or nut butters.
- Perfect for Sharing: They make a delightful treat for parties, picnics, or cozy evenings at home.
Ingredients
Gathering your ingredients is part of the fun! You’ll need the following:
- 1 cup creamy or chunky peanut butter (make sure it’s not too thick)
- 1/2 cup unsalted butter, melted
- 1 cup brown sugar, packed
- 1/2 cup granulated sugar
- 2 large eggs
- 1 teaspoon vanilla extract
- 1 teaspoon baking powder
- 1/2 teaspoon baking soda
- 1/4 teaspoon salt
- 1 3/4 cups all-purpose flour
- 1/2 cup your favorite jelly or jam (grape, raspberry, or strawberry work great)
Note: Using high-quality peanut butter and fruit preserves can make a world of difference in flavor! Aim for the natural stuff with minimal ingredients.
Step-by-Step Instructions
Now, let’s get baking! Follow these simple steps for your Peanut Butter and Jelly Blondies:
- Preheat your oven: Set your oven to 350°F (175°C) and grease a 9×9 inch baking pan or line it with parchment paper for easy clean-up.
- Mix the wet ingredients: In a large bowl, whisk together the melted butter and both sugars until smooth. Then add the peanut butter, eggs, and vanilla extract. Mix until everything is well combined—a whisk works well here!
- Combine the dry ingredients: In a separate bowl, whisk together the flour, baking powder, baking soda, and salt. Gradually add this to the wet mixture until just combined—avoid overmixing to keep those blondies chewy!
- Prepare for the jam: Take about half of your blondie batter and spread it evenly across the bottom of your prepared baking pan. Be gentle, as you don’t want to mess up that beautiful peanut butter texture!
- Add the jelly: Drop spoonfuls of your chosen jelly or jam over the batter. Use a spatula or the back of a spoon to swirl it gently into the batter. Remember, you want some glorious swirls, so don’t go overboard!
- Top it off: Drop the remaining batter in dollops over the jelly. This will create a lovely marbled effect, but feel free to smooth it out if you like.
- Bake away: Pop the pan in your preheated oven and bake for about 25-30 minutes, or until the edges are golden and a toothpick inserted in the center comes out with a few moist crumbs.
- Cool and slice: Allow the blondies to cool in the pan for about 10-15 minutes. Once they’re cool enough to handle, you can lift them out using the parchment paper (if you used it) and slice them into squares. Try to resist the temptation to bite into them immediately—the warm peanut buttery goodness is a test of patience!
Pro Tips & Variations
Now that you’ve mastered the classic Peanut Butter and Jelly Blondies, why not explore some fun variations? These bars are like a blank canvas, welcoming all sorts of creativity!
- Nutty Swap: Experiment with almond butter or sunflower seed butter for different flavor notes—especially delightful for nut-free schools!
- Jam Options: Switch out the jelly for Nutella, chocolate spread, or even a fun fruit curd!
- Mix-Ins: Add in some chocolate chips, chopped nuts, or dried fruits for extra texture and flavor.
- Spice It Up: A pinch of cinnamon or a splash of maple syrup can elevate your blondies to the next level.
Serving Suggestions
Imagine biting into a warm, gooey Peanut Butter and Jelly Blondie paired with a glass of cold milk or even warm coffee—pure bliss! Serve them at room temperature, but a quick 10 seconds in the microwave gives that extra melty goodness that’s hard to resist.
For a fun twist, try serving them with a scoop of vanilla ice cream on top—yes, please! You could also sprinkle them with some flaky sea salt to cut through the sweetness and add a touch of sophistication.

Storage Tips
These blondies are best enjoyed fresh, but they can hold their own in the fridge! To store, simply place them in an airtight container; they’ll keep for about 4-5 days in the refrigerator. If you want to keep them longer, you can definitely freeze them. Just wrap each blondie tightly in plastic wrap and then place them in a freezer-safe bag. They should last up to three months.
When you’re ready to enjoy, simply let them thaw in the fridge overnight or pop them in the microwave for a few seconds. You won’t lose any of that delicious flavor!
FAQs
Can I use natural peanut butter for this recipe?
Absolutely! Just make sure it’s well-stirred and not too thick—natural peanut butter can sometimes be a bit more challenging to mix. Stir well before adding it to the batter.
What can I substitute for eggs?
If you’re looking for an egg alternative, you can use applesauce (1/4 cup per egg), flax eggs (1 tablespoon ground flaxseed mixed with 2.5 tablespoons water, let it sit until it gels), or even mashed bananas for a fun flavor twist!
Can I make these blondies gluten-free?
You sure can! Just substitute the all-purpose flour with a 1-to-1 gluten-free baking flour blend. It works wonderfully, so no one will miss the gluten!
How do I know when the blondies are done?
Keep an eye on the edges—they should be golden brown, and a toothpick inserted in the center should come out with a few moist crumbs. If it’s clean, they might be a bit overdone!
Conclusion
As you dive into baking these Peanut Butter and Jelly Blondies, I hope you feel that wave of nostalgia I experienced on those sunny days of childhood. There’s something magical about making a treat that harks back to simpler times. Don’t forget to share how yours turned out! I’d love to hear about your little twists and turns along the way. Enjoy your baking adventure, and happy treats!


Leave a Comment