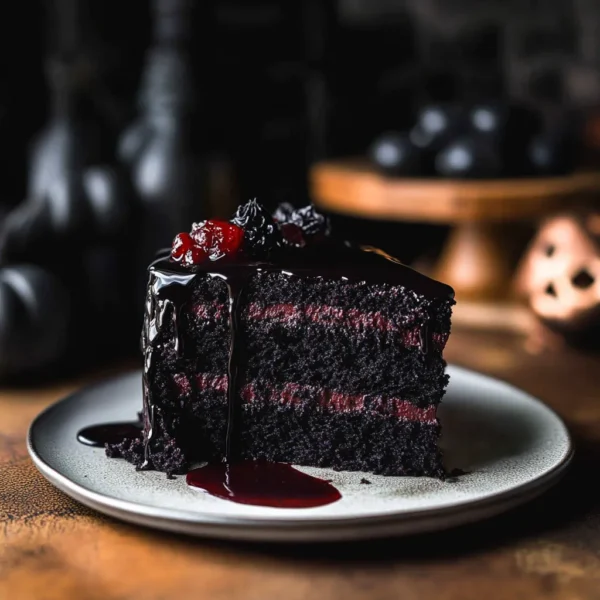
As the leaves begin to turn and the crisp autumn air settles in, I can’t help but feel a wave of nostalgia wash over me. It takes me back to my childhood when Halloween wasn’t just a day; it was an entire season filled with the thrill of pumpkin patches, ghost stories, and, of course, all those wonderful treats. And one of my absolute favorites? A rich, dark cake that perfectly captures the spirit of Halloween. That’s right, folks! I’m talking about my Spooky Black Velvet Halloween Cake!
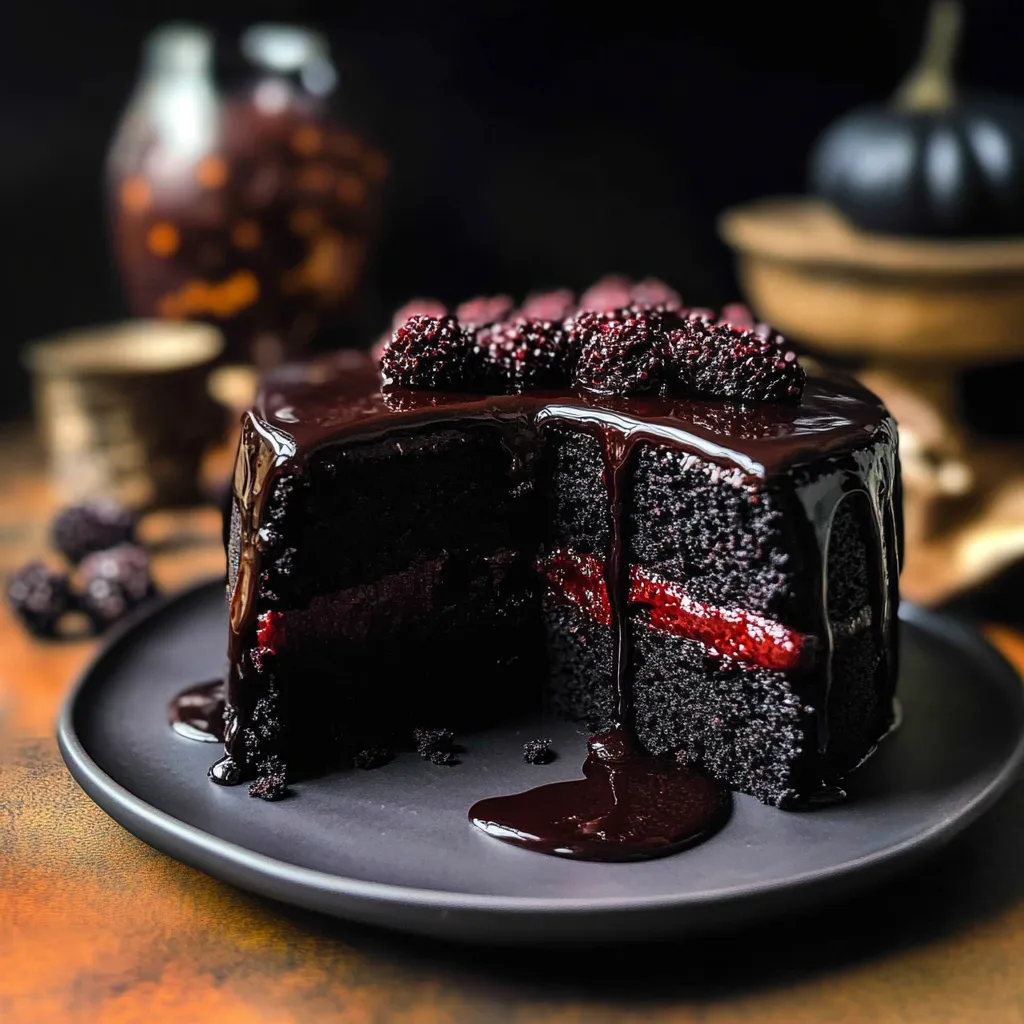
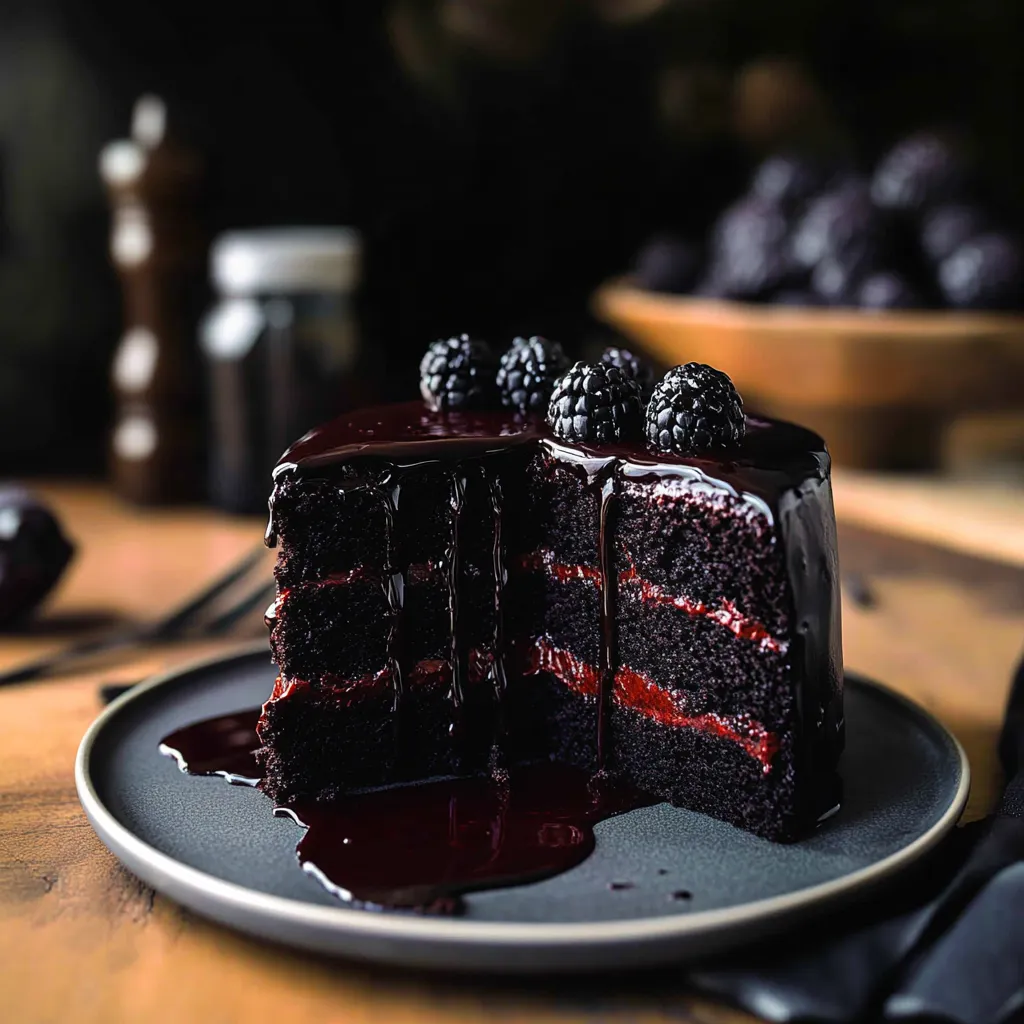
This cake is not just a feast for the eyes with its eerie black hue, but it’s also an indulgent delight with a moist and velvety texture. Picture this: a slice of this gorgeous cake paired with a glossy black frosting and maybe even a sprinkle of edible glitter or ghostly meringues on top. It’s an instant head-turner at any Halloween gathering, and honestly, who doesn’t want to impress their friends with a show-stopping cake that’s both delicious and a little spooky?
Why You’ll Love This Recipe
- Easy to Make: I promise this recipe comes together quickly, so it can be a last-minute indulgence!
- Impressive Presentation: The striking black color alone makes it a head-turner!
- Decadent Flavor: Moist, rich, and intensely chocolatey—perfect for any chocolate lover!
- Versatile Decor: Dress it up with fun Halloween-themed toppings like sprinkles or candy eyes.
Ingredients
Let’s gather our spooky ingredients! Here’s what you’ll need:
- 2 ½ cups all-purpose flour (plus extra for dusting)
- 1 ½ cups granulated sugar
- 1 cup unsweetened cocoa powder (the darker, the better!)
- 1 ½ teaspoons baking soda
- 1 teaspoon baking powder
- ½ teaspoon salt
- 1 ½ cups buttermilk (room temperature for best results)
- 1 cup vegetable oil
- 2 large eggs (room temperature)
- 2 teaspoons vanilla extract
- 1 tablespoon black food coloring (gel works best for deep color)
- 1 teaspoon white vinegar
Note: Using fresh buttermilk makes a huge difference! If you don’t have it, you can make a substitute by mixing milk with a splash of lemon juice or vinegar.

Step-by-Step Instructions
Now, it’s time to roll up our sleeves and get baking!
- Preheat Your Oven: Preheat your oven to 350°F (175°C). Prepare two 9-inch round cake pans by greasing them and dusting them with flour.
- Mix Dry Ingredients: In a large mixing bowl, whisk together the flour, granulated sugar, cocoa powder, baking soda, baking powder, and salt until well combined.
- Mix Wet Ingredients: In another bowl, whisk together the buttermilk, vegetable oil, eggs, vanilla extract, black food coloring, and vinegar until smooth.
- Combine Mixtures: Gradually pour the wet ingredients into the dry ingredients. Use a spatula or whisk to gently combine them until just incorporated. Important: Don’t overmix, or your cake will be dense!
- Pour and Bake: Divide the batter evenly between the prepared pans. Bake in your preheated oven for 30-35 minutes, or until a toothpick inserted into the center comes out clean.
- Cool It Down: Once baked, allow the cakes to cool in the pans for about 10 minutes. Then, transfer them to a wire rack to cool completely.
- Add Frosting: Once the cakes are completely cool, frost with your favorite black or cream cheese frosting!
Pro Tip: To achieve that smooth, professional finish on your frosting, chill your frosted cake for about 30 minutes before serving. This helps the frosting set and makes slicing easier!
Pro Tips & Variations
Want to add a little twist or keep it fresh? Here are some playful suggestions:
- Add Spices: A pinch of cinnamon or espresso powder can enhance the chocolate flavor beautifully!
- Frosting Fun: Try pairing your cake with cream cheese frosting for a tangy kick or go full-on spooky with a black chocolate frosting.
- Decoration Diversions: Get creative with toppings! Edible spider webs made from spun sugar or vibrant candy eyes can add a touch of Halloween magic!
Serving Suggestions
When it comes to serving your Spooky Black Velvet Halloween Cake, the options are as endless as your imagination! Serve it with:
- A scoop of vanilla ice cream on the side for a warm and cold contrast
- A cup of freshly brewed coffee to balance the sweetness
- Some caramel sauce drizzled on top for added decadence
Picture this: your guests gathered around the table, laughter filling the air as they dig into a slice of this rich, velvety cake—pure delight!
Storage Tips
Got leftovers? This cake can last a few days and still taste fabulous. Here’s how to store it:
- Refrigeration: Wrap the cake tightly in plastic wrap and store it in the refrigerator. It should stay fresh for up to 5 days.
- Freezing: If you need to stash some away for later, wrap individual slices in plastic wrap followed by aluminum foil and freeze for up to 3 months. Simply thaw in the fridge for a few hours or overnight before serving.
- Reheating: To reheat, pop it in the microwave for about 15-20 seconds, but be careful not to overdo it! You want it warm, not hot.
FAQs
Can I use a different type of food coloring?
Absolutely! While black food coloring gives that classic spooky look, you can get creative. Just keep in mind that other colors may result in a different, albeit fun, vibe!
Can I make this cake ahead of time?
You sure can! You can bake the cakes a day or two in advance and store them in the fridge. Just frost them when you’re ready to serve!
What if I don’t have buttermilk?
No worries! A simple substitute is to mix one cup of milk with a tablespoon of vinegar or lemon juice. Let it sit for about 5 minutes, and voila! You’ve got homemade buttermilk.
How do I keep my cake from sticking to the pans?
Greasing the pans thoroughly and dusting with flour is key! You can also use parchment paper at the bottom of the pans for extra insurance.
Can I use gluten-free flour?
Yes, you can! Just make sure to use a good quality all-purpose gluten-free blend for the best results.
Conclusion
And there you have it—a Spooky Black Velvet Halloween Cake that’s not only delicious but makes a statement too! I can’t wait for you to share this cake with your friends and family. It’s bound to become a favorite at your Halloween gatherings, just like it is in my house. Let me know how yours turns out, and if you try any fun variations! Happy baking, and may your Halloween be filled with sweet treats and festive vibes!

Leave a Comment